Difference between revisions of "Tutorial:First Steps"
m |
|||
| Line 4: | Line 4: | ||
'''Important: This tutorial is made for [[v2.X]] of IndustrialCraft².''' | '''Important: This tutorial is made for [[v2.X]] of IndustrialCraft².''' | ||
If this is your first time playing IC2, it is highly recommended to create a creative world and test things like how machines work, how to do this and that... By doing this you can reduce testing things in your survival world as there is a chance of messing things up. You don't want half an hour of your work turns into a hole in the ground, right? | |||
== Basic steps in a new world == | == Basic steps in a new world == | ||
| Line 41: | Line 44: | ||
|Output=Crops | |Output=Crops | ||
}} | }} | ||
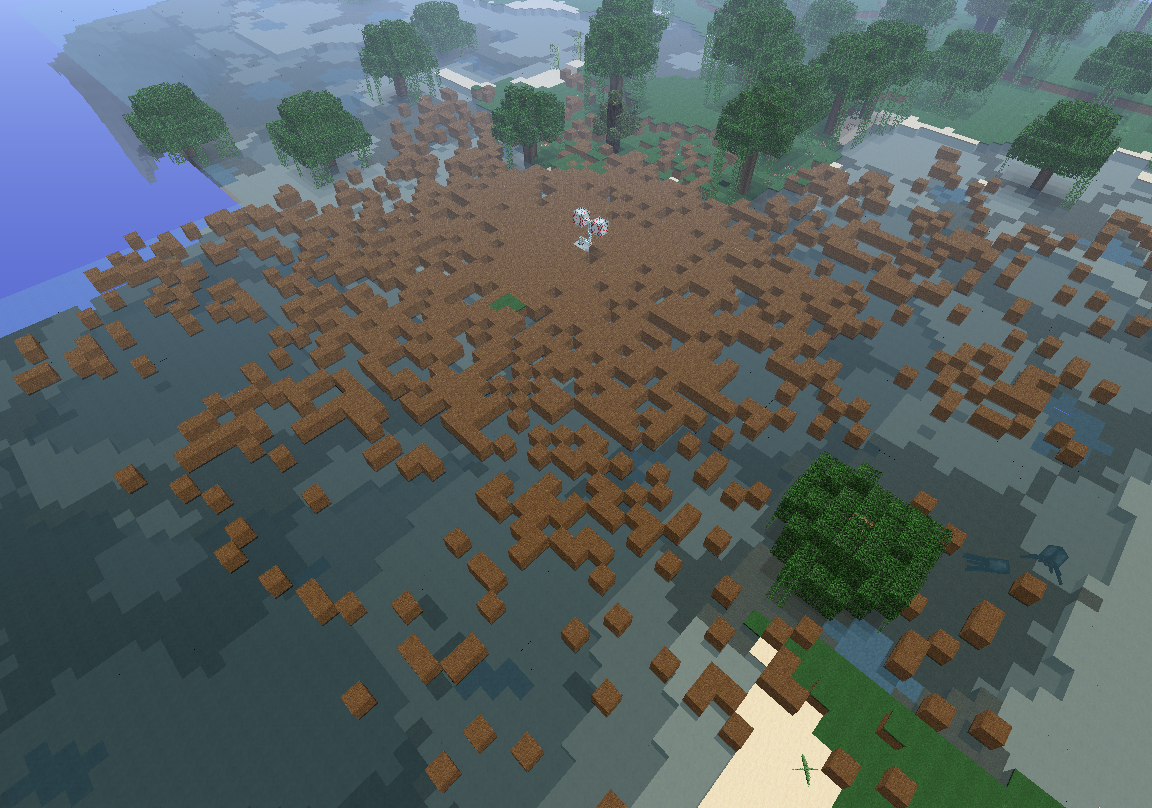
[[File:Rubber_tree_farm_demo.png|thumb|right|An example of a rubber farm consisted of 25 rubber trees. A farm with the size of this is enough to provide plenty of rubber as long as you don't build something like a huge rubber trampoline. Note that in this farm there is a 4 block gap between the trees.]] | |||
Take these, and place one on each block of farmland. Go get some Wheat seeds by punching grass and then plant them. When your wheat is ready to harvest, you can right-click to harvest it and wheat seedlings will remain, saving you from having to use more seeds to replant! There's a lot more you can do with crops in IC2, but this will help get you basic food to survive. | Take these, and place one on each block of farmland. Go get some Wheat seeds by punching grass and then plant them. When your wheat is ready to harvest, you can right-click to harvest it and wheat seedlings will remain, saving you from having to use more seeds to replant! There's a lot more you can do with crops in IC2, but this will help get you basic food to survive. | ||
Now, you need to gather [[Rubber]]. Rubber can be | Now, you need to gather [[Rubber]]. Rubber is produced by smelting [[Sticky Resin]] in a furnace, and sticky resin can be collected by right clicking a [[Resin Hole]] on a [[Rubber Tree]] with a [[Treetap]]. While your crops are growing, go to a forest or a swamp biome to find a [[Rubber Tree]]. Harvest the tree, and take at least 1 sapling back to your base. With that sapling you can start a rubber tree farm. 3 to 5 rubber trees are enough for now, but more will be always beneficial in the long term. So just plant the tree, destroy the leaves to get the sapling back, and continue on until you have around 20 trees. That should be enough in the long term. Also, start a manual birch tree farm, as you main source of wood. In the meantime, you should always harvest your wheat and craft them into bread, to prepare enough food for mining. Always keep a stack of logs and half a stack of charcoal in your chest if you can. | ||
{| | {| | ||
{{Grid/Crafting Table | {{Grid/Crafting Table | ||
| Line 54: | Line 60: | ||
}} | }} | ||
|} | |} | ||
Use 5 Wooden Planks to craft a [[Treetap]]. You will need | Use 5 Wooden Planks to craft a [[Treetap]]. You will need more of them later, but one is enough for now. It doesn't have to be oak wood planks that works, any wood plank (including some of the modded ones) should work, as long as it is registered as plankWood in the oredict. | ||
Now, extract | Now, extract 7 [[Sticky Resin]] from the [[Rubber Wood|Rubber Trees]]. You can leave the rubber in the furnace, as it is needed later. | ||
For now, | For now, gather torches, stone pickaxes, a iron pickaxe and food, for you will have to go to the center of the earth! The second thing you must gather is Redstone; that next-to useless red powder you will have in astronomical quantity is the base of industrial electricity. Of course, you will need an iron pickaxe to extract it, but you must have a bad spawn point if you don’t find any along the way. The iron pickaxe is a luxury by now, so only use it when it is really needed, like mining redstone ores. | ||
[[file:first_steps6.png |500px| link=|center]] | [[file:first_steps6.png |500px| link=|center]] | ||
Here is a screenshot of a natural cave where you can see all but three types of ores you can gather, from left to right: | Here is a screenshot of a natural cave where you can see all but three types of ores you can gather, from left to right: | ||
*Gold. | *Gold. It's much more useful in IC2 than it was in vanilla Minecraft, especially in its dust form. It's involved in many mid-tech machines. You should mine it - it will become more useful in the future. | ||
*[[Tin]]. It is required for many things, but it is fairly common. | *[[Tin]]. It is required for many things, but it is fairly common. | ||
| Line 80: | Line 86: | ||
*Redstone: Redstone is involved in most parts of IC crafting, especially the basic ones. We need some for crafting the first part of a machine, and later, other things. | *Redstone: Redstone is involved in most parts of IC crafting, especially the basic ones. We need some for crafting the first part of a machine, and later, other things. | ||
*Diamond: Ha, the diamond. Everybody runs after them. | *Diamond: Ha, the diamond. Everybody runs after them. Only get 3 of them and keep them in a chest; leave the rest of the diamond ores. It is not beneficial to mine diamond ores without a fortune pickaxe unless it is really necessary. We will craft something awesome with them(Not the vanilla diamond pickaxe!). You should know that you can produce diamonds with coal. This will be shown later. There is something else to do with them other than wasting them in one-use tools or armor. | ||
*Lapis lazuli: Not shown here, but you know it. Involved in the more advanced machines, you need '''BLOCKS''' of lapis to craft them, so if you find it now, just keep it until you have a need to use it. | *Lapis lazuli: Not shown here, but you know it. Involved in the more advanced machines, you need '''BLOCKS''' of lapis to craft them, so if you find it now, just keep it until you have a need to use it. | ||
*Lava: I know, it’s not a mineable resource, but it’s used to power one of the most powerful generators: the [[Geothermal Generator]]. Keep in mind where some lava lakes are to go back to later. | *Lava: I know, it’s not a mineable resource, but it’s used to power one of the most powerful generators: the [[Geothermal Generator]]. Also, it can be used to create a nether portal without a diamond pickaxe. Keep in mind where some lava lakes are to go back to later. | ||
*[[Lead]]: Not shown here. You won't need lead for a quite a while, and even then only in small quantities. It's primary used in nuclear reactors, but is also used in intermediate batteries. | *[[Lead]]: Not shown here. You won't need lead for a quite a while, and even then only in small quantities. It's primary used in nuclear reactors, but is also used in intermediate batteries. | ||
| Line 90: | Line 96: | ||
*Obsidian: You need some Obsidian to go in the Nether because you will need some Glowstone Dust for mid-tech machines (alternatively, Glowstone Dust can be crafted using Gold Dust and Redstone Dust). Obsidian is also a part of the process of producing Diamonds out of Coal. | *Obsidian: You need some Obsidian to go in the Nether because you will need some Glowstone Dust for mid-tech machines (alternatively, Glowstone Dust can be crafted using Gold Dust and Redstone Dust). Obsidian is also a part of the process of producing Diamonds out of Coal. | ||
Now you know what you can gather under the surface. To continue, you need to have the following materials: | |||
*27 iron ores | |||
*4 redstone dusts | |||
*3 [[Copper Ore|copper ores]] | |||
*3 [[Tin Ore|tin ores]] | |||
*3 flint | |||
An alternate route: If you REALLY can't get that much iron but you are willing to spend 5 extra redstone dusts, you can save yourself 4 iron ore and a tin ore. HAYO! | |||
Now that you’re safe at your base, smelt exactly 27 iron ore, 3 copper ore and 3 tin ore. | |||
For the alternate route: smelt exactly 19 iron ore, and 3 copper ore. Don't smelt the tin ore. | |||
Be patient and don’t smelt any more ore than listed above. Soon you will be able to craft an incredible machine: the [[Macerator]], which will give you 2 ore [[dust]] from one ore and other stuff which will be explained later. | |||
However, before you build a Macerator, you need basic crafting tools in IC2: The [[Forge Hammer]] and the [[Cutter]]. Grab 2 sticks and your freshly-made iron ingots to craft those tools. | |||
{{Grid/Crafting_Table | |||
|A1=|B1=Iron|C1=Iron | |||
|A2=Stick|B2=Stick|C2=Iron | |||
|A3=|B3=Iron|C3=Iron | |||
|Output=Forge_Hammer | |||
}} | |||
{{Grid/Crafting_Table | |||
|A1=Iron|B1=Iron|C1= | |||
|A2=Iron|B2=Stick|C2=Stick | |||
|A3=Iron|B3=Iron|C3= | |||
|Output=Forge_Hammer | |||
}} | |||
{{Grid/Crafting Table | |||
|A1=Iron Plate|B1=|C1=Iron Plate | |||
|A2=|B2=Iron Plate|C2= | |||
|A3=Iron|B3=|C3=Iron | |||
|Output=Cutter|OA= | |||
}} | |||
Why are there two recipes for the forge hammer? Because it is SYMMETRICAL! HAYO! | |||
=== Your First Machine: The Macerator === | |||
Now that you have your tools ready, it's time to craft your first machine! Take ''all'' of your iron inogts and copper ingots, and craft all of them into iron and copper plates. | |||
{{Grid/Crafting_Table | |||
|A1=Iron|B1=Forge_Hammer|C1= | |||
|A2=|B2=|C2= | |||
|A3=|B3=|C3= | |||
|Output=Iron Plate | |||
}} | |||
{{Grid/Crafting_Table | |||
|A1=Copper|B1=Forge_Hammer|C1= | |||
|A2=|B2=|C2= | |||
|A3=|B3=|C3= | |||
|Output=Copper Plate | |||
}} | |||
Note that these recipes are shapeless, meaning that you can put the two ingredients anywhere you like, and you will still get the same output. Your crafting tool will not be consumed, but they will take 1 damage per use. | |||
You remember the rubber that you have smelted? Take it, and we will craft some [[Insulated Copper Cable]]s. Place the Copper Plates and the cutter onto the crafting grid cut them into copper wire. Then combine your wire with Rubber to insulate it. | |||
{{Grid/Crafting Table | |||
|A2=Copper Plate|B2=Cutter | |||
|Output=Copper Cable|OA=2 | |||
}} | |||
{{Grid/Crafting Table | |||
|A1=Rubber|B1=Copper Cable | |||
|Output=Insulated Copper Cable | |||
}} | |||
Now we will craft our first [[Electronic Circuit]]. If you have followed this tutorial, all materials should be prepared by now. Electronic Circuits are the basic circuit boards used in every machine. | |||
{{Grid/Crafting Table | |||
|A1=Insulated Copper Cable|B1=Insulated Copper Cable|C1=Insulated Copper Cable | |||
|A2=Redstone|B2=Iron Plate|C2=Redstone | |||
|A3=Insulated Copper Cable|B3=Insulated Copper Cable|C3=Insulated Copper Cable | |||
|Output=Electronic Circuit | |||
}} | |||
Next we must craft the recipe of all machines: the [[Basic Machine Casing]]. Just take 8 [[Iron Plate]]s and draw a box with them in the crafting interface. | |||
{| | |||
|{{Grid/Crafting Table | |||
|A1=Iron Plate|B1=Iron Plate|C1=Iron Plate | |||
|A2=Iron Plate|C2=Iron Plate | |||
|A3=Iron Plate|B3=Iron Plate|C3=Iron Plate | |||
|Output=Machine | |||
}} | |||
FINALLY we can craft our first machine. We just need 3 more flint and 2 cobblestone. They should be lying somewhere in your world. Put the flints, the cobbelstone, the Machine Casing, the Electronic Circuit on the crafting table and '''TADA'''! | |||
{{Grid/Crafting Table | |||
|A1=Flint|B1=Flint|C1=Flint | |||
|A2=Cobblestone|B2=Machine|C2=Cobblestone | |||
|B3=Electronic Circuit | |||
|Output=Macerator | |||
}} | |||
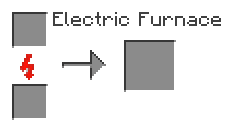
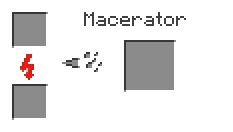
And now, ladies and gentlemen, the moment you’ve all been waiting for: the incredible '''[[Macerator|MACERATOR]]''' which can double your mining productivity. You placed down the macerator, put your ores into it, but you are scratching your head thinking WHY IS THIS THING NOT WORKING? Because to use it, you need [[EU|ELECTRICITY]], made by a [[generator|GENERATOR]]. | |||
'''Alternate route''' | |||
Still remember there is an alternate route? This is where things will start to be a little different. Skip this section if you have smelted 27 iron ores at the beginning. | |||
What should you do with the 4 iron ores that you didn't smelt? Macerate it! With what? Redstone dust! Redstone dust can provide the macerator (or any other machine) with 800 EU. Put your 4 iron ore into the top left slot of the macerator, and then a single piece of redstone on the bottom left slot. BOOM! The magical macerator starts to work! By hovering your mouse over the lightning icon, you can see how many EU are left in the machine. If a machine runs out of EU, it will stop working. When there is less than 400 EU, put another piece of redstone into the machine to power it longer. After your iron ore is well-macerated, put 2 tin ore into it and repeat the same process. After all of them are complete, you should use 5 redstone dust. | |||
Now you have 8 Crushed Iron Ore and 4 Crushed Tin Ore, throw them into a furnace to smelt them. The magic appears: each crushed ore is smelted into an ingot! You've got double the ingots out of a single ore block! Awesome! | |||
=== Generator === | |||
Before making the generator, you also need to craft some items. | |||
Take 3 tin ingots, first craft all of them into plates, them craft '''only 2''' of them into item casings. It is the same with other metals. Time to remember that recipe. | |||
{{Grid/Crafting Table | |||
|A1=Tin|B1=Forge Hammer | |||
|Output=Tin Plate | |||
}} | |||
{{Grid/Crafting Table | |||
|A1=Tin Plate|B1=Forge Hammer | |||
|OA=2|Output=Tin_Casing | |||
}} | |||
Craft the remaining tin plate into tin cables | |||
{{Grid/Crafting Table | |||
|A1=Tin Plate|B1=Forge Hammer | |||
|OA=3|Output=Tin Cable | |||
}} | |||
Insulate one of the tin cables | |||
{{Grid/Crafting Table | |||
|A1=Tin Cable|B1=Rubber | |||
|Output=Insulated Tin Cable | |||
}} | |||
Then craft a [[RE-battery]]. | |||
{{Grid/Crafting Table | |||
|A1=|B1=Insulated Tin Cable|C1= | |||
|A2=Tin_Casing|B2=Redstone|C2=Tin_Casing | |||
|A3=Tin_Casing|B3=Redstone|C3=Tin_Casing | |||
|Output=RE Battery | |||
}} | |||
There. Now you have crafted one of the main ingredients of the generator. | |||
There are 2 ways to craft a [[Generator]], but both actually requires the same amount of raw materials: First, you can use a [[RE Battery]], a [[Basic Machine Casing]], and a Furnace. | |||
{{Grid/Crafting Table | |||
|A1=|B1=RE Battery|C1= | |||
|A2=|B2=Machine|C2= | |||
|A3=|B3=Furnace|C3= | |||
|linkB3= | |||
|Output=Generator | |||
}} | |||
Or, you can use a [[RE Battery]], 3 [[Iron Plate]]s, and an [[Iron Furnace]]. | |||
{{Grid/Crafting Table | |||
|A1=|B1=RE Battery|C1= | |||
|A2=Iron Plate|B2=Iron Plate|C2=Iron Plate | |||
|A3=|B3=Iron Furnace|C3= | |||
|linkB2=|linkC2= | |||
|linkB3= | |||
|Output=Generator | |||
}} | |||
The iron furnace is crafted as following: | |||
{{Grid/Crafting Table | |||
|A1=|B1=Iron Plate|C1= | |||
|A2=Iron Plate|B2=|C2=Iron Plate | |||
|A3=Iron Plate|B3=Furnace|C3=Iron Plate | |||
|Output=Iron Furnace | |||
}} | |||
Both recipes cost the same amount of iron plates overall, so take your pick. | |||
---------- | |||
The content in the next few sections below is currently WIP, and is quite messy. You might see some duplicate content that aren't deleted. Please go to wiki.industrial-craft.net/index.php?title=Tutorial:First_Steps&oldid=66506 for a cleaner version. Apologies for the inconvenience. | |||
---------- | |||
You need to assemble two [[RE Battery|Rechargeable Batteries]]. One is needed to build the Generator, and the second is needed to power your Extractor. | |||
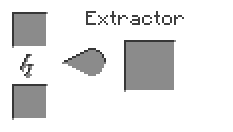
But wait! You just used your last [[Cable]]. It’s time to craft more, but this time we will not waste great quantities of resin. Go back in front of your [[Extractor]], put 2 [[Sticky Resin]] into the top slot, and put some Redstone into the bottom slot (pure Redstone is like a 1 use low-efficient battery, but it works). With the Extractor, you get 3 Rubber for each Sticky Resin instead of just 1. Now craft two Tin Cables. | |||
Now you can assemble your two RE Batteries. | |||
Next follow one of the two recipes above to craft the [[Generator]]. | |||
Don't place the generator next to anything; I’ll explain why in the wiring section. Put your empty battery in the upper slot and put some (Char)Coal or other things that burn in the lower slot. You will need 2.5 (Char)Coal to fill up a single battery. I usually don't worry about completely filling my battery at this point. Feel free to make more RE Batteries. However, we'll be adding a cable shortly which will make the batteries unnecessary. | |||
The empty Rechargeable Batteries can stack up to 16, but the fully charged ones can’t be stacked. It’s the drawback of the re-usability. You can place a chest right next to the generator and it will gather your full batteries. | |||
For now, you can use a partially or fully charged battery to power the [[Extractor]]. This will give you a lot more [[Rubber]] for making [[Cable|cables]], which in turn will make it easier to build other machines. | |||
| Line 126: | Line 323: | ||
}} | }} | ||
=== | === Extractor === | ||
''You can optionally exchange the Extractor with the Macerator listed below if you have several Rubber trees nearby.'' | ''You can optionally exchange the Extractor with the Macerator listed below if you have several Rubber trees nearby.'' | ||
Revision as of 09:08, 30 July 2019
The most recent version of IC² is V2.8.<html>.
This tutorial is regularly updated. You can see the first version of it here: First Steps in the IndustrialCraft mod for Minecraft V0.5.pdf (texture pack used: Soartex).
Important: This tutorial is made for v2.X of IndustrialCraft².
If this is your first time playing IC2, it is highly recommended to create a creative world and test things like how machines work, how to do this and that... By doing this you can reduce testing things in your survival world as there is a chance of messing things up. You don't want half an hour of your work turns into a hole in the ground, right?
Basic steps in a new world[edit]
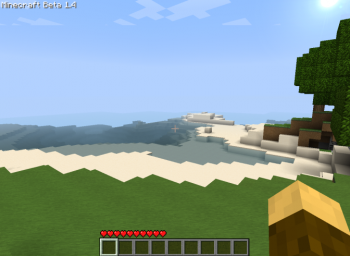
Now that you have downloaded and installed the mod and generated a new map, you really don't know where to begin. Like all other maps you begin in, gather some wood, then some cobblestone, and build a shelter for your first night, just as how you would do in vanilla survival.
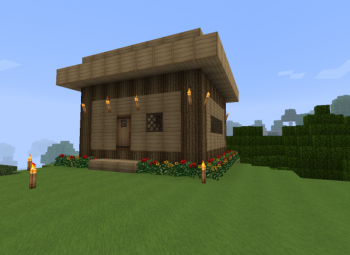
Here is an example of a shelter with some decorative flowers. In the first days, having an pretty shelter is not recommended, as it will be much easier to do this in late game.
Beware of the mobs if you are not playing in Peaceful mode; the creepers can blow up what you built. Lighting up wherever you go with torches is always a good thing to do.
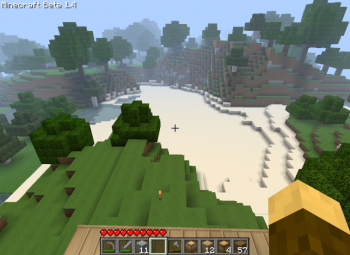
Keep in mind that you will need a lot of room for your industry. Try to get a good spot with a lot of open space not too far away, like the sandy beach in the picture. Don’t forget to add some chests and a bed in your little place. Once you acquire stone tools, growing trees and wheat are essential if you don't want to travel long distances to get wood and food.
Nothing new here, but a good base is a good start. The next part will introduce some new things.
First Ingredients and Machines[edit]
Now, you have a little basic survival base. Want to plant crops in IC2 style? Sure! However, keep in mind that empty Crops, which is the IC2 block to plant crops on, will grow Weed after some time and it can destroy all of your farmed crops. Weed can be removed by breaking and replacing the crop block, or with a Weeding Trowel, which needs iron. However, the advantage of the IC2 crops is that you don't need to re-plant the wheat after harvesting it.
Of course, you should till some soil near a water source and gather a crop to plant. Wheat is a good crop to plant as wheat seeds are fairly simple to get in early game. For the hydration of farmland, use a natural water source if you can to save the iron needed to craft a bucket.
If you have decided to go with the IC2 crops, take some wood and create some sticks for Crops.


Take these, and place one on each block of farmland. Go get some Wheat seeds by punching grass and then plant them. When your wheat is ready to harvest, you can right-click to harvest it and wheat seedlings will remain, saving you from having to use more seeds to replant! There's a lot more you can do with crops in IC2, but this will help get you basic food to survive.
Now, you need to gather Rubber. Rubber is produced by smelting Sticky Resin in a furnace, and sticky resin can be collected by right clicking a Resin Hole on a Rubber Tree with a Treetap. While your crops are growing, go to a forest or a swamp biome to find a Rubber Tree. Harvest the tree, and take at least 1 sapling back to your base. With that sapling you can start a rubber tree farm. 3 to 5 rubber trees are enough for now, but more will be always beneficial in the long term. So just plant the tree, destroy the leaves to get the sapling back, and continue on until you have around 20 trees. That should be enough in the long term. Also, start a manual birch tree farm, as you main source of wood. In the meantime, you should always harvest your wheat and craft them into bread, to prepare enough food for mining. Always keep a stack of logs and half a stack of charcoal in your chest if you can.
Use 5 Wooden Planks to craft a Treetap. You will need more of them later, but one is enough for now. It doesn't have to be oak wood planks that works, any wood plank (including some of the modded ones) should work, as long as it is registered as plankWood in the oredict.
Now, extract 7 Sticky Resin from the Rubber Trees. You can leave the rubber in the furnace, as it is needed later.
For now, gather torches, stone pickaxes, a iron pickaxe and food, for you will have to go to the center of the earth! The second thing you must gather is Redstone; that next-to useless red powder you will have in astronomical quantity is the base of industrial electricity. Of course, you will need an iron pickaxe to extract it, but you must have a bad spawn point if you don’t find any along the way. The iron pickaxe is a luxury by now, so only use it when it is really needed, like mining redstone ores.
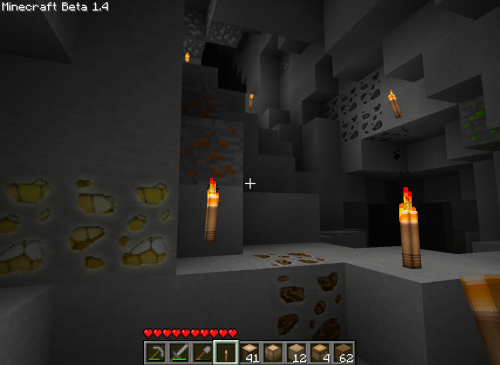
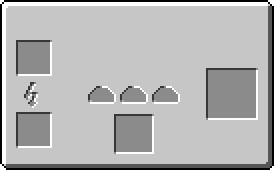
Here is a screenshot of a natural cave where you can see all but three types of ores you can gather, from left to right:
- Gold. It's much more useful in IC2 than it was in vanilla Minecraft, especially in its dust form. It's involved in many mid-tech machines. You should mine it - it will become more useful in the future.
- Tin. It is required for many things, but it is fairly common.
- Copper. Like Tin, it is required for most things in IC, such as cables, so you must gather a good stock in the beginning. Like Tin, there's plenty in the world.
- Iron. Every machine uses Iron, so it will be the ore you must hunt the most. You will be always short of Iron.
- Coal. Its value was increased, so if you want torches or furnace fuel, use Charcoal. Use Coal for other, more important things. Coal Dust is used to build Solar Panels; it's a more efficient Fuel, and lots of things like the nano-suit use it. In other worlds, you might not care about Coal, but in IC, it is valuable.
- Uranium. You will need it to power your future nuclear reactor or to craft a nuke to blow up a mountain. Besides that, it is not involved in other recipes. It is rarer than other ores, but can be found at every layer. You will need an iron pickaxe to gather it.
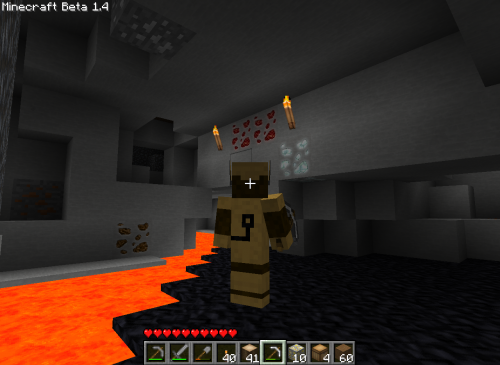
Further away in the cave:
- Redstone: Redstone is involved in most parts of IC crafting, especially the basic ones. We need some for crafting the first part of a machine, and later, other things.
- Diamond: Ha, the diamond. Everybody runs after them. Only get 3 of them and keep them in a chest; leave the rest of the diamond ores. It is not beneficial to mine diamond ores without a fortune pickaxe unless it is really necessary. We will craft something awesome with them(Not the vanilla diamond pickaxe!). You should know that you can produce diamonds with coal. This will be shown later. There is something else to do with them other than wasting them in one-use tools or armor.
- Lapis lazuli: Not shown here, but you know it. Involved in the more advanced machines, you need BLOCKS of lapis to craft them, so if you find it now, just keep it until you have a need to use it.
- Lava: I know, it’s not a mineable resource, but it’s used to power one of the most powerful generators: the Geothermal Generator. Also, it can be used to create a nether portal without a diamond pickaxe. Keep in mind where some lava lakes are to go back to later.
- Lead: Not shown here. You won't need lead for a quite a while, and even then only in small quantities. It's primary used in nuclear reactors, but is also used in intermediate batteries.
- Obsidian: You need some Obsidian to go in the Nether because you will need some Glowstone Dust for mid-tech machines (alternatively, Glowstone Dust can be crafted using Gold Dust and Redstone Dust). Obsidian is also a part of the process of producing Diamonds out of Coal.
Now you know what you can gather under the surface. To continue, you need to have the following materials:
- 27 iron ores
- 4 redstone dusts
- 3 copper ores
- 3 tin ores
- 3 flint
An alternate route: If you REALLY can't get that much iron but you are willing to spend 5 extra redstone dusts, you can save yourself 4 iron ore and a tin ore. HAYO!
Now that you’re safe at your base, smelt exactly 27 iron ore, 3 copper ore and 3 tin ore. For the alternate route: smelt exactly 19 iron ore, and 3 copper ore. Don't smelt the tin ore.
Be patient and don’t smelt any more ore than listed above. Soon you will be able to craft an incredible machine: the Macerator, which will give you 2 ore dust from one ore and other stuff which will be explained later. However, before you build a Macerator, you need basic crafting tools in IC2: The Forge Hammer and the Cutter. Grab 2 sticks and your freshly-made iron ingots to craft those tools.
Why are there two recipes for the forge hammer? Because it is SYMMETRICAL! HAYO!
Your First Machine: The Macerator[edit]
Now that you have your tools ready, it's time to craft your first machine! Take all of your iron inogts and copper ingots, and craft all of them into iron and copper plates.
Note that these recipes are shapeless, meaning that you can put the two ingredients anywhere you like, and you will still get the same output. Your crafting tool will not be consumed, but they will take 1 damage per use.
You remember the rubber that you have smelted? Take it, and we will craft some Insulated Copper Cables. Place the Copper Plates and the cutter onto the crafting grid cut them into copper wire. Then combine your wire with Rubber to insulate it.
Now we will craft our first Electronic Circuit. If you have followed this tutorial, all materials should be prepared by now. Electronic Circuits are the basic circuit boards used in every machine.
Next we must craft the recipe of all machines: the Basic Machine Casing. Just take 8 Iron Plates and draw a box with them in the crafting interface.
FINALLY we can craft our first machine. We just need 3 more flint and 2 cobblestone. They should be lying somewhere in your world. Put the flints, the cobbelstone, the Machine Casing, the Electronic Circuit on the crafting table and TADA! And now, ladies and gentlemen, the moment you’ve all been waiting for: the incredible MACERATOR which can double your mining productivity. You placed down the macerator, put your ores into it, but you are scratching your head thinking WHY IS THIS THING NOT WORKING? Because to use it, you need ELECTRICITY, made by a GENERATOR. Alternate route Still remember there is an alternate route? This is where things will start to be a little different. Skip this section if you have smelted 27 iron ores at the beginning. What should you do with the 4 iron ores that you didn't smelt? Macerate it! With what? Redstone dust! Redstone dust can provide the macerator (or any other machine) with 800 EU. Put your 4 iron ore into the top left slot of the macerator, and then a single piece of redstone on the bottom left slot. BOOM! The magical macerator starts to work! By hovering your mouse over the lightning icon, you can see how many EU are left in the machine. If a machine runs out of EU, it will stop working. When there is less than 400 EU, put another piece of redstone into the machine to power it longer. After your iron ore is well-macerated, put 2 tin ore into it and repeat the same process. After all of them are complete, you should use 5 redstone dust. Now you have 8 Crushed Iron Ore and 4 Crushed Tin Ore, throw them into a furnace to smelt them. The magic appears: each crushed ore is smelted into an ingot! You've got double the ingots out of a single ore block! Awesome! Generator[edit]Before making the generator, you also need to craft some items. Take 3 tin ingots, first craft all of them into plates, them craft only 2 of them into item casings. It is the same with other metals. Time to remember that recipe. Craft the remaining tin plate into tin cables Insulate one of the tin cables Then craft a RE-battery. There. Now you have crafted one of the main ingredients of the generator. There are 2 ways to craft a Generator, but both actually requires the same amount of raw materials: First, you can use a RE Battery, a Basic Machine Casing, and a Furnace. Or, you can use a RE Battery, 3 Iron Plates, and an Iron Furnace. The iron furnace is crafted as following: Both recipes cost the same amount of iron plates overall, so take your pick. The content in the next few sections below is currently WIP, and is quite messy. You might see some duplicate content that aren't deleted. Please go to wiki.industrial-craft.net/index.php?title=Tutorial:First_Steps&oldid=66506 for a cleaner version. Apologies for the inconvenience. You need to assemble two Rechargeable Batteries. One is needed to build the Generator, and the second is needed to power your Extractor. But wait! You just used your last Cable. It’s time to craft more, but this time we will not waste great quantities of resin. Go back in front of your Extractor, put 2 Sticky Resin into the top slot, and put some Redstone into the bottom slot (pure Redstone is like a 1 use low-efficient battery, but it works). With the Extractor, you get 3 Rubber for each Sticky Resin instead of just 1. Now craft two Tin Cables. Now you can assemble your two RE Batteries. Next follow one of the two recipes above to craft the Generator. Don't place the generator next to anything; I’ll explain why in the wiring section. Put your empty battery in the upper slot and put some (Char)Coal or other things that burn in the lower slot. You will need 2.5 (Char)Coal to fill up a single battery. I usually don't worry about completely filling my battery at this point. Feel free to make more RE Batteries. However, we'll be adding a cable shortly which will make the batteries unnecessary. The empty Rechargeable Batteries can stack up to 16, but the fully charged ones can’t be stacked. It’s the drawback of the re-usability. You can place a chest right next to the generator and it will gather your full batteries. For now, you can use a partially or fully charged battery to power the Extractor. This will give you a lot more Rubber for making cables, which in turn will make it easier to build other machines.
Iron Furnace[edit]One of the first IC2-related things you'll probably want to create is an Iron Furnace. This is an upgrade over the regular Furnace from vanilla Minecraft (a.k.a. Stone Furnace by IC2 users). It operates faster and uses fuel more efficiently. Click on the link for details. But wait! You need to make a Forge Hammer in order to create the Iron Plates for the Iron Furnace. Now the Iron Furnace itself: Together you will need ten Iron Ore, two Sticks, and two pieces of Charcoal (or several pieces of Wood) for fuel. Smelt the ten Iron Ore into ingots in your regular stone Furnace. Take the Sticks and five Iron Ingots and make the Forge Hammer. Next place the Forge Hammer and the remaining five ingots on the crafting grid to create five Iron Plates. Now pick up your Furnace and use it to craft an Iron Furnace as shown above. An Iron Furnace is an important part of making an Electric Furnace later, so making it now lets you use it until we get to that step. Before you proceed, you'll need to make a Cutter tool in order to make cables. It requires five Iron Ingots. Make three of them into Iron Plates using the Forge Hammer. Here's the recipe: Extractor[edit]You can optionally exchange the Extractor with the Macerator listed below if you have several Rubber trees nearby. For this project you'll need:
You remember the Sticky Resin you kept in the chest? Take it, and three Copper Ingots too. We will create some Copper Cables. You see it takes 6 Rubber and 3 Copper Ingots for every 6 cables. Later you will need a large amount of them, but first you want just enough to make an Extractor. Once you have that, you can make Rubber much more efficiently. Smelt your 6 Sticky Resin in any furnace to get 6 Rubber. Place the Forge Hammer and three Copper Ingots on the crafting grid to make three Copper Plates. Then place the Copper Plates on the crafting grid and replace the Forge Hammer with the Cutters to cut them into wire. Lastly combine your wire with Rubber to create Insulated Copper Cables. Use the Forge Hammer to turn your Iron Ingots into nine Iron Plates. Now we will craft our first Electronic Circuit. You need 6 cables, 2 Redstone, and one Iron Plate. Electronic Circuits are the basis industry, used in every machine, so you'll be using them a lot. Next we must craft the recipe of all machines: the Basic Machine Casing.
|
|||||||||||||||||||||||||||||||||||||||||||||||||