Difference between revisions of "Recipes and Resources (experimental)"
(Created page with "coming soon") |
|||
| (83 intermediate revisions by 21 users not shown) | |||
| Line 1: | Line 1: | ||
{{Experimental}} | |||
{{Tocright}} | |||
== Resources == | |||
=== Changed vanilla blocks & items=== | |||
{| class="wikitable" | |||
|- | |||
!width=120px|Name | |||
!Picture | |||
!Description | |||
|- | |||
![[Non-IC Items|Obsidian]] | |||
![[Image:Grid_Obsidian.png|64px]] | |||
|[[Explosion]] resistance changed from 6000 to 60, this allows [[Secret:Nuke|nuke]] and [[Nuclear_Reactor|reactor]] to destroy obsidian on default power (up to 6 blocks). | |||
|- | |||
![[Non-IC Items|Water]] | |||
![[Image:Grid_Water_Bucket.png|64px]] | |||
|[[Explosion]] resistance changed from 500 to 30, this allows [[Non-IC Items|TNT]] and [[Industrial TNT|ITNT]] to destroy water blocks. | |||
|- | |||
![[Non-IC Items|Lava]] | |||
![[Image:Grid_Lava_Bucket.png|64px]] | |||
|[[Explosion]] resistance changed from 500 to 30, this allows [[Non-IC Items|TNT]] and [[Industrial TNT|ITNT]] to destroy lava blocks. | |||
|-http://wiki.industrial-craft.net/skins/common/images/button_extlink.png | |||
![[Non-IC Items|Lava bucket]] | |||
![[Image:Grid_Lava_Bucket.png|64px]] | |||
|Only smelts 12 items in an [[Iron Furnace]]. | |||
|- | |||
![[Non-IC Items|Redstone]] | |||
![[Image:Grid_Redstone.png|64px]] | |||
|Can be used as power source with electric machines, provides 500 EU per item, acts just like [[Single-Use Battery]]. | |||
|- | |||
![[Non-IC Items|Cacti]] | |||
![[Image:Grid_Cactus.png|64px]] | |||
|Can now be burned in any furnace for 50 fuel points. | |||
|- | |||
![[Non-IC Items|Sugar Cane]] | |||
![[Image:Grid_Sugar_Cane.png|64px]] | |||
|Can now be burned in any furnace for 50 fuel points. | |||
|- | |||
|} | |||
=== Ores === | |||
{| class="wikitable" | |||
|- | |||
!width=120px|Name | |||
!Picture | |||
!Description | |||
|- | |||
![[Copper Ore]] | |||
![[Image:Copper Ore.png|64px]] | |||
|Found on layers 10 to 70 (rate 15:10). Used most notably to make [[Copper Cable]], [[Bronze]] and some [[Nuclear Reactor|Reactor]] components. | |||
|- | |||
![[Tin Ore]] | |||
![[Image:Tin Ore.png|64px]] | |||
|Found on layers 0 to 40 (rate 25:6). Used most notably to make [[RE Battery|Rechargeable Batteries]], [[Empty Cell|Cells]], [[Bronze]] and some [[Nuclear Reactor|Reactor]] components. | |||
|- | |||
![[Lead Ore]] | |||
![[Image:Lead Ore.png|64px]] | |||
|Found on layers 0 to 65 (rate ?). Used to make [[Advanced RE-Battery|Advanced RE-Batteries]] and [[Reactor Chamber]]s. | |||
|- | |||
![[Uranium Ore]] | |||
![[Image:Uranium Ore.png|64px]] | |||
|Found on layers 0 to 64 (rate 20:3). Needed to run a [[Nuclear Reactor]]. | |||
|- | |||
|} | |||
Generation rate is number of generation attempts per chunk : number of ore generated per attempt. | |||
20:3 means that ore will attempt to generate up to 20 times and will generate up to 3 ore per attempt, generation attempts can fail. | |||
=== Overworld === | |||
{| class="wikitable" | |||
|- | |||
!width=120px|Name | |||
!Picture | |||
!Description | |||
|- | |||
![[Rubber Tree]] | |||
![[Image:Rubber Tree.png|128px]] | |||
|Mod-related trees which have dark yellow logs and light green leaves. Cannot be found anywhere except Swamp, Forest and Taiga biomes. They are extremely abundant in Swamp, Forest and Taiga biomes and are easy to find due to their unique "wing" on their leaf design. Their wood is special and sometimes has resin holes that may be right-clicked on with a [[Treetap]] to get [[Sticky Resin]], used in [[Rubber]] production. | |||
Can be crafted into 3 jungle planks or smelted into spruce logs. Leaves can be harvested with Shears and have a 2% chance of dropping a sapling. | |||
|- | |||
|} | |||
World generation rate of Rubber Trees depends on biome: | |||
{| class="wikitable" | |||
|- | |||
|width=500px|'''Forest''' 2-12% chance to generate 1-6 Rubber Trees per chunk. | |||
|- | |||
|'''Taiga''' 0-6% chance to generate 0-3 Rubber Trees per chunk. | |||
|- | |||
|'''Swampland''' 10-30% chance to generate 5-15 Rubber Trees per chunk. | |||
|- | |||
|} | |||
The minimum tree height is 2, and the maximum is 8. | |||
Every log has a 25% chance of having a resin hole, with a maximum of 3 holes per tree. | |||
===Fluids=== | |||
{| class="wikitable" | |||
|- | |||
!width=200px|Name | |||
!Picture | |||
!Description | |||
|- | |||
![[UU-Matter]] | |||
![[Image:fluid_UU-Matter.png|64px]] | |||
|Made by the [[Mass Fabricator]]. Needs [[EU]] and optional [[Scrap]]. | |||
Used to replicate items by [[Replicator]] | |||
|- | |||
![[Construction Foam]] | |||
![[Image:fluid_ConstructionFoam.png|64px]] | |||
|Made by the [[Canning Machine]]. Needs water and [[CF Powder]]. | |||
Used to fill the [[CF Sprayer]]/[[CF Backpack]] and to make [[Reinforced Stone]]. | |||
|- | |||
![[Coolant]] | |||
![[Image:fluid_Coolant.png|64px]] | |||
|Made by the [[Canning Machine]] using 1 bucket of water and 8 [[Dust|Lapis Dust]] or 1 bucket of [[Distilled Water]] and 1 [[Dust|Lapis Dust]]. | |||
Used to make [[Coolant Cell|10k Coolant Cell]]s or to cool [[Nuclear Reactor]]s in heat mode. | |||
|- | |||
![[Hot Coolant]] | |||
![[Image:fluid_HotCoolant.png|64px]] | |||
|Made in a [[Fluid reactor]] transferring heat from [[Uranium]] into the coolant. | |||
Used to to make [[Heat | Heat Units]] in a [[Liquid Heat Exchanger]]. | |||
|- | |||
![[Pahoehoe Lava]] | |||
![[Image:fluid_PahoehoeLava.png|64px]] | |||
|Made by putting lava in a [[Liquid Heat Exchanger]]. | |||
Used to make [[Basalt]]. | |||
|- | |||
![[Biomass]] | |||
![[Image:fluid_Biomass.png|64px]] | |||
|Made by the [[Canning Machine]]. Needs water and [[Bio Chaff]]. | |||
Used to make [[Biogas]]. | |||
|- | |||
![[Biogas]] | |||
![[Image:fluid_Biogas.png|64px]] | |||
|Made by the [[Fermenter]]. Needs [[Biomass]]. | |||
Used to power the [[Semifluid Generator]] or [[Jetpack]] | |||
|- | |||
![[Distilled Water]] | |||
![[Image:fluid_DistilledWater.png|64px]] | |||
|Made by the [[Solar Distiller]] or by putting [[Steam]] in a [[Condenser]]. Needs water and Solar Energy. | |||
Used to craft [[Upgrade#Overclocker Upgrade|Overclocker Upgrade]] | |||
|- | |||
![[Steam]] | |||
![[Image:fluid_Steam.png|64px]] | |||
|Made by putting Water in a [[Steam Generator]] heated past 100°C | |||
|- | |||
![[Superheated Steam]] | |||
![[Image:fluid_SuperheatedSteam.png|64px]] | |||
|Made by putting Water in a [[Steam Generator]] heated past 374°C | |||
|- | |||
|} | |||
== Cables == | |||
{| class="wikitable" | |||
|- | |||
!width=120px|Name | |||
!width=256px|Recipe IC2 [[v2.X|experimental]] | |||
!Description <span style="color:red;">''Crossed out text only applies to Minecraft version 1.9.4 and above''</span> | |||
|- | |||
![[Tin Cable]] | |||
|{{Grid/Crafting Table | |||
|B1=Tin Plate|B2=Cutter | |||
|Output=Tin Cable|OA=3 | |||
}} | |||
{{Grid/MetalFormer | |||
|Mode=Extruding | |||
|Top=Tin | |||
|Bottom=RE Battery (Charged) | |||
|Output=Tin Cable|OA=3 | |||
}} | |||
|Uninsulated tin cable <s>which handles up to 32 EU-p (low [[EU|voltage]]) and has 0.025 loss per block</s>. | |||
Uninsulated cables cannot be painted. | |||
<s>Uninsulated cables deal 1 point of damage per 64 EU current rounded down.</s> | |||
The most effective tool for cable removal is a [[chainsaw]]. | |||
Used in crafting recipes. | |||
|- | |||
![[Tin Cable|Insulated Tin Cable]] | |||
|{{Grid/Crafting Table | |||
|B1=Tin Cable|A1=Rubber | |||
|Output=Insulated Tin Cable | |||
}} | |||
|Insulated tin cable <s>which handles up to 32 EU-p (low [[EU|voltage]]) have 0.025(?) EU loss per block.</s> | |||
Used in crafting recipes, such as [[RE Battery|RE Batteries]]. | |||
|- | |||
![[Copper Cable]] | |||
|{{Grid/Crafting Table | |||
|B1=Copper Plate|B2=Cutter | |||
|Output=Copper Cable|OA=2 | |||
}} | |||
{{Grid/MetalFormer | |||
|Mode=Extruding | |||
|Top=Copper | |||
|Bottom=RE Battery (Charged) | |||
|Output=Copper Cable|OA=3 | |||
}} | |||
|Uninsulated copper cable <s>which handles up to 128 EU-p (medium [[EU|voltage]]). | |||
EU loss rate is 0.29.</s> | |||
|- | |||
![[Copper Cable|Insulated Copper Cable]] | |||
|{{Grid/Crafting Table | |||
|A1=Rubber|B1=Copper Cable | |||
|Output=Insulated Copper Cable | |||
}} | |||
|Insulated copper cable <s>which handles up to 128 EU-p (medium [[EU|voltage]])</s>. Insulation allows the cable to be painted, <s>reduces distance-based energy loss and completely removes electric shock. | |||
EU loss rate is 0.21</s> | |||
|- | |||
![[Gold Cable]] | |||
|{{Grid/Crafting Table | |||
|B1=Gold Plate|B2=Cutter | |||
|Output=Gold Cable|OA=4 | |||
}} | |||
{{Grid/MetalFormer | |||
|Mode=Extruding | |||
|Top=Gold | |||
|Bottom=RE Battery (Charged) | |||
|Output=Gold Cable|OA=4 | |||
}} | |||
|Uninsulated gold cable <s>which handles up to 512 EU-p (high [[EU|voltage]]). | |||
EU loss rate is 0.5.</s> | |||
|- | |||
![[Gold Cable|Insulated Gold Cable]] | |||
|{{Grid/Crafting Table | |||
|A1=Rubber|B1=Gold Cable | |||
|A2=Rubber | |||
|Output=2xIns. Gold Cable | |||
|Output-link=Insulated Gold Cable | |||
}} | |||
|Double-insulated gold cable <s>which handles up to 512 EU-p (high [[EU|voltage]]). | |||
EU loss rate is 0.402</s> | |||
|- | |||
![[HV Cable]] | |||
|{{Grid/MetalFormer | |||
|Mode=Extruding | |||
|Top=Iron | |||
|Bottom=RE Battery (Charged) | |||
|Output=HV Cable|OA=4 | |||
}} | |||
|Uninsulated HV cable <s>which handles up to 2048 EU-p (extreme [[EU|voltage]]). | |||
EU loss rate is 1.0</s> | |||
|- | |||
![[HV Cable|Insulated HV Cable]] | |||
|{{Grid/Crafting Table | |||
|A1=Rubber|B1=HV Cable | |||
|A2=Rubber|B2=Rubber | |||
|Output=3xIns. HV Cable|OA | |||
|Output-link=Insulated HV Cable | |||
}} | |||
|Triple-insulated HV cable <s>which handles up to 2048 EU-p (extreme [[EU|voltage]]).</s> | |||
|- | |||
![[Glass Fibre Cable]] | |||
|{{Grid/Crafting Table | |||
|A1=Glass|B1=Glass|C1=Glass | |||
|A2=Energium Dust|B2=Silver Dust|C2=Energium Dust | |||
|A3=Glass|B3=Glass|C3=Glass | |||
|Output=Glass Fibre Cable | |||
}} | |||
|Special glass fibre cable <s>which handles up to 8192 EU-p (ultra [[EU|voltage]])</s>. It is the only kind of uninsulated cable which can be painted <s>and gives no electric shock. Glass fibre cable is useful for long-distance wiring, since it has the smallest energy loss of all kinds of cable - 1 EU every 40 blocks (0.025 EU per block).</s> | |||
|- | |||
![[Detector Cable]] | |||
|{{Grid/Crafting Table | |||
|B1=Electronic Circuit | |||
|A2=Redstone|B2=3xIns. HV Cable|C2=Redstone | |||
|B3=Redstone | |||
|Output=Detector Cable | |||
}} | |||
|Outputs Redstone current when powered<s>, supports up to 8192 EU-p. | |||
EU loss rate is 0.5.</s> | |||
|- | |||
![[Splitter Cable]] | |||
|{{Grid/Crafting Table | |||
|B1=Redstone | |||
|A2=3xIns. HV Cable|B2=Lever|C2=3xIns. HV Cable | |||
|B3=Redstone | |||
|Output=Splitter Cable | |||
}} | |||
|Prevents the transfer of EU while being powered by Redstone<s>, supports up to 8192 EU-p. | |||
EU loss rate is 0.025</s> | |||
|} | |||
== EU Storage == | |||
=== Blocks === | |||
{| class="wikitable" | |||
|- | |||
!width=120px|Name | |||
!width=256px|Recipe IC2 [[v2.X|experimental]] | |||
!Description | |||
|- | |||
![[BatBox]] | |||
|{{Grid/Crafting Table | |||
|A1=Wooden Planks|B1=Insulated Tin Cable|C1=Wooden Planks | |||
|A2=RE Battery|B2=RE Battery|C2=RE Battery | |||
|A3=Wooden Planks|B3=Wooden Planks|C3=Wooden Planks | |||
|Output=BatBox | |||
}} | |||
|[[EU]] storage block which stores up to 40,000 [[EU]] and accepts up to and outputs 32 EU/t (low voltage). Accepts current from any side, except the one with a dot, which is the output. | |||
|- | |||
![[CES Unit]] | |||
|{{Grid/Crafting Table | |||
|A1=Bronze Plate|B1=Insulated Copper Cable|C1=Bronze Plate | |||
|A2=Advanced RE-Battery|B2=Advanced RE-Battery|C2=Advanced RE-Battery | |||
|A3=Bronze Plate|B3=Bronze Plate|C3=Bronze Plate | |||
|Output=CES Unit | |||
}} | |||
|[[EU]] storage block which stores up to 300,000 EU an accepts up to and outputs 128 EU-p (medium voltage). Accepts current from any side, expect the one with a dot, which is the output. | |||
|- | |||
![[MFE Unit]] | |||
|{{Grid/Crafting Table | |||
|A1=2xIns. Gold Cable|B1=Energy Crystal|C1=2xIns. Gold Cable | |||
|A2=Energy Crystal|B2=Machine|C2=Energy Crystal | |||
|A3=2xIns. Gold Cable|B3=Energy Crystal|C3=2xIns. Gold Cable | |||
|Output=MFE Unit | |||
}} | |||
|[[EU]] storage block which stores up to 4,000,000 [[EU]] and accepts up to and outputs 512 EU/t (high voltage). Accepts current from any side, except the one with a dot, which is the output. | |||
|- | |||
![[MFS Unit]] | |||
|{{Grid/Crafting Table | |||
|A1=Lapotron Crystal|B1=Advanced Circuit|C1=Lapotron Crystal | |||
|A2=Lapotron Crystal|B2=MFE Unit|C2=Lapotron Crystal | |||
|A3=Lapotron Crystal|B3=Advanced Machine|C3=Lapotron Crystal | |||
|Output=MFS Unit | |||
}} | |||
|[[EU]] storage block which stores up to 40,000,000 [[EU]] and accepts up to and outputs 2048 EU-p (extreme voltage). Accepts current from any side, except the one with a dot, which is the output. | |||
|- | |||
|} | |||
=== Items === | |||
{| class="wikitable" | |||
|- | |||
!width=120px|Name | |||
!width=256px|Recipe IC2 [[v2.X|experimental]] | |||
!Description | |||
|- | |||
![[Single-Use Battery]] | |||
|{{Grid/Crafting Table | |||
|B1=Insulated Copper Cable | |||
|B2=Hydrated Coal Dust | |||
|B3=Redstone | |||
|Output=Single-Use Battery|OA=8 | |||
}} | |||
{{Grid/Crafting Table | |||
|B1=Insulated Copper Cable | |||
|B2=Coal Dust | |||
|B3=Redstone | |||
|Output=Single-Use Battery|OA=5 | |||
}} | |||
|[[EU]] storage item which stores 1,000 EU and can only be used once, but are stackable in up to 64. It can also be used to power most machines from their bottom slot. | |||
|- | |||
![[RE Battery]] | |||
||{{Grid/Crafting Table | |||
|B1=Insulated Tin Cable | |||
|A2=Tin Casing|B2=Redstone|C2=Tin Casing | |||
|A3=Tin Casing|B3=Redstone|C3=Tin Casing | |||
|Output=RE Battery | |||
}} | |||
|[[EU]] storage item which stores up to 10,000 [[EU]] and can be charged or discharged in a [[BatBox]], [[CES Unit]], [[MFE Unit]] or [[MFS Unit]]. It can also be used to power most machines from their bottom slot, and be charged in generators through their top (or middle) slot. | |||
Empty ones can stack, but must be destacked to charge. | |||
|- | |||
![[Advanced RE-Battery]] | |||
|{{Grid/Crafting Table | |||
|A1=Insulated Copper Cable|B1=Bronze Item Casing|C1=Insulated Copper Cable | |||
|A2=Bronze Item Casing|B2=Sulfur Dust|C2=Bronze Item Casing | |||
|A3=Bronze Item Casing|B3=Lead Dust|C3=Bronze Item Casing | |||
|Output=Advanced RE-Battery | |||
}} | |||
|[[EU]] storage item which stores up to 100,000 [[EU]] and can be charged or discharged in a [[CES Unit]], [[MFE Unit]] or [[MFS Unit]]. | |||
|- | |||
![[Energy Crystal]] | |||
|{{Grid/Machine | |||
|Type=Compressor | |||
|Top=Energium Dust|IA=9 | |||
|Bottom=RE Battery (Charged) | |||
|Output=Energy Crystal | |||
}} | |||
|[[EU]] storage item which stores up to 1,000,000 [[EU]] and can only be charged or discharged in a [[MFE Unit]] or a [[MFS Unit]]. | |||
|- | |||
![[Lapotron Crystal]] | |||
|{{Grid/Crafting Table | |||
|A1=Lapis Lazuli Dust|B1=Advanced Circuit|C1=Lapis Lazuli Dust | |||
|A2=Lapis Lazuli Dust|B2=Energy Crystal|C2=Lapis Lazuli Dust | |||
|A3=Lapis Lazuli Dust|B3=Advanced Circuit|C3=Lapis Lazuli Dust | |||
|Output=Lapotron Crystal | |||
}} | |||
|[[EU]] storage item which stores up to 10,000,000 [[EU]] and can only be charged or discharged in a [[MFS Unit]]. | |||
|- | |||
![[Electrolyzed Water Cell]] | |||
| | |||
|Created in an [[Electrolyzer]] when the adjacent power storage (any tier) is more then 70.01% full, these cells adsorb 20k EU, but lose 1500 per energy storage tier (with minimal 1500 loss on [[MFS Unit]]) when discharged (discharged when energy storage 25% or less). | |||
|- | |||
|} | |||
== Transformers == | |||
{| class="wikitable" | |||
|- | |||
!width=120px|Name | |||
!width=256px|Recipe IC2 [[v2.X|experimental]] | |||
!Description | |||
|- | |||
![[LV Transformer]] | |||
|{{Grid/Crafting Table | |||
|A1=Wooden Planks|B1=Insulated Tin Cable|C1=Wooden Planks | |||
|A2=Wooden Planks|B2=Coil|C2=Wooden Planks | |||
|A3=Wooden Planks|B3=Insulated Tin Cable|C3=Wooden Planks | |||
|Output=LV Transformer | |||
}} | |||
|Either: | |||
* Accepts up to 32EU packets (LV) and outputs 128EU (MV) packets, OR | |||
* Accepts up to 128EU packets (MV) and outputs 32EU (LV) packets. | |||
|- | |||
![[MV Transformer]] | |||
|{{Grid/Crafting Table | |||
|A1=|B1=Insulated Copper Cable|C1= | |||
|A2=|B2=Machine|C2= | |||
|A3=|B3=Insulated Copper Cable|C3= | |||
|Output=MV Transformer | |||
}} | |||
|Either: | |||
* Accepts up to 128EU packets (MV) and outputs 512EU (HV) packets, OR | |||
* Accepts up to 512EU packets (HV) and outputs 128EU (MV) packets. | |||
|- | |||
![[HV Transformer]] | |||
|{{Grid/Crafting Table | |||
|B1=2xIns. Gold Cable | |||
|A2=Electronic Circuit|B2=MV Transformer|C2=Advanced RE-Battery | |||
|B3=2xIns. Gold Cable | |||
|Output=HV Transformer | |||
}} | |||
|Either: | |||
* Accepts up to 512EU packets (HV) and outputs 2048EU (EV) packets, OR | |||
* Accepts up to 2048EU packets (EV) and outputs 512EU (HV) packets. | |||
|- | |||
![[EV Transformer]] | |||
|{{Grid/Crafting Table | |||
|B1=4xIns. HV Cable | |||
|A2=Advanced Circuit|B2=HV Transformer|C2=Lapotron Crystal | |||
|B3=4xIns. HV Cable | |||
|Output=EV Transformer | |||
}} | |||
|Either: | |||
* Accepts up to 2048EU packets (EV) and outputs 8192EU (IV) packets, OR | |||
* Accepts up to 8192EU packets (IV) and outputs 2048EU (EV) packets. | |||
|- | |||
|} | |||
== Machine Components == | |||
{| class="wikitable" | |||
|- | |||
!width=120px|Name | |||
!width=256px|Recipe IC2 [[v2.X|experimental]] | |||
!Description | |||
|- | |||
![[Refined Iron]] | |||
||{{Grid/Blast Furnace | |||
|Input=Iron | |||
|AirFull=6 | |||
|AirEmpty=1 | |||
|Output1=Refined Iron | |||
|Output2=Slag | |||
}} | |||
|Refined Iron is a mid-game metal. It can be made in a [[Blast Furnace]] and is used for advanced machines. | |||
|- | |||
![[Universal Fluid Cell]] | |||
|{{Grid/Crafting Table | |||
|B1=Tin Casing | |||
|A2=Tin Casing|B2=Glass Pane|C2=Tin Casing | |||
|B3=Tin Casing | |||
|Output=Universal Fluid Cell}} | |||
|Used in some recipes, such as the [[CF Sprayer]] recipe. | |||
|- | |||
![[Machine]] | |||
||{{Grid/Crafting Table | |||
|A1=Iron Plate|B1=Iron Plate|C1=Iron Plate | |||
|A2=Iron Plate|C2=Iron Plate | |||
|A3=Iron Plate|B3=Iron Plate|C3=Iron Plate | |||
|Output=Machine | |||
}} | |||
{{Grid/Crafting Table | |||
|B2=Machine | |||
|Output=Iron|OA=8 | |||
}} | |||
|Base component for machines and the [[QuantumSuit Leggings|Quantum Leggings]]. | |||
|- | |||
![[Advanced Machine]] | |||
|{{Grid/Crafting Table | |||
|A1=Refined Iron Plate|B1=Advanced Alloy|C1=Refined Iron Plate | |||
|A2=Carbon Plate|B2=Machine|C2=Carbon Plate | |||
|A3=Refined Iron Plate|B3=Advanced Alloy|C3=Refined Iron Plate | |||
|Output=Advanced Machine | |||
}} | |||
|Base component for tier 2 and tier 3 machines. | |||
|- | |||
![[Electronic Circuit]] | |||
||{{Grid/Crafting Table | |||
|A1=Cable|B1=Cable|C1=Cable | |||
|A2=Redstone|B2=Iron Plate|C2=Redstone | |||
|A3=Cable|B3=Cable|C3=Cable | |||
|Output=Electronic Circuit | |||
}} | |||
|Base component for machines, smart items and the [[Advanced Circuit]]. | |||
|- | |||
![[Advanced Circuit]] | |||
|{{Grid/Crafting Table | |||
|A1=Redstone|B1=Glowstone Dust|C1=Redstone | |||
|A2=Lapis Lazuli (Dye)|B2=Electronic Circuit|C2=Lapis Lazuli (Dye) | |||
|A3=Redstone|B3=Glowstone Dust|C3=Redstone | |||
|Output=Advanced Circuit | |||
}} | |||
|Base component for tier 2 and tier 3 tools and machines. | |||
|- | |||
![[Coil]] | |||
|{{Grid/Crafting Table | |||
|A1=Copper Cable|B1=Copper Cable|C1=Copper Cable | |||
|A2=Copper Cable|B2=Iron|C2=Copper Cable | |||
|A3=Copper Cable|B3=Copper Cable|C3=Copper Cable | |||
|Output=Coil | |||
}} | |||
|Used to make [[Electric Motor]] and some other things. Also required inside the [[Electric Heat Generator]] in order to make it produce [[Heat]]. | |||
|- | |||
![[Electric Motor]] | |||
|{{Grid/Crafting Table | |||
|A1=|B1=Tin Casing|C1= | |||
|A2=Coil|B2=Iron|C2=Coil | |||
|A3=|B3=Tin Casing|C3= | |||
|Output=Electric Motor | |||
}} | |||
| | |||
|- | |||
![[Heat Conductor]] | |||
|{{Grid/Crafting Table | |||
|A1=Rubber|B1=Copper Plate|C1=Rubber | |||
|A2=Rubber|B2=Copper Plate|C2=Rubber | |||
|A3=Rubber|B3=Copper Plate|C3=Rubber | |||
|Output=Heat Conductor | |||
}} | |||
|Used to create Heat Generators like [[Electric Heat Generator]] | |||
|- | |||
![[Crystal Memory (raw)]] | |||
|{{Grid/Crafting Table | |||
|A1=Silicon Dioxide|B1=Obsidian Dust|C1=Silicon Dioxide | |||
|A2=Obsidian Dust|B2=Silicon Dioxide|C2=Obsidian Dust | |||
|A3=Silicon Dioxide|B3=Obsidian Dust|C3=Silicon Dioxide | |||
|Output=Crystal Memory (raw) | |||
}} | |||
|Used to make Crystal Memory. See the [[Tutorial:Replication|Replication tutorial]] for more information. | |||
|- | |||
![[Crystal Memory]] | |||
|{{Grid/Machine | |||
|Top=Crystal Memory (raw) | |||
|Output=Crystal Memory | |||
}} | |||
|Used to make [[Pattern Storage]] and store scanned information. See the [[Tutorial:Replication|Replication tutorial]] for more information. | |||
|- | |||
|} | |||
== Generators == | |||
=== EU === | |||
{| class="wikitable" | |||
|- | |||
!width=120px|Name | |||
!width=256px|Recipe IC2 [[v2.X|experimental]] | |||
!Description | |||
|- | |||
![[Generator]] | |||
|{{Grid/Crafting Table | |||
|B1=RE Battery | |||
|B2=Machine | |||
|B3=Furnace | |||
|Output=Generator | |||
}} | |||
{{Grid/Crafting Table | |||
|B1=RE Battery | |||
|A2=Iron Plate|B2=Iron Plate|C2=Iron Plate | |||
|B3=Iron Furnace | |||
|Output=Generator | |||
}} | |||
|Simple generator which accepts [[Fuel Can (Filled)|fuel]] (43,200 EU for coal fuel, 16,200 EU for bio fuel), coal (4000 EU), [[Scrap|scrap]] (825 EU), wood (750 EU), planks (750 EU), wooden blocks (750 EU), sticks (250 EU), saplings (250 EU, 200 EU for rubber tree saplings), sugar cane (125 EU) and cactus (125 EU) and outputs 10 EU/t. If there is no destination for the current, it can store up to 4000 [[EU]]. It is also a base component for other generators. | |||
|- | |||
![[Geothermal Generator]] | |||
|{{Grid/Crafting Table | |||
|A1=Glass|B1=Universal Fluid Cell|C1=Glass | |||
|A2=Glass|B2=Universal Fluid Cell|C2=Glass | |||
|A3=Iron Casing|B3=Generator|C3=Iron Casing | |||
|Output=Geothermal Generator | |||
}} | |||
|Generator which accepts lava buckets and [[Lava Cell|cells]] and outputs 20 EU/t for a total of 10,000 [[EU]] per lava unit. It can store 2400 [[EU]] and 24 units of lava inside. | |||
Any stored lava is lost if blocked removed. | |||
|- | |||
![[Solar Panel]] | |||
|{{Grid/Crafting Table | |||
|A1=Coal Dust|B1=Glass|C1=Coal Dust | |||
|A2=Glass|B2=Coal Dust|C2=Glass | |||
|A3=Electronic Circuit|B3=Generator|C3=Electronic Circuit | |||
|Output=Solar Panel | |||
}} | |||
|Generator which, when exposed to '''direct''' sunlight through its top, outputs 1.0 EU/t for a total of 13500 EU per Minecraft day. | |||
|- | |||
![[Water Mill]] | |||
|{{Grid/Crafting Table | |||
|A1=Stick|B1=Wooden Planks|C1=Stick | |||
|A2=Wooden Planks|B2=Generator|C2=Wooden Planks | |||
|A3=Stick|B3=Wooden Planks|C3=Stick | |||
|Output=Water Mill|OA=2 | |||
}} | |||
Generator which accepts water buckets and adjacent water and outputs either 2 EU/t for a total of 1000 EU per water bucket, or 0.010 EU/t per adjacent water block for a maximum of 0.25 EU/t with a 3x3 cube of water with the water mill in the middle and cable on top. | |||
|- | |||
![[Wind Mill]] | |||
|{{Grid/Crafting Table | |||
|A1=Iron|C1=Iron | |||
|B2=Generator | |||
|A3=Iron|C3=Iron | |||
|Output=Windmill | |||
}} | |||
Generator which outputs 0-6 EU/t (can melt tin cable!) for a total of an average of 250 EU/t multiplied by its height in the Minecraft world. The generation power can be hindered by any block in a 9x9x7 area around it, reducing the effective height by 1 for each block in said area. | |||
Will break on heavy load, replacing itself with normal generator. | |||
|- | |||
![[Semifluid Generator]] | |||
|{{Grid/Crafting Table | |||
|A1=Iron Casing|B1=Universal Fluid Cell|C1=Iron Casing | |||
|A2=Universal Fluid Cell|B2=Geothermal Generator|C2=Universal Fluid Cell | |||
|A3=Iron Casing|B3=Universal Fluid Cell|C3=Iron Casing | |||
|Output=Semifluid Generator | |||
}} | |||
|Can burn [[Biogas]], oil and fuel (Buildcraft, except in Minecraft 1.11.x or 1.12.x), biomass and ethanol (Forestry). | |||
|- | |||
![[Stirling Generator]] | |||
|{{Grid/Crafting Table | |||
|A1=Iron Item Casing|B1=Heat Conductor|C1=Iron Item Casing | |||
|A2=Iron Item Casing|B2=Generator|C2=Iron Item Casing | |||
|A3=Iron Item Casing|B3=Iron Item Casing|C3=Iron Item Casing | |||
|Output=Stirling Generator | |||
}} | |||
|A [[Heat]] acceptor which turns [[Heat | Heat Units]] ([[hU]]) into [[EU]]. | |||
|- | |||
![[Radioisotope Thermoelectric Generator]] | |||
|{{Grid/Crafting Table | |||
|A1=Iron Casing|B1=Iron Casing|C1=Iron Casing | |||
|A2=Iron Casing|B2=Reactor Chamber|C2=Iron Casing | |||
|A3=Iron Casing|B3=Generator|C3=Iron Casing | |||
|Output=Radioisotope Thermoelectric Generator | |||
}} | |||
|Uses [[Pellets of RTG Fuel]] to produce energy. Depending on the amount of fuel in the generator, it produces between 1 EU/t and 16 EU/t. The fuel pellets are not consumed after many years, making this generator a source of unlimited power. | |||
|- | |||
![[Kinetic Generator]] | |||
|{{Grid/Crafting Table | |||
|A1=Iron Casing|B1=Iron Casing|C1=Iron Casing| | |||
|A2=Generator|B2=Electric Motor|C2=Shaft (Iron) | |||
|A3=Iron Casing|B3=Iron Casing|C3=Iron Casing| | |||
|Output=Kinetic Generator | |||
}} | |||
|Connects to [[Kinetic Wind Generator]] or [[Kinetic Steam Generator]] to change Kinetic Energy Units into Energy Units. | |||
|- | |||
|} | |||
=== Heat === | |||
{| class="wikitable" | |||
|- | |||
!width=120px|Name | |||
!width=256px|Recipe IC2 [[v2.X|experimental]] | |||
!Description | |||
|- | |||
![[Electric Heat Generator]] | |||
|{{Grid/Crafting Table | |||
|A1=Iron Casing|B1=RE Battery|C1=Iron Casing | |||
|A2=Iron Casing|B2=Electronic Circuit|C2=Iron Casing | |||
|A3=Iron Casing|B3=Heat Conductor|C3=Iron Casing | |||
|Output=Electric Heat Generator | |||
}} | |||
| Creates [[Heat]]/[[hU]] out of [[EU]]. Heat can be used for [[Blast Furnace]] | |||
|- | |||
![[Solid Heat Generator]] | |||
|{{Grid/Crafting Table | |||
|A1=|B1=Heat Conductor|C1= | |||
|A2=Iron Plate|B2=Iron Plate|C2=Iron Plate | |||
|A3=|B3=Iron Furnace|C3= | |||
|Output=Solid Heat Generator | |||
}} | |||
{{Grid/Crafting Table | |||
|A1=Heat Conductor|B1=|C1= | |||
|A2=Machine|B2=|C2= | |||
|A3=Furnace|B3=|C3= | |||
|Output=Solid Heat Generator | |||
}} | |||
| Creates [[Heat]]/[[hU]] by burning solid stuff (e.g. [[Coal]]). Heat can be used for [[Blast Furnace]] | |||
|- | |||
![[Fluid Heat Generator]] | |||
|{{Grid/Crafting Table | |||
|A1=Iron Casing|B1=Universal Fluid Cell|C1=Iron Casing | |||
|A2=Universal Fluid Cell|B2=Heat Conductor|C2=Universal Fluid Cell | |||
|A3=Iron Casing|B3=Universal Fluid Cell|C3=Iron Casing | |||
|Output=Fluid Heat Generator | |||
}} | |||
| Creates [[Heat]]/[[hU]] by burning fluids (e.g. [[Fuel]]). Heat can be used for [[Blast Furnace]] | |||
|- | |||
![[Liquid Heat Exchanger]] | |||
|{{Grid/Crafting Table | |||
|A1=Glass|B1=Empty Cell|C1=Glass | |||
|A2=Glass|B2=Empty Cell|C2=Glass | |||
|A3=Iron Item Casing|B3=Heat Conductor|C3=Iron Item Casing | |||
|Output=Liquid Heat Exchanger | |||
}} | |||
| Creates [[Heat]]/[[hU]] from specific fluids ([[Non-IC Items|Lava]] and [[Hot Coolant]]) | |||
|- | |||
![[Radioisotope Heat Generator]] | |||
|{{Grid/Crafting Table | |||
|A1=Iron Casing|B1=Iron Casing|C1=Iron Casing | |||
|A2=Iron Casing|B2=Reactor Chamber|C2=Iron Casing | |||
|A3=Iron Casing|B3=Heat Conductor|C3=Iron Casing | |||
|Output=Radioisotope Heat Generator | |||
}} | |||
| Creates [[Heat]]/[[hU]] by using [[Pellets of RTG Fuel]]. Heat can be used for [[Blast Furnace]] | |||
|- | |||
|} | |||
=== Kinetic === | |||
{| class="wikitable" | |||
|- | |||
!width=120px|Name | |||
!width=256px|Recipe IC2 [[v2.X|experimental]] | |||
!Description | |||
|- | |||
![[Electric Kinetic Generator]] | |||
|{{Grid/Crafting Table | |||
|A1=Iron Item Casing|A2=Iron Item Casing|A3=Iron Item Casing|B1=RE Battery|B2=Shaft (Iron)|B3=Electric Motor|C1=Iron Item Casing|C2=Iron Item Casing|C3=Iron Item Casing | |||
|Output=Electric Kinetic Generator | |||
}} | |||
|Creates Kinetic Energy/[[kU]] out of [[EU]]. Can be used for [[Turning Table]]. | |||
|- | |||
![[Kinetic Wind Generator]] | |||
|{{Grid/Crafting Table | |||
|A2=Shaft (Iron)|B2=Machine|C2=Shaft (Iron) | |||
|Output=Kinetic Wind Generator | |||
}} | |||
|More powerful than the standard Wind Generator, Kinetic Wind Generators use Rotors of varying types to capture the wind to turn an internal crankshaft. Requires a large, clear space in front of the machine to operate and a Kinetic Generator hooked up to convert rotation energy into EU. | |||
|- | |||
![[Manual Kinetic Generator]] | |||
|{{Grid/Crafting Table | |||
|A1=Machine|B1=Lever | |||
|Output=Manual Kinetic Generator | |||
}} | |||
|Another source of "free" energy. Each time a player clicks on the machine it will generate a small charge of EU if hooked up to a Kinetic Generator. | |||
|- | |||
![[Kinetic Steam Generator]] | |||
|{{Grid/Crafting Table | |||
|A1=Refined Iron Casing|B1=Refined Iron Casing|C1=Refined Iron Casing | |||
|A2=Coil|B2=Shaft (Iron)|C2=Shaft (Iron) | |||
|A3=Universal Fluid Cell|B3=Refined Iron Casing|C3=Refined Iron Casing | |||
|Output=Kinetic Steam Generator | |||
}} | |||
|Not to be confused with the [[Steam Generator]], the Kinetic Steam Generator takes in Steam or super-heated steam generated from the Steam Generator to turn an internal turbine. Again, it requires not only a Kinetic Generator to actually produce EU but, also requires a means to remove excess condensation from inside the turbine chamber. | |||
|- | |||
|} | |||
=== Nuclear Reactor === | |||
{| class="wikitable" | |||
|- | |||
!width=120px|Name | |||
!width=256px|Recipe IC2 [[v2.X|experimental]] | |||
!Description | |||
|- | |||
![[Nuclear Reactor]] | |||
|{{Grid/Crafting Table | |||
|A1=Dense Lead Plate|B1=Advanced Circuit|C1=Dense Lead Plate | |||
|A2=Reactor Chamber|B2=Reactor Chamber|C2=Reactor Chamber | |||
|A3=Dense Lead Plate|B3=Generator|C3=Dense Lead Plate | |||
|Output=Nuclear Reactor | |||
}} | |||
|Complex generator whose output and total [[EU]] varies depending on the setup. Refer to [[Tutorial:Nuclear_Power| Nuclear Reactor for Dummies]] for more info. | |||
Needs indirect redstone current to run. | |||
|- | |||
![[Reactor Chamber]] | |||
|{{Grid/Crafting Table | |||
|A1=|B1=Lead Plate|C1= | |||
|A2=Lead Plate|B2=Machine|C2=Lead Plate | |||
|A3=|B3=Lead Plate|C3= | |||
|Output=Reactor Chamber | |||
}} | |||
|Can be attached to a [[Nuclear Reactor|reactor]] to increase its space by 1 column, provides no bonuses, valid output and input. | |||
|- | |||
![[Uranium|Tiny Pile of Uranium 235]] | |||
|{{Grid/Centrifuge | |||
|Top=Purified Crushed Uranium Ore | |||
|Bottom=Advanced RE-Battery | |||
|Output1=Tiny Pile of Uranium 235|OA1=2 | |||
|Output2=Uranium 238|OA2=5}} | |||
|Used to craft [[Enriched Uranium Nuclear Fuel]], [[Uranium 235]] and can be used for something very explosive. '''Warning:''' This Item is [[Radiation|radioactive]]! You need a '''full''' [[Hazmat Suit]] to transport it! | |||
|- | |||
![[Uranium|Uranium 238]] | |||
|{{Grid/Centrifuge | |||
|Top=Purified Crushed Uranium Ore | |||
|Bottom=Advanced RE-Battery | |||
|Output1=Tiny Pile of Uranium 235|OA1=2 | |||
|Output2=Uranium 238|OA2=5}} | |||
|Used to craft [[Enriched Uranium Nuclear Fuel]], [[MOX Nuclear Fuel]] and [[Uranium Block]]. '''Warning:''' This item is [[Radiation|radioactive]]! You need a '''full''' [[Hazmat Suit]] to transport it! | |||
|- | |||
![[Enriched Uranium Nuclear Fuel]] | |||
|{{Grid/Crafting Table | |||
|A1=Uranium 238|B1=Uranium 238|C1=Uranium 238 | |||
|A2=Tiny Pile of Uranium 235|B2=Tiny Pile of Uranium 235|C2=Tiny Pile of Uranium 235 | |||
|A3=Uranium 238|B3=Uranium 238|C3=Uranium 238 | |||
|Output=Enriched Uranium Nuclear Fuel | |||
}} | |||
|Used to craft a [[Uranium Cell]]. '''Warning:''' This item is [[Radiation|radioactive]]! | |||
|- | |||
![[MOX Nuclear Fuel]] | |||
|{{Grid/Crafting Table | |||
|A1=Uranium 238|B1=Uranium 238|C1=Uranium 238 | |||
|A2=Plutonium|B2=Plutonium|C2=Plutonium | |||
|A3=Uranium 238|B3=Uranium 238|C3=Uranium 238 | |||
|Output=MOX Nuclear Fuel | |||
}} | |||
|(MOX=Mixed oxide, see the <span class="pops">[[wikipedia:MOX_fuel|wikipedia]]</span> article for more info) | |||
Used to craft [[Fuel Rod (MOX)]]. '''Warning:''' This item is [[Radiation|radioactive]]! | |||
|- | |||
![[Reactor Plating]] | |||
|{{Grid/Crafting Table | |||
|A1=Lead Plate|B1=Advanced Alloy|C1= | |||
|A2=|B2=|C2= | |||
|A3=|B3=|C3= | |||
|Output=Reactor Plating | |||
}} | |||
| +1000 Maximum Reactor Temperature | |||
-5% Explosion Range | |||
|- | |||
![[Heat-Capacity Reactor Plating]] | |||
|{{Grid/Crafting Table | |||
|A1=Copper Plate|B1=Copper Plate|C1=Copper Plate | |||
|A2=Copper Plate|B2=Reactor Plating|C2=Copper Plate | |||
|A3=Copper Plate|B3=Copper Plate|C3=Copper Plate | |||
|Output=Heat-Capacity Reactor Plating | |||
}} | |||
| +1700 Maximum Reactor Temperature | |||
-1% Explosion Range | |||
|- | |||
![[Containment Reactor Plating]] | |||
|{{Grid/Crafting Table | |||
|A1=Reactor Plating|B1=Advanced Alloy|C1= | |||
|A2=Advanced Alloy|B2=|C2= | |||
|A3=|B3=|C3= | |||
|Output=Containment Reactor Plating | |||
}} | |||
| +500 Maximum Reactor Temperature | |||
-10% Explosion Range | |||
|- | |||
![[Heat Exchanger]] | |||
|{{Grid/Crafting Table | |||
|A1=Copper Plate|B1=Electronic Circuit|C1=Copper Plate | |||
|A2=Tin Plate|B2=Copper Plate|C2=Tin Plate | |||
|A3=Copper Plate|B3=Tin Plate|C3=Copper Plate | |||
|Output=Heat Exchanger | |||
}} | |||
|These will first exchange up to 12 heat with each surrounding component, and then up to 4 with the reactor itself. | |||
|- | |||
![[Advanced Heat Exchanger]] | |||
|{{Grid/Crafting Table | |||
|A1=Lapis Lazuli Plate|B1=Electronic Circuit|C1=Lapis Lazuli Plate | |||
|A2=Heat Exchanger|B2=Copper Plate|C2=Heat Exchanger | |||
|A3=Lapis Lazuli Plate|B3=Electronic Circuit|C3=Lapis Lazuli Plate | |||
|Output=Advanced Heat Exchanger | |||
}} | |||
|These transfer up to 24 heat with each surrounding component, and then up to 8 with the reactor. | |||
|- | |||
![[Core Heat Exchanger]] | |||
|{{Grid/Crafting Table | |||
|A1=Copper Plate|B1=Copper Plate|C1=Copper Plate | |||
|A2=Copper Plate|B2=Heat Exchanger|C2=Copper Plate | |||
|A3=Copper Plate|B3=Copper Plate|C3=Copper Plate | |||
|Output=Core Heat Exchanger | |||
}} | |||
|These transfer up to 72 heat with the reactor, put will not move heat to or from nearby components. These will usually be at the same percent capacity as the reactor, so they are useful as a kind of thermometer for your reactor. | |||
|- | |||
![[Component Heat Exchanger]] | |||
|{{Grid/Crafting Table | |||
|A1=|B1=Gold Plate|C1= | |||
|A2=Gold Plate|B2=Heat Exchanger|C2=Gold Plate | |||
|A3=|B3=Gold Plate|C3= | |||
|Output=Component Heat Exchanger | |||
}} | |||
|These transfer up to 36 heat with each adjacent component, but does not transfer any with the reactor itself. | |||
|- | |||
![[Heat Vent]] | |||
|{{Grid/Crafting Table | |||
|A1=Iron Bars|B1=Iron Plate|C1=Iron Bars | |||
|A2=Iron Plate|B2=Electric Motor|C2=Iron Plate | |||
|A3=Iron Bars|B3=Iron Plate|C3=Iron Bars | |||
|Output=Heat Vent | |||
}} | |||
|The basic vent dissipates 6 heat from itself every second. | |||
|- | |||
![[Advanced Heat Vent]] | |||
|{{Grid/Crafting Table | |||
|A1=Iron Bars|B1=Heat Vent|C1=Iron Bars | |||
|A2=Iron Bars|B2=Diamond|C2=Iron Bars | |||
|A3=Iron Bars|B3=Heat Vent|C3=Iron Bars | |||
|Output=Advanced Heat Vent | |||
}} | |||
|An improvement to a basic heat vent, this component dissipates 12 heat from itself. | |||
|- | |||
![[Reactor Heat Vent]] | |||
|{{Grid/Crafting Table | |||
|A1=Copper Plate|B1=Copper Plate|C1=Copper Plate | |||
|A2=Copper Plate|B2=Heat Vent|C2=Copper Plate | |||
|A3=Copper Plate|B3=Copper Plate|C3=Copper Plate | |||
|Output=Reactor Heat Vent | |||
}} | |||
|This vent moves 5 heat from the reactor vessel to itself and dissipates 5 heat every second. This has the advantage that it can function effectively anywhere in the reactor, not just next to the uranium cell. | |||
|- | |||
![[Component Heat Vent]] | |||
|{{Grid/Crafting Table | |||
|A1=Iron Bars|B1=Tin Plate|C1=Iron Bars | |||
|A2=Tin Plate|B2=Heat Vent|C2=Tin Plate | |||
|A3=Iron Bars|B3=Tin Plate|C3=Iron Bars | |||
|Output=Component Heat Vent | |||
}} | |||
|This vent dissipates 4 heat from each surrounding component. | |||
|- | |||
![[Overclocked Heat Vent]] | |||
|{{Grid/Crafting Table | |||
|A1=|B1=Gold Plate|C1= | |||
|A2=Gold Plate|B2=Reactor Heat Vent|C2=Gold Plate | |||
|A3=|B3=Gold Plate|C3= | |||
|Output=Overclocked Heat Vent | |||
}} | |||
|This vent moves 36 heat from the reactor to itself and then dissipates 20 heat from itself. This will cause the component to overheat if steps are not taken to cool this component. | |||
|- | |||
![[Neutron Reflector]] | |||
|{{Grid/Crafting Table | |||
|A1=Tin Dust|B1=Coal Dust|C1=Tin Dust | |||
|A2=Coal Dust|B2=Copper Plate|C2=Coal Dust | |||
|A3=Tin Dust|B3=Coal Dust|C3=Tin Dust | |||
|Output=Neutron Reflector | |||
}} | |||
|These reflect neutron pulses back to the uranium cell which produced them. The neutron reflector can reflect 10,000 pulses (one complete cycle from one uranium cell). | |||
|- | |||
![[Thick Neutron Reflector]] | |||
|{{Grid/Crafting Table | |||
|A1=Copper Plate|B1=Neutron Reflector|C1=Copper Plate | |||
|A2=Neutron Reflector|B2=Copper Plate|C2=Neutron Reflector | |||
|A3=Copper Plate|B3=Neutron Reflector|C3=Copper Plate | |||
|Output=Thick Neutron Reflector | |||
}} | |||
|The thick neutron reflector is more durable, allowing it to reflect 40,000 pulses before failure. | |||
|- | |||
![[Coolant Cell|10K Cooling Cell]] | |||
|{{Grid/Crafting Table | |||
|A1=|B1=Tin Plate|C1= | |||
|A2=Tin Plate|B2=Coolant Cell|B2-link=Coolant (Fluid)|C2=Tin Plate | |||
|A3=|B3=Tin Plate|C3= | |||
|Output=10k Coolant Cell | |||
}} | |||
|Holds 10,000 heat before melting. | |||
|- | |||
![[Coolant Cell|30K Cooling Cell]] | |||
|{{Grid/Crafting Table | |||
|A1=Tin Plate|B1=Tin Plate|C1=Tin Plate | |||
|A2=Cooling Cell|B2=Cooling Cell|C2=Cooling Cell | |||
|A3=Tin Plate|B3=Tin Plate|C3=Tin Plate | |||
|Output=30K Cooling Cell | |||
}} | |||
|Holds 30,000 heat before melting. | |||
|- | |||
![[Coolant Cell|60K Cooling Cell]] | |||
|{{Grid/Crafting Table | |||
|A1=Tin Plate|B1=30K Cooling Cell|C1=Tin Plate | |||
|A2=Tin Plate|B2=Iron Plate|C2=Tin Plate | |||
|A3=Tin Plate|B3=30K Cooling Cell|C3=Tin Plate | |||
|Output=60K Cooling Cell | |||
}} | |||
|Holds 60,000 heat before melting. | |||
|- | |||
![[RSH-Condensator]] | |||
|{{Grid/Crafting Table | |||
|A1=Redstone|B1=Redstone|C1=Redstone | |||
|A2=Redstone|B2=Heat Vent|C2=Redstone | |||
|A3=Redstone|B3=Heat Exchanger|C3=Redstone | |||
|Output=RSH-Condensator | |||
}} | |||
|Holds 20,000 heat. Can be restored with redstone (10,000 each). | |||
|- | |||
![[LZH-Condensator]] | |||
|{{Grid/Crafting Table | |||
|A1=Redstone|B1=Reactor Heat Vent|C1=Redstone | |||
|A2=RSH-Condensator|B2=Lapis Lazuli Block|C2=RSH-Condensator | |||
|A3=Redstone|B3=Core Heat Exchanger|C3=Redstone | |||
|Output=LZH-Condensator | |||
}} | |||
|Holds 100,000 heat. Can be restored with lapis lazuli dust (40,000 each) and redstone (5,000 each). | |||
|- | |||
![[Uranium Cell]] | |||
|{{Grid/Machine | |||
|Type=Canning Machine | |||
|Top=Enriched Uranium Nuclear Fuel | |||
|Bottom=Fuel Rod (Empty) | |||
|Output=Uranium Cell | |||
}} | |||
|Generates 1,000,000-5,000,000 [[EU]] at 5-25 EU/t (depending on efficiency, that is, cell adjacency), but generates excess heat which must be eliminated through cooling. When it decays, 25% of time turns into a [[Near-Depleted Uranium Cell]], which once recharged, turns into a fresh new cell. | |||
|- | |||
![[Dual Uranium Cell]] | |||
|{{Grid/Crafting Table | |||
|A2=Uranium Cell|B2=Iron Plate|C2=Uranium Cell | |||
|Output=Dual Uranium Cell | |||
}} | |||
|These act as if they're 2 cells in a Grid pattern. 1 Dual cell acts as 2x Uranium Cells are side-by-side. The output from a single slot used is 20EU/t because of 5EU/t per cell, as well as the +5EU/t per cell adjacent to another. | |||
|- | |||
![[Quad Uranium Cell]] | |||
|{{Grid/Crafting Table | |||
|A1=Uranium Cell|B1=Iron Plate|C1=Uranium Cell | |||
|A2=Copper Plate|B2=Iron Plate|C2=Copper Plate | |||
|A3=Uranium Cell|B3=Iron Plate|C3=Uranium Cell | |||
|Output=Quad Uranium Cell | |||
}} | |||
|4 Uranium Cells forged together to only take one space in the reactor slot; Output for these are 60EU/t. These new Uranium components allow for much more compact Nuclear Reactor designs - However you still have to manage that heat produced. | |||
|- | |||
![[Fuel Rod (MOX)]] | |||
|{{Grid/Machine | |||
|Type=Canning Machine | |||
|Top=MOX Nuclear Fuel | |||
|Bottom=Fuel Rod (Empty) | |||
|Output=Fuel Rod (MOX) | |||
}} | |||
|Much like [[Uranium Cell]] but with higher energy output on higher reactor heat. | |||
|- | |||
![[Dual Fuel Rod (MOX)]] | |||
|{{Grid/Crafting Table | |||
|A2=Fuel Rod (MOX)|B2=Iron Plate|C2=Fuel Rod (MOX) | |||
|Output=Dual Fuel Rod (MOX) | |||
}} | |||
|These act as if they're 2 cells in a Grid pattern. 1 Dual cell acts as 2x MOX Cells are side-by-side. The output at 0 heat from a single slot used is 20EU/t because of 5EU/t per cell, as well as the +5EU/t per cell adjacent to another. | |||
|- | |||
![[Quad Fuel Rod (MOX)]] | |||
|{{Grid/Crafting Table | |||
|A1=Fuel Rod (MOX)|B1=Iron Plate|C1=Fuel Rod (MOX) | |||
|A2=Copper Plate|B2=Iron Plate|C2=Copper Plate | |||
|A3=Fuel Rod (MOX)|B3=Iron Plate|C3=Fuel Rod (MOX) | |||
|Output=Quad Fuel Rod (MOX) | |||
}} | |||
|4 MOX Cells forged together to only take one space in the reactor slot; Output with no heat for these are 60EU/t. These new reactor components allow for much more compact Nuclear Reactor designs - However you still have to manage that heat produced. | |||
|- | |||
|} | |||
== Processors == | |||
{| class="wikitable" | |||
|- | |||
!width=120px|Name | |||
!width=256px|Recipe IC2 [[v2.X|experimental]] | |||
!Description | |||
|- | |||
![[Iron Furnace]] | |||
|{{Grid/Crafting Table | |||
|B1=Iron Plate | |||
|A2=Iron Plate|C2=Iron Plate | |||
|A3=Iron Plate|B3=Furnace|C3=Iron Plate | |||
|Output=Iron Furnace | |||
}} | |||
|Non-electric machine, 25% faster and 125% fuel effective, can burn lava and [[Fuel Can (Filled)|fuel]]. | |||
|- | |||
![[Electro Furnace|Electric Furnace]] | |||
|{{Grid/Crafting Table | |||
|B1=Electronic Circuit | |||
|A2=Redstone|B2=Iron Furnace|C2=Redstone | |||
|Output=Electro Furnace | |||
}} | |||
|[[EU|Energy]]-powered furnace which is 150% faster then normal and 125% fuel effective. Takes 400 [[EU]] per operation (at least 3 EU/t needed for continuous usage), up to low [[EU|voltage]] (32 EU/t). | |||
|- | |||
![[Blast Furnace]] | |||
|{{Grid/Crafting Table | |||
|A1=Iron Casing|B1=Iron Casing|C1=Iron Casing | |||
|A2=Iron Casing|B2=Machine|C2=Iron Casing | |||
|A3=Iron Casing|B3=Heat Conductor|C3=Iron Casing | |||
|Output=Blast Furnace | |||
}} | |||
|Heat powered machine used for the creation of [[Refined Iron]]. Require 1 Iron(Ingot, Ore, Crushed Ore, Purified Crushed Ore, or Dust) and 6 [[Compressed Air Cell]]s per operation. Outputs 1 Refined Iron Ingot and 1 [[Slag]]. | |||
|- | |||
![[Macerator]] | |||
|{{Grid/Crafting Table | |||
|A1=Flint|B1=Flint|C1=Flint | |||
|A2=Cobblestone|B2=Machine|C2=Cobblestone | |||
|B3=Electronic Circuit | |||
|Output=Macerator | |||
}} | |||
|Turns ore into [[Crushed Ore]] and some other things - look for more recipes on [[Macerator|this]] page. Takes 800 [[EU]] per operation (at least 2 EU/t needed for continuous usage), up to low [[EU|voltage]] (32 EU/t). | |||
|- | |||
![[Ore Washing Plant]] | |||
|{{Grid/Crafting Table | |||
|A1=Iron Plate|B1=Iron Plate|C1=Iron Plate | |||
|A2=Bucket|B2=Machine|C2=Bucket | |||
|A3=Electric Motor|B3=Electronic Circuit|C3=Electric Motor | |||
|Output=Ore Washing Plant | |||
}} | |||
|Turns [[Crushed Ore]] into [[Purified Crushed Ore]], [[Stone Dust]] and a tiny pile of dust - look for more recipes on [[Ore Washing Plant|this]] page. Takes 8000 [[EU]] per operation (at least 16 EU/t needed for continuous usage), up to low [[EU|voltage]] (32 EU/t). | |||
|- | |||
![[Thermal Centrifuge]] | |||
|{{Grid/Crafting Table | |||
|A1=Coil|B1=Mining Laser|C1=Coil | |||
|A2=Iron|B2=Advanced Machine|C2=Iron | |||
|A3=Iron|B3=Electric Motor|C3=Iron | |||
|Output=Thermal Centrifuge | |||
}} | |||
|Turns [[Crushed Purified Ore]] into [[Dusts]] and some other things - look for more recipes on [[Thermal Centrifuge|this]] page. Takes (?) [[EU]] per operation (at least 48 EU/t needed for continuous usage), up to medium [[EU|voltage]] (128 EU/t). | |||
|- | |||
![[Metal Former]] | |||
|{{Grid/Crafting Table | |||
|A1=|B1=Electronic Circuit|C1= | |||
|A2=Tool Box|B2=Machine|C2=Tool Box | |||
|A3=Coil|B3=Coil|C3=Coil | |||
|Output=Metal Former | |||
}} | |||
|Has 3 modes: Rolling, Extruding and Cutting. Used to craft plates, casings, cables and some other things - look for more recipes on [[Metal Former|this]] page. | |||
|- | |||
![[Block Cutting Machine]] | |||
|{{Grid/Crafting Table | |||
|B1=Electronic Circuit | |||
|B2=Basic Machine Casing | |||
|B3=Electric Motor | |||
|Output=Block Cutting Machine|nobreak=y | |||
}} | |||
|Cuts metal blocks into plates, faster than a metal former would roll 9 plates. | |||
|- | |||
![[Extractor]] | |||
|{{Grid/Crafting Table | |||
|A1=Treetap|B1=Machine|C1=Treetap | |||
|A2=Treetap|B2=Electronic Circuit|C2=Treetap | |||
|Output=Extractor | |||
}} | |||
|Extracts resin into 3 rubber (triple the efficiency) and turns simple fuel cells into liquid fuel ones and some other things - look for more recipes on [[Extractor|this]] page. Takes 313 [[EU]] per operation (at least 2 EU/t needed for continuous usage), up to low [[EU|voltage]] (32 EU/t). | |||
|- | |||
![[Compressor]] | |||
|{{Grid/Crafting Table | |||
|A1=Stone|C1=Stone | |||
|A2=Stone|B2=Machine|C2=Stone | |||
|A3=Stone|B3=Electronic Circuit|C3=Stone | |||
|Output=Compressor | |||
}} | |||
|Compresses [[Mixed Metal Ingot]]s into [[Advanced Alloy]] and [[Plantball]]s into [[Compressed Plants]] and some other things - look for more recipes on [[Compressor|this]] page. Takes 625 EU per operation (at least 2 EU/t needed for continuous usage), up to low [[EU|voltage]] (32 EU/t). | |||
|- | |||
![[Recycler]] | |||
|{{Grid/Crafting Table | |||
|B1=Glowstone Dust | |||
|A2=Dirt|B2=Compressor|C2=Dirt | |||
|A3=Iron|B3=Dirt|C3=Iron | |||
|Output=Recycler | |||
}} | |||
|Has a 6% chance of turning anything inserted into it to [[Scrap]]. Takes 35 [[EU]] per operation (at least 1 EU/t needed for continuous usage), up to low [[EU|voltage]] (32 EU/t). | |||
|- | |||
![[Canning Machine]] | |||
|{{Grid/Crafting Table | |||
|A1=Tin Casing|B1=Electronic Circuit|C1=Tin Casing | |||
|A2=Tin Casing|B2=Machine|C2=Tin Casing | |||
|A3=Tin Casing|B3=Tin Casing|C3=Tin Casing | |||
|Output=Canning Machine | |||
}} | |||
|Turns food (top slot) and tin cans (bottom slot) into several canned food (see the [[Food List]]). Canned food instantly heals you 1 heart per unit. It is also used to fill [[Fuel Can (Empty)|fuel cans]] using [[Biofuel Cell]]s and [[Coalfuel Cell]]s, and refuel [[Jetpack]]s using those cells. Takes 35 EU per operation, up to low [[EU|voltage]] (32 EU/t). | |||
|- | |||
![[Steam Generator]] | |||
|{{Grid/Crafting Table | |||
|A1=Iron Item Casing|B1=Iron Item Casing|C1=Iron Item Casing | |||
|A2=Iron Item Casing|B2=Copper Boiler|C2=Iron Item Casing | |||
|A3=Iron Item Casing|B3=Heat Conductor|C3=Iron Item Casing | |||
|Output=Steam Generator | |||
}} | |||
|Makes [[Steam]] and [[Superheated Steam]]. | |||
|- | |||
![[Bottling Plant]] | |||
|{{Grid/Crafting Table | |||
|B1=Empty Cell | |||
|B2=Empty Cell | |||
|A3=Electronic Circuit|B3=Machine|C3=Electronic Circuit | |||
|Output=Bottling Plant | |||
}} | |||
|Empties cells or other liquid containers (top slot) into tank or fills containers from tank (bottom slot). Takes 5 EU per operation, up to low [[EU|voltage]] (32 EU/t). | |||
|- | |||
![[Induction Furnace]] | |||
|{{Grid/Crafting Table | |||
|A1=Copper|B1=Copper|C1=Copper | |||
|A2=Copper|B2=Electro Furnace|C2=Copper | |||
|A3=Copper|B3=Advanced Machine|C3=Copper | |||
|Output=Induction Furnace | |||
}} | |||
|Special two-input two-output furnace which increases its smelting speed as it heats up through smelting. When it's not smelting anything, it will quickly lose heat, but the furnace can be applied a Redstone current to keep itself heated for 1 EU/t. Takes 6000 (0% heat) to 208 (100% heat) EU per operation (at least 16 EU/t needed for continuous usage), up to medium [[EU|voltage]] (128 EU/t). | |||
|- | |||
![[Tutorial:Replication|Mass Fabricator]] | |||
|{{Grid/Crafting Table | |||
|A1=Glowstone Dust|B1=Advanced Circuit|C1=Glowstone Dust | |||
|A2=Advanced Machine|B2=Lapotron Crystal|C2=Advanced Machine | |||
|A3=Glowstone Dust|B3=Advanced Circuit|C3=Glowstone Dust | |||
|Output=Mass Fabricator | |||
}} | |||
|Generates [[Matter]] for a vast amount of energy, but said amount can be reduced and the generation speed increased by feeding [[Scrap]] to the bottom slot. Takes up to high [[EU|voltage]] (512 EU/t). See the [[Tutorial:Replication|Replication tutorial]] for more information. | |||
|- | |||
![[Scanner]] | |||
|{{Grid/Crafting Table | |||
|A1=Iron Plate|B1=Reinforced Glass|C1=Iron Plate | |||
|A2=Electric Motor|B2=Luminator|C2=Electric Motor | |||
|A3=Advanced Circuit|B3=Advanced Machine|C3=Advanced Circuit | |||
|Output=Scanner | |||
}} | |||
|Used to scan items to get their [[Pattern]]. The Pattern can be saved in a [[Memory Crystal]] or a [[Pattern Storage]] next to the scanner. See the [[Tutorial:Replication|Replication tutorial]] for more information. | |||
|- | |||
![[Replicator]] | |||
|{{Grid/Crafting Table | |||
|A1=Reinforced Stone|B1=Reinforced Glass|C1=Reinforced Stone | |||
|A2=Teleporter|B2=Teleporter|C2=Teleporter | |||
|A3=HV Transformer|B3=MFE Unit|C3=HV Transformer | |||
|Output=Replicator | |||
}} | |||
|Uses Uu-Liquid and energy to produce any item which pattern is in an adjacent [[Pattern Storage]]. See the [[Tutorial:Replication|Replication tutorial]] for more information. | |||
|- | |||
|} | |||
== Agriculture == | |||
{| class="wikitable" | |||
|- | |||
!width=120px|Name | |||
!width=256px|Recipe IC2 [[v2.X|experimental]] | |||
!Description | |||
|- | |||
![[Crop-Matron]] | |||
||{{Grid/Crafting Table | |||
|A1=Electronic Circuit|B1=Chest|C1=Electronic Circuit | |||
|A2=Empty Cell|B2=Machine|C2=Empty Cell | |||
|A3=Crops|B3=Crops|C3=Crops | |||
|Output=Crop-Matron | |||
}} | |||
|The Crop-Matron will monitor nearby crop sticks and will automatically apply [[Fertilizer]], [[Hydration Cell]]s and [[Weed-EX]] as needed. | |||
|- | |||
![[Crop Harvester]] | |||
||{{Grid/Crafting Table | |||
|A1=Electronic Circuit|B1=Chest|C1=Electronic Circuit | |||
|A2=Shears|B2=Machine|C2=Shears | |||
|A3=Crops|B3=Crops|C3=Crops | |||
|Output=Crop Harvester | |||
}} | |||
|The Crop Harvester will monitor nearby crop sticks and automatically harvest them. A [[Cropnalyzer]] will make sure it harvests at the optimum growth stage. | |||
|} | |||
== Utility == | |||
{| class="wikitable" | |||
|- | |||
!width=120px|Name | |||
!width=256px|Recipe IC2 [[v2.X|experimental]] | |||
!Description | |||
|- | |||
![[Luminator]] | |||
||{{Grid/Crafting Table | |||
|A1=Iron Casing|B1=Insulated Copper Cable|C1=Iron Casing | |||
|A2=Glass|B2=Tin_Cable|C2=Glass | |||
|A3=Glass|B3=Glass|C3=Glass | |||
|Output=Luminator|OA=8 | |||
}} | |||
|Produces light when powered. | |||
|- | |||
![[Personal Safe]] | |||
|{{Grid/Crafting Table | |||
|B1=Electronic Circuit | |||
|B2=Machine | |||
|B3=Chest | |||
|Output=Personal Safe | |||
}} | |||
|Chest which can only be opened by you once you right-click it for the first time. It also has the space of a double chest. Useful for SMP. | |||
|- | |||
![[Trade-O-Mat]] | |||
|{{Grid/Crafting Table | |||
|A1=Redstone|B1=Redstone|C1=Redstone | |||
|A2=Chest|B2=Machine|C2=Chest | |||
|Output=Trade-O-Mat | |||
}} | |||
|Allows a certain item to be traded by another, giving or taking from an adjacent chest or [[Personal Safe]]. Useful for SMP. See its [[Trade-O-Mat|article]] for a full guide on how to set one up. Does not require energy. | |||
|- | |||
![[Magnetizer]] | |||
|{{Grid/Crafting Table | |||
|A1=Redstone|B1=Iron Fence|C1=Redstone | |||
|A2=Redstone|B2=Machine|C2=Redstone | |||
|A3=Redstone|B3=Iron Fence|C3=Redstone | |||
|Output=Magnetizer | |||
}} | |||
|Turns [[Iron Fence]]s stacked vertically (up and/or down) into a faster alternative to ladders. When a player wearing metal boots (iron, gold, [[Bronze Boots|bronze]], [[Nano-Boots|nano]] or [[QuantumSuit Boots|quantum]]) approaches the fences, said player is quickly propelled upwards while the Magnetizer uses energy. Takes 2 EU/t while a player is being propelled, up to low [[EU|voltage]] (32 EU/t). | |||
|- | |||
![[Electrolyzer]] | |||
|{{Grid/Crafting Table | |||
|A1=Cable|C1=Cable | |||
|A2=Cable|B2=Electronic Circuit|C2=Cable | |||
|A3=Empty Cell|B3=Machine|C3=Empty Cell | |||
|Output=Electrolyzer | |||
}} | |||
|When placed adjacent to energy storage and filled with [[Water Cell]]s, once the [[EU]] storage is 70.01% or more, starts turning the cells into [[Electrolyzed Water Cell]]s, but once it's 25%, starts using up the electrolyzed cells to supply power. Speed depend on energy storage block tier. | |||
|- | |||
![[Tesla Coil]] | |||
|{{Grid/Crafting Table | |||
|A1=Redstone|B1=Redstone|C1=Redstone | |||
|A2=Redstone|B2=MV Transformer|C2=Redstone | |||
|A3=Iron Casing|B3=Electronic Circuit|C3=Iron Casing | |||
|Output=Tesla Coil | |||
}} | |||
|When charged and applied a Redstone current, it starts finding NPCs and players at a range of 4 blocks at the cost of 2 EU/t. If a NPC/player is found, it will apply 10 hearts of damage to it and discharge. Useful for placing monster traps outside your base. Takes 5000 [[EU]] to charge, up to medium [[EU|voltage]] (128 EU/t). | |||
|- | |||
![[Teleporter]] | |||
|{{Grid/Crafting Table | |||
|A1=Advanced Circuit|B1=FreqTrans|C1=Advanced Circuit | |||
|A2=Glass Fibre Cable|B2=Advanced Machine|C2=Glass Fibre Cable | |||
|A3=Advanced Circuit|B3=Diamond|C3=Advanced Circuit | |||
|Output=Teleporter | |||
}} | |||
|Teleports a player to another [[Teleporter]] defined by a [[FreqTrans]] once it is applied Redstone current. Takes a variable amount of EU depending on the distance, kind of creature (human/monster/animal), inventory and worn armor (from Distance*100 for an animal to Distance*3100 for a player with a full inventory of stacks of 64 and all armor pieces worn), up to high [[EU|voltage]] (512 EU/t). Please note that a teleporter does not accept cables as energy inputs - only EU storage blocks ([[MFS Unit]] recommended) adjacent to it. | |||
|- | |||
![[Industrial TNT]] | |||
|{{Grid/Crafting Table | |||
|A1=Flint|B1=Flint|C1=Flint | |||
|A2=TNT|B2=TNT|C2=TNT | |||
|A3=Flint|B3=Flint|C3=Flint | |||
|Output=Industrial TNT|OA=4 | |||
}} | |||
{{Grid/Crafting Table | |||
|A1=Flint|B1=TNT|C1=Flint | |||
|A2=Flint|B2=TNT|C2=Flint | |||
|A3=Flint|B3=TNT|C3=Flint | |||
|Output=Industrial TNT|OA=4 | |||
}} | |||
|Much like [[TNT]], but with less power so as not to destroy ores or deal as much damage. It will fuse when broken. | |||
|- | |||
![[Dynamite]] | |||
|{{Grid/Crafting Table | |||
|A1=String | |||
|A2=Industrial TNT | |||
|Output=Dynamite|OA=8 | |||
}} | |||
|Smaller version of [[Industrial TNT]] which can be thrown or placed. | |||
|- | |||
![[Sticky Dynamite]] | |||
|{{Grid/Crafting Table | |||
|A1=Dynamite|B1=Dynamite|C1=Dynamite | |||
|A2=Dynamite|B2=Sticky Resin|C2=Dynamite | |||
|A3=Dynamite|B3=Dynamite|C3=Dynamite | |||
|Output=Sticky Dynamite|OA=8 | |||
}} | |||
|Dynamite that will stick to a wall when thrown. | |||
|- | |||
![[Rubber Trampoline]] | |||
|{{Grid/Crafting Table | |||
|A1= |B1= |C1= | |||
|A2=Rubber |B2=Rubber |C2=Rubber | |||
|A3=Rubber |B3=Rubber |C3=Rubber | |||
|Output=Rubber Trampoline|OA=3 | |||
}} | |||
|Jumping off of a height onto this rubberized sheet will cause you to bounce back up, effectively negating fall damage. The rubber trampoline must be connected on at least 2 sides to blocks on the same level as it, and must have a gap underneath, similar to a real trampoline. | |||
|- | |||
![[Wool Sheet]] | |||
|{{Grid/Crafting Table | |||
|A1= |B1= |C1= | |||
|A2=Carpet |B2=Resin Sheet |C2=Carpet | |||
|A3= |B3= |C3= | |||
|Output=Wool Sheet|OA=3 | |||
}} | |||
|The wool sheet allows you to fall from twice the height before taking damage (6 blocks as opposed to 3). | |||
|- | |||
![[Iron Fence]] | |||
|{{Grid/MetalFormer | |||
|Mode=Extruding | |||
|Top=Iron Casing | |||
|Bottom=RE_Battery_(Charged) | |||
|Output=Iron Fence | |||
}} | |||
|Iron Fences can serve as a normal fence. Iron Fences can be stacked on top of one another, and if a player approaches the resulting pole while holding the Crouch button, he will quickly slide down the pole, much faster than down a ladder, but still not fast enough to receive fall damage upon touching the ground. | |||
|- | |||
|} | |||
=== Miner === | |||
{| class="wikitable" | |||
|- | |||
!width=120px|Name | |||
!width=256px|Recipe IC2 [[v2.X|experimental]] | |||
!Description | |||
|- | |||
![[Miner]] | |||
|{{Grid/Crafting Table | |||
|B1=Chest | |||
|A2=Electronic Circuit|B2=Machine|C2=Electronic Circuit | |||
|B3=Mining Pipe | |||
|Output=Miner | |||
}} | |||
|Mines vertically by laying down [[Mining Pipe]]s placed in the top-center slot, using the [[Mining Drill]] or [[Diamond Drill]] (faster but consumes more energy) in the top-left slot and scanning for ores using the [[OD Scanner]] (5x5 area) or [[OV Scanner]] (9x9 area) in the top-right slot, either throwing anything out or placing in an adjacent chest. Any kind of block may be placed in the pipe slot too, causing the pipes to be retracted and refunded. Takes a variable amount of EU per operation based on the scanner and drill (460 EU for Mining Drill or 890 EU for Diamond Drill + 70 EU for OD Scanner or 180 EU for OV Scanner), up to low [[EU|voltage]] (32 EU/t). | |||
|- | |||
![[Advanced Miner]] | |||
|{{Grid/Crafting Table | |||
|A1=Advanced Alloy|B1=Miner|C1=Advanced Alloy | |||
|A2=MFE Unit|B2=Advanced Machine|C2=Teleporter | |||
|A3=Advanced Alloy|B3=Miner|C3=Advanced Alloy | |||
|Output=Advanced Miner | |||
}} | |||
| | |||
|- | |||
![[Pump]] | |||
|{{Grid/Crafting Table | |||
|A1=Empty Cell|B1=Electronic Circuit|C1=Empty Cell | |||
|A2=Empty Cell|B2=Machine|C2=Empty Cell | |||
|A3=Mining Pipe|B3=Treetap|C3=Mining Pipe | |||
|Output=Pump | |||
}} | |||
|When placed next to a miner and filled with empty [[Empty Cell|cells]], fills the cells with any liquid the miner comes across. When alone, fills an empty [[Empty Cell|cell]] with a liquid one block directly below the pump. Takes 200 [[EU]] per operation, up to low [[EU|voltage]] (32 EU/t). | |||
|- | |||
![[Mining Pipe]] | |||
|{{Grid/Crafting Table | |||
|A1=Iron Plate|C1=Iron Plate | |||
|A2=Iron Plate|C2=Iron Plate | |||
|A3=Iron Plate|B3=Treetap|C3=Iron Plate | |||
|Output=Mining Pipe|OA=8 | |||
}} | |||
|Placed in the miner's top-center slot. | |||
|- | |||
|} | |||
=== Terraformer === | |||
{| class="wikitable" | |||
|- | |||
!width=120px|Name | |||
!width=256px|Recipe | |||
!Description | |||
|- | |||
![[Terraformer]] | |||
|{{Grid/Crafting Table | |||
|A1=Glowstone Dust|B1=Tfbp|C1=Glowstone Dust | |||
|A2=Dirt|B2=Advanced Machine|C2=Dirt | |||
|A3=Glowstone Dust|B3=Dirt|C3=Glowstone Dust | |||
|Output=Terraformer | |||
}} | |||
|Alters (terraforms) nearby landscape following a [[Terraformer Blueprint]] inserted in it (by right-clicking the machine with the blueprint). Takes a unlimited amount of EU/t (just like [[Mass Fabricator|mass fab]]), up to high voltage (512 EU/t). | |||
|- | |||
![[Terraformer Blueprint|Empty Blueprint]] | |||
|{{Grid/Crafting Table | |||
|B1=Electronic Circuit | |||
|B2=Advanced Circuit | |||
|A3=Redstone|C3=Redstone | |||
|Output=Tfbp | |||
}} | |||
|Empty Terraformer blueprint used to craft functional ones. | |||
|- | |||
![[Chilling|Chilling Blueprint]] | |||
|{{Grid/Crafting Table | |||
|B1=Snowball | |||
|A2=Snowball|B2=Tfbp|C2=Snowball | |||
|B3=Snowball | |||
|Output=Chilling | |||
}} | |||
|Simulates a Snow biome by placing snow (and later snow blocks) on top of blocks and freezing water. Takes 4 EU/t. | |||
|- | |||
![[Cultivation|Cultivation Blueprint]] | |||
|{{Grid/Crafting Table | |||
|B1=Seeds | |||
|A2=Seeds|B2=Tfbp|C2=Seeds | |||
|B3=Seeds | |||
|Output=Cultivation | |||
}} | |||
|Simulates a Plains biome by replacing sand with dirt, growing grass on top of dirt and randomly adding plantlife. Takes 20 EU/t. | |||
|- | |||
![[Desertification|Desertification Blueprint]] | |||
|{{Grid/Crafting Table | |||
|B1=Sand | |||
|A2=Sand|B2=Tfbp|C2=Sand | |||
|B3=Sand | |||
|Output=Desertification | |||
}} | |||
|Simulates a Desert biome by replacing dirt with sand, destroying plants, melting ice/snow and causing forest fires. Takes 4 EU/t. | |||
|- | |||
![[Flatificator|Flatificator Blueprint]] | |||
|{{Grid/Crafting Table | |||
|B1=Dirt | |||
|A2=Dirt|B2=Tfbp|C2=Dirt | |||
|B3=Dirt | |||
|Output=Flatificator | |||
}} | |||
|Removes all natural blocks (except stone) above the Terraformer and fills land below the Terraformer with dirt. Takes 40 EU/t. | |||
|- | |||
![[Irrigation|Irrigation Blueprint]] | |||
|{{Grid/Crafting Table | |||
|B1=Water Bucket | |||
|A2=Water Bucket|B2=Tfbp|C2=Water Bucket | |||
|B3=Water Bucket | |||
|Output=Irrigation | |||
}} | |||
|Replaces sand with dirt, grows grass on top of dirt, causes plants to grow faster, lets sugar cane grow past 3 blocks and rarely spawns water below the Terraformer. Takes 8 EU/t. | |||
|} | |||
=== Upgrades === | |||
Place one or more upgrades into the four right-most slots of a machine to upgrade said machine. | |||
{| class="wikitable" | |||
|- | |||
!width=120px|Name | |||
<!--!width=256px|Recipe--> | |||
!width=256px|Recipe IC2 [[v2.X|experimental]] | |||
!Description | |||
|- | |||
![[Overclocker upgrade|Overclocker Upgrade]] | |||
|{{Grid/Crafting Table | |||
|A1=Cooling Cell|B1=Cooling Cell|C1=Cooling Cell | |||
|A2=Insulated Copper Cable|B2=Electronic Circuit|C2=Insulated Copper Cable | |||
|A3=|B3=|C3= | |||
|Output=Overclocker upgrade|OA=2 | |||
}} | |||
|Used to speed up machines at the cost of higher energy consumption. Each upgrade reduces the operating time to 70% of the previous value and increases energy consumption by 60%. The effect is multiplicative. | |||
|- | |||
![[Transformer upgrade|Transformer Upgrade]] | |||
|{{Grid/Crafting Table | |||
|A1=Glass|B1=Glass|C1=Glass | |||
|A2=2xIns. Gold Cable|B2=MV Transformer|C2=2xIns. Gold Cable | |||
|A3=Glass|B3=Electronic Circuit|C3=Glass | |||
|Output=Transformer upgrade | |||
}} | |||
|Used to upgrade a machine's power input rate or tier. One upgrade enables a tier 1 machine to receive 128EU/t. Two upgrades enables it to receive 512EU/t and three for more than 512 EU. | |||
|- | |||
![[Energy storage upgrade|Energy Storage Upgrade]] | |||
|{{Grid/Crafting Table | |||
|A1=Wooden Planks|B1=Wooden Planks|C1=Wooden Planks | |||
|A2=Insulated Copper Cable|B2=RE Battery|C2=Insulated Copper Cable | |||
|A3=Wooden Planks|B3=Electronic Circuit|C3=Wooden Planks | |||
|Output=Energy storage upgrade | |||
}} | |||
|Used to upgrade a machine's internal power storage. Each upgrade increases the storage capacity by 10,000 EU. | |||
|- | |||
![[Ejector Upgrade]] | |||
|{{Grid/Crafting Table | |||
|A1=Tin Plate|C1=Tin Plate | |||
|B2=Piston | |||
|A3=Tin Plate|C3=Tin Plate | |||
|Output=Ejector Upgrade | |||
}} | |||
|Used to allow a machine to automatically eject it's item output | |||
|- | |||
![[Fluid Ejector Upgrade]] | |||
|{{Grid/Crafting Table | |||
|A1=Tin Plate|C1=Tin Plate | |||
|B2=Electric Motor | |||
|A3=Tin Plate|C3=Tin Plate | |||
|Output=Fluid Ejector Upgrade | |||
}} | |||
|Used to allow a machine to automatically eject it's liquid output | |||
|- | |||
![[Redstone Signal Inverter Upgrade]] | |||
|{{Grid/Crafting Table | |||
|A1=Tin Plate|C1=Tin Plate | |||
|B2=Lever | |||
|A3=Tin Plate|C3=Tin Plate | |||
|Output=Redstone Signal Inverter Upgrade | |||
}} | |||
|Inverts the redstone signal a machine is receiving | |||
|} | |||
== Armor == | |||
=== Material === | |||
{| class="wikitable" | |||
|- | |||
!width=135px|Name | |||
!width=256px|Recipe | |||
!Description | |||
|- | |||
![[Bronze Helmet]] | |||
|{{Grid/Crafting Table | |||
|A2=Bronze|B2=Bronze|C2=Bronze | |||
|A3=Bronze|C3=Bronze | |||
|Output=Bronze Helmet | |||
}} | |||
|Helmet with 30% more durability than iron (same durability in [[v2.X]]). | |||
|- | |||
![[Bronze Chestplate]] | |||
|{{Grid/Crafting Table | |||
|A1=Bronze|C1=Bronze | |||
|A2=Bronze|B2=Bronze|C2=Bronze | |||
|A3=Bronze|B3=Bronze|C3=Bronze | |||
|Output=Bronze Chestplate | |||
}} | |||
|Chestplate with 30% more durability than iron (same durability in [[v2.X]]). | |||
|- | |||
![[Bronze Leggings]] | |||
|{{Grid/Crafting Table | |||
|A1=Bronze|B1=Bronze|C1=Bronze | |||
|A2=Bronze|C2=Bronze | |||
|A3=Bronze|C3=Bronze | |||
|Output=Bronze Leggings | |||
}} | |||
|Leggings with 30% more durability than iron (same durability in [[v2.X]]). | |||
|- | |||
![[Bronze Boots]] | |||
|{{Grid/Crafting Table | |||
|A2=Bronze|C2=Bronze | |||
|A3=Bronze|C3=Bronze | |||
|Output=Bronze Boots | |||
}} | |||
|Boots with 30% more durability than iron (same durability in [[v2.X]]). | |||
|- | |||
|} | |||
=== Energy === | |||
{| class="wikitable" | |||
|- | |||
!width=135px|Name | |||
!width=256px|Recipe IC2 [[v2.X|experimental]] | |||
!Description | |||
|- | |||
![[Nightvision Goggles]] | |||
|{{Grid/Crafting Table | |||
|A1=Advanced Heat Exchanger|B1=Advanced RE-Battery|C1=Advanced Heat Exchanger | |||
|A2=Luminator|B2=Reinforced Glass|C2=Luminator | |||
|A3=Rubber|B3=Advanced Circuit|C3=Rubber | |||
|Output=Nightvision Goggles | |||
}} | |||
|[[EU|Energy]]-based helmet that allows the user to see in the dark (night vision). Use [ALT] + M to activate Night Vision.<br><br> | |||
HAYO: Don't be an <strike>idiot</strike> silly person and activate night vision during day time! Your insurance probably won't cover scorched retinas. | |||
|- | |||
![[Nano-Helmet|Nano Helmet]] | |||
|{{Grid/Crafting Table | |||
|A1=Carbon Plate|B1=Energy Crystal (Charged)|C1=Carbon Plate | |||
|A2=Carbon Plate|B2=Nightvision Goggles|C2=Carbon Plate | |||
|Output=Nano-Helmet | |||
}} | |||
|[[EU|Energy]]-based helmet which absorbs part of your damage while charged. Night Vision can be enabled using [ALT] + M. | |||
|- | |||
![[Nano-Bodyarmor|Nano Body Armor]] | |||
|{{Grid/Crafting Table | |||
|A1=Carbon Plate|C1=Carbon Plate | |||
|A2=Carbon Plate|B2=Energy Crystal (Charged)|C2=Carbon Plate | |||
|A3=Carbon Plate|B3=Carbon Plate|C3=Carbon Plate | |||
|Output=Nano-Bodyarmor | |||
}} | |||
|[[EU|Energy]]-based chestplate which absorbs part of your damage while charged. | |||
|- | |||
![[Nano-Leggings|Nano Leggings]] | |||
|{{Grid/Crafting Table | |||
|A1=Carbon Plate|B1=Energy Crystal (Charged)|C1=Carbon Plate | |||
|A2=Carbon Plate|C2=Carbon Plate | |||
|A3=Carbon Plate|C3=Carbon Plate | |||
|Output=Nano-Leggings | |||
}} | |||
|[[EU|Energy]]-based leggings which absorb part of your damage while charged. | |||
|- | |||
![[Nano-Boots|Nano Boots]] | |||
|{{Grid/Crafting Table | |||
|A2=Carbon Plate|C2=Carbon Plate | |||
|A3=Carbon Plate|B3=Energy Crystal (Charged)|C3=Carbon Plate | |||
|Output=Nano-Boots | |||
}} | |||
|[[EU|Energy]]-based boots which absorb part of your damage while charged. | |||
|- | |||
![[Iridium Plate]] | |||
|{{Grid/Crafting Table | |||
|A1=Iridium Ore|B1=Advanced Alloy|C1=Iridium Ore | |||
|A2=Advanced Alloy|B2=Diamond|C2=Advanced Alloy | |||
|A3=Iridium Ore|B3=Advanced Alloy|C3=Iridium Ore | |||
|Output=Iridium Plate | |||
}} | |||
|Material used to craft QuantumSuit armor. | |||
|- | |||
![[QuantumSuit Helmet|Quantum Helmet]] | |||
|{{Grid/Crafting Table | |||
|A1=Reinforced Glass|B1=Nano-Helmet|C1=Reinforced Glass | |||
|A2=Iridium Plate|B2=Lapotron Crystal|C2=Iridium Plate | |||
|A3=Advanced Circuit|B3=Scuba Helmet|C3=Advanced Circuit | |||
|Output=Quantum-Helmet | |||
}} | |||
|[[EU|Energy]]-based helmet which lets you breathe underwater, replenishes your hunger and cures poison while charged. | |||
|- | |||
![[QuantumSuit Bodyarmor|Quantum Body Armor]] | |||
|{{Grid/Crafting Table | |||
|A1=Advanced Alloy|B1=Nano-Bodyarmor|C1=Advanced Alloy | |||
|A2=Iridium Plate|B2=Lapotron Crystal|C2=Iridium Plate | |||
|A3=Iridium Plate|B3=Electric Jetpack|C3=Iridium Plate | |||
|Output=Quantum-Bodyarmor | |||
}} | |||
|[[EU|Energy]]-based chestplate which absorbs a lot of your damage while charged. Jetpack can be enabled using CTRL-M. | |||
|- | |||
![[QuantumSuit Leggings|Quantum Leggings]] | |||
|{{Grid/Crafting Table | |||
|A1=Machine|B1=Lapotron Crystal|C1=Machine | |||
|A2=Iridium Plate|B2=Nano-Leggings|C2=Iridium Plate | |||
|A3=Glowstone Dust|B3=|C3=Glowstone Dust | |||
|Output=Quantum-Leggings | |||
}} | |||
|[[EU|Energy]]-based leggings which let you sprint more than 3 times faster. | |||
|- | |||
![[QuantumSuit Boots|Quantum Boots]] | |||
|{{Grid/Crafting Table | |||
|A1=Iridium Plate|B1=Nano-Boots|C1=Iridium Plate | |||
|A2=Rubber Boots|B2=Lapotron Crystal|C2=Rubber Boots | |||
|A3=|B3=|C3=|Output=Quantum-Boots | |||
}} | |||
|[[EU|Energy]]-based boots which absorb all of your fall damage while charged, and while pressing CTRL, let you jump higher. | |||
|- | |||
|} | |||
=== Utility === | |||
{| class="wikitable" | |||
|- | |||
!width=120px|Name | |||
!width=256px|Recipe IC2 [[v2.X|experimental]] | |||
!Description | |||
|- | |||
![[BatPack|Bat-Pack]] | |||
|{{Grid/Crafting Table | |||
|A1=RE Battery (Charged)|B1=Electronic_Circuit|C1=RE Battery (Charged) | |||
|A2=RE Battery (Charged)|B2=Wooden Planks|C2=RE Battery (Charged) | |||
|A3=RE Battery (Charged)|C3=RE Battery (Charged) | |||
|Output=Bat-Pack | |||
}} | |||
|Chestplate which powers your electric tools using its energy of up to 60,000 [[EU]] while you are wearing it. | |||
|- | |||
![[Adv.Batpack|Advanced Bat-Pack]] | |||
|{{Grid/Crafting Table | |||
|A1=Advanced RE-Battery|B1=Electronic_Circuit|C1=Advanced RE-Battery | |||
|A2=Advanced RE-Battery|B2=Copper Item Casing|C2=Advanced RE-Battery | |||
|A3=Advanced RE-Battery|C3=Advanced RE-Battery | |||
|Output=Advanced_Batpack | |||
}} | |||
|Chestplate which powers your electric tier 2 tools using its energy of up to 600,000 [[EU]] while you are wearing it. | |||
|- | |||
![[Energypack|Energy-Pack]] | |||
|{{Grid/Crafting Table | |||
|A1=Advanced Circuit|B1=Iron Item Casing|C1=Advanced Circuit | |||
|A2=Energy Crystal|B2=Iron Item Casing|C2=Energy Crystal | |||
|A3=Iron Item Casing|C3=Iron Item Casing | |||
|Output=Energypack | |||
}} | |||
|Chestplate which powers your electric tier 3 tools using its energy of up to 2,000,000 [[EU]] while you are wearing it. | |||
|- | |||
![[Composite Armor Vest|Composite Armor]] | |||
|{{Grid/Crafting Table | |||
|A1=Advanced Alloy|C1=Advanced Alloy | |||
|A2=Advanced Alloy|B2=Iron Chestplate|C2=Advanced Alloy | |||
|A3=Advanced Alloy|B3=Leather_Tunic|C3=Advanced Alloy | |||
|Output=Composite Armor Vest | |||
}} | |||
|Super-durable chestplate, more than 3 times the durability of a diamond chestplate. | |||
|- | |||
![[Electric Jetpack]] | |||
|{{Grid/Crafting Table | |||
|A1=Iron Item Casing|B1=Advanced Circuit|C1=Iron Item Casing | |||
|A2=Iron Item Casing|B2=BatBox|C2=Iron Item Casing | |||
|A3=Glowstone Dust|C3=Glowstone Dust | |||
|Output=Electric Jetpack | |||
}} | |||
|[[EU|Energy]]-powered jetpack worn as a chestplate. It has a limited maximum flying height and a smaller operational time, unlike the normal fuel-powered [[Jetpack]]. | |||
|- | |||
![[Jetpack]] | |||
|{{Grid/Crafting Table | |||
|A1=Iron Item Casing|B1=Electronic Circuit|C1=Iron Item Casing | |||
|A2=Iron Item Casing|B2=Universal Fluid Cell|C2=Iron Item Casing | |||
|A3=Redstone|C3=Redstone | |||
|Output=Jetpack | |||
}} | |||
|[[Fuel]]-powered tool that allows the player to fly while worn as a chestplate. It lasts for 90 seconds when fully charged. | |||
|- | |||
![[CFPack]] | |||
|{{Grid/Crafting Table | |||
|A1=CF_Sprayer|B1=Electronic_Circuit|C1=CF_Sprayer | |||
|A2=Universal Fluid Cell|B2=Iron Item Casing|C2=Universal Fluid Cell | |||
|A3=Universal Fluid Cell|B3=|C3=Universal Fluid Cell | |||
|Output=CFPack | |||
|Output link=CFPack | |||
}} | |||
|Chestplate that stores additional [[CF Pellet]]s to automatically reload a [[CF Sprayer]]. | |||
|- | |||
![[Scuba Helmet]] | |||
|{{Grid/Crafting Table | |||
|B1=Orange Dye | |||
|A2=Rubber|B2=Glass|C2=Rubber | |||
|A3=Rubber|B3=Iron Bars|C3=Rubber | |||
|Output=Scuba Helmet | |||
|- | |||
}} | |||
|Helmet that refills your breath bar as long as you have [[Compressed Air Cell|compressed air cells]] in your inventory. | |||
|- | |||
![[Hazmat Suit]] | |||
|{{Grid/Crafting Table | |||
|A1=Rubber|C1=Rubber | |||
|A2=Rubber|B2=Orange Dye|C2=Rubber | |||
|A3=Rubber|B3=Orange Dye|C3=Rubber | |||
|Output=Hazmat Suit | |||
|- | |||
}} | |||
|A chestplate that provides protection from environmental dangers such as fire, lava, [[Nuclear Reactor|Nuclear Reactors]], and other effects. | |||
|- | |||
![[Hazmat Suit Leggings]] | |||
|{{Grid/Crafting Table | |||
|A1=Rubber|B1=Orange Dye|C1=Rubber | |||
|A2=Rubber|C2=Rubber | |||
|A3=Rubber|C3=Rubber | |||
|Output=Hazmat Suit Leggings | |||
|- | |||
}} | |||
|A pair of leggings that provide protection from environmental dangers such as fire, lava, [[Nuclear Reactor|Nuclear Reactors]], and other effects. | |||
|- | |||
![[Rubber Boots]] | |||
|{{Grid/Crafting Table | |||
|A1=Rubber|C1=Rubber | |||
|A2=Rubber|C2=Rubber | |||
|A3=Rubber|B3=Wool|C3=Rubber | |||
|Output=Rubber Boots | |||
|- | |||
}} | |||
|Boots that reduce your fall damage. | |||
|- | |||
![[Static Boots|Static Boots]] | |||
|{{Grid/Crafting Table | |||
|A1=Iron|A2=Iron|C1=Iron|C2=Iron | |||
|B2=Wool | |||
|A3=Insulated_Copper_Cable|B3=Insulated_Copper_Cable|C3=Insulated_Copper_Cable | |||
|Output=Static Boots | |||
}} | |||
|[[EU|Energy]]-based boots that will charge a [[BatPack]] or a [[LapPack]] while walking. | |||
|- | |||
![[Solar Helmet|Solar Helmet]] | |||
|{{Grid/Crafting Table | |||
|A1=Iron|A2=Iron|B1=Iron|C1=Iron|C2=Iron | |||
|B2=Solar_Panel | |||
|A3=Insulated_Copper_Cable|B3=Insulated_Copper_Cable|C3=Insulated_Copper_Cable | |||
|Output=Solar Helmet | |||
}} | |||
{{Grid/Crafting Table | |||
|B1=Iron Helmet | |||
|B2=Solar_Panel | |||
|A3=Insulated_Copper_Cable|B3=Insulated_Copper_Cable|C3=Insulated_Copper_Cable | |||
|Output=Solar Helmet | |||
}} | |||
|[[EU|Energy]]-based helmet that will charge a [[BatPack]] or a [[LapPack]] from the sunlight. | |||
|} | |||
== Tools == | |||
=== Material === | |||
{| class="wikitable" | |||
|- | |||
!width=120px|Name | |||
!width=256px|Recipe | |||
!Description | |||
|- | |||
![[Bronze Pickaxe]] | |||
|{{Grid/Crafting Table | |||
|A1=Bronze|B1=Bronze|C1=Bronze | |||
|B2=Stick | |||
|B3=Stick | |||
|Output=Bronze Pickaxe | |||
}} | |||
|Pickaxe with the same durability as iron. | |||
|- | |||
![[Bronze Shovel]] | |||
|{{Grid/Crafting Table | |||
|B1=Bronze | |||
|B2=Stick | |||
|B3=Stick | |||
|Output=Bronze Shovel | |||
}} | |||
|Shovel with the same durability as iron. | |||
|- | |||
![[Bronze Axe]] | |||
|{{Grid/Crafting Table | |||
|B1=Bronze|C1=Bronze | |||
|B2=Stick|C2=Bronze | |||
|B3=Stick | |||
|Output=Bronze Axe | |||
}} | |||
|Axe with the same durability as iron. | |||
|- | |||
![[Bronze Sword]] | |||
|{{Grid/Crafting Table | |||
|B1=Bronze | |||
|B2=Bronze | |||
|B3=Stick | |||
|Output=Bronze Sword | |||
}} | |||
|Sword with the same durability as iron. | |||
|- | |||
![[Bronze Hoe]] | |||
|{{Grid/Crafting Table | |||
|B1=Bronze|C1=Bronze | |||
|B2=Stick | |||
|B3=Stick | |||
|Output=Bronze Hoe | |||
}} | |||
|Hoe with the same durability as iron. | |||
|- | |||
|} | |||
=== Utility === | |||
{| class="wikitable" | |||
|- | |||
!width=120px|Name | |||
!width=256px|Recipe IC2 [[v2.X|experimental]] | |||
!Description | |||
|- | |||
![[Forge Hammer]] | |||
|{{Grid/Crafting Table | |||
|B1=Iron|C1=Iron | |||
|A2=Stick|B2=Stick|C2=Iron | |||
|B3=Iron|C3=Iron | |||
|Output=Forge Hammer | |||
}} | |||
|Used to craft Metal Plates out of ingots. | |||
|- | |||
![[Treetap]] | |||
|{{Grid/Crafting Table | |||
|B1=Wooden Planks | |||
|A2=Wooden Planks|B2=Wooden Planks|C2=Wooden Planks | |||
|A3=Wooden Planks | |||
|Output=Treetap | |||
}} | |||
|Extracts [[Sticky Resin]] from [[Rubber Wood|rubber wood]] with resin holes in them upon right-clicking the wood. | |||
|- | |||
![[Wrench]] | |||
|{{Grid/Crafting Table | |||
|A1=Bronze|C1=Bronze | |||
|A2=Bronze|B2=Bronze|C2=Bronze | |||
|B3=Bronze | |||
|Output=Wrench | |||
}} | |||
|Removes machine with right-click (there is a small chance that a machine will be gutted and drop only machine block or generator). | |||
|- | |||
![[Cutter]] | |||
|{{Grid/Crafting Table | |||
|A1=Iron Plate|C1=Iron Plate | |||
|B2=Iron Plate | |||
|A3=Iron|C3=Iron | |||
|Output=Cutter | |||
}} | |||
|When left-clicked on a cable, removes one layer of insulation, dropping the [[Rubber|rubber]]. When right-clicked on a cable, adds one layer of insulation, using rubber from your inventory. It is also used to make wire when used with Plates. | |||
|- | |||
![[Painter]] | |||
|{{Grid/Crafting Table | |||
|B1=Wool|C1=Wool | |||
|B2=Iron|C2=Wool | |||
|A3=Iron | |||
|Output=Painter | |||
}} | |||
{{Grid/Crafting Table | |||
|A1=Painter|B1=Red Dye | |||
|Output=Painter (Red) | |||
}} | |||
|When dyed and right-clicked on a cable, paints the cable. Painted cables only connect with unpainted cables or painted cables of the same color. It cannot paint uninsulated cable, except for [[Glass Fibre Cable]]. Each dye lasts 16 uses. | |||
Has auto-refill mode (via M key). | |||
|- | |||
![[EC-Meter|EU-Reader]] | |||
|{{Grid/Crafting Table | |||
|B1=Glowstone Dust | |||
|A2=Insulated Copper Cable|B2=Electronic Circuit|C2=Insulated Copper Cable | |||
|A3=Insulated Copper Cable|C3=Insulated Copper Cable | |||
|Output=EC Manipulator | |||
|Output-link=EC-Meter | |||
|Output-tooltip=EU-Reader | |||
}} | |||
|Detects how many EU are passing through a cable upon right-clicking on one. | |||
Will provide misleading readings on many cases. | |||
|- | |||
![[Scaffold]] | |||
|{{Grid/Crafting Table | |||
|A1=Wooden Planks |B1=Wooden Planks |C1=Wooden Planks | |||
|A2=|B2=Stick |C2= | |||
|A3=Stick |B3=|C3=Stick | |||
|Output=Scaffold |OA=16 | |||
}} | |||
|Easy to place, easy to demolish platforms that also work like ladders. Try with [[Construction Foam]]. | |||
Provides better fuel than anything, since every scaffold provides 750 EU when burned. | |||
Blacklisted in [[recycler]]. | |||
|- | |||
![[Iron Scaffold]] | |||
|{{Grid/Crafting Table | |||
|A1=Iron Plate|B1=Iron Plate|C1=Iron Plate | |||
|A2=Iron Fence|B2=Iron Fence|C2=Iron Fence | |||
|A3=Iron Plate|B3=Iron Plate|C3=Iron Plate | |||
|Output=Iron Scaffold |OA=16 | |||
}} | |||
|A sturdier version of the wooden scaffolding. Can now be used to make [[Reinforced Stone]]. | |||
|- | |||
![[Reinforced Glass]] | |||
|{{Grid/Crafting Table | |||
|A1=Glass|B1=Advanced Alloy|C1=Glass | |||
|A2=Glass|B2=Glass|C2=Glass | |||
|A3=Glass|B3=Advanced Alloy|C3=Glass | |||
|Output=Reinforced Glass | |||
}} | |||
|[[Reinforced Glass]] can withstand a nuclear explosion, if you build a wall with at least 4 blocks. | |||
Also see [[Reinforced Stone]] | |||
|- | |||
![[Reinforced Stone]] | |||
|''See [[Reinforced Stone]] page'' | |||
|In IC2.x, Reinforced Stone is no longer made with a crafting recipe. Rather, it is made by spraying [[Construction Foam]] from a [[CF Sprayer]] onto [[Iron Scaffold]]. When the Construction Foam hardens around the scaffold, it turns into Reinforced Stone. This can be sped up by right-clicking the Scaffold with a block of Sand. | |||
|- | |||
![[Reinforced Door]] | |||
|{{Grid/Crafting Table | |||
|A1=Iron Plate|B1=Lead Plate|C1=Iron Plate | |||
|A2=Iron Plate|B2=Lead Plate|C2=Iron Plate | |||
|A3=Iron Plate|B3=Lead Plate|C3=Iron Plate | |||
|Output=Reinforced Door | |||
}} | |||
|[[Reinforced Door]] can withstand a nuclear explosion. | |||
Also see [[Reinforced Stone]] | |||
|- | |||
![[CF Sprayer]] | |||
|{{Grid/Crafting Table | |||
|A1=Iron Casing|B1=|C1= | |||
|A2=|B2=Iron Casing|C2= | |||
|A3=|B3=Universal Fluid Cell|C3=Iron Casing | |||
|Output=CF Sprayer | |||
}} | |||
|Sprays [[Construction Foam]]. It can be recharged in a crafting table using [[CF Pellet|CF pellets]]. | |||
|- | |||
![[Lathing Tool]] | |||
|{{Grid/Crafting Table | |||
|A1=Refined Iron Plate | |||
|B2=Iron Item Casing | |||
|C3=Iron Item Casing | |||
|Output=Lathing Tool | |||
}} | |||
|Is needed to use the [[Turning Table]]. | |||
|- | |||
![[Wooden Turning Blank]] | |||
|{{Grid/Crafting Table | |||
|A1=Wooden Planks|B1=Wooden Planks|C1=Wooden Planks | |||
|A2=Stick|B2=Stick|C2=Stick | |||
|A3=Wooden Planks|B3=Wooden Planks|C3=Wooden Planks | |||
|Output=[Wooden Turning Blank\Blank]Wooden Turning Blank | |||
}} | |||
|Wooden version of the [[Iron Turning Blank]]. Can be used in the [[Turning Table]] but is useless currently. | |||
|- | |||
![[Iron Turning Blank]] | |||
|{{Grid/Crafting Table | |||
|A2=Iron|B2=Iron Item Casing|C2=Iron | |||
|Output=[Iron Turning Blank\Blank]Iron Turning Blank | |||
}} | |||
|Material to craft the [[Diamond Drill]] and the [[Mining Laser]]. | |||
For more information see [[Turning Table]]. | |||
|- | |||
|} | |||
=== Electric === | |||
Electric tools use energy instead of durability. They need recharging when they run out of energy, but they never wear out. | |||
{| class="wikitable" | |||
|- | |||
!width=120px|Name | |||
!width=256px|Recipe IC2 [[v2.X|experimental]] | |||
!Description | |||
|- | |||
![[Small Power Unit]] | |||
|{{Grid/Crafting Table | |||
|A1=|B1=Copper Cable|C1=Iron Casing | |||
|A2=RE Battery|B2=Electronic Circuit|C2=Electric Motor | |||
|A3=|B3=Copper Cable|C3=Iron Casing | |||
|Output=Small Power Unit | |||
}} | |||
|Used to craft [[Electric Hoe]], [[Electric Wrench]] and [[Electric Treetap]]. | |||
|- | |||
![[Power Unit]] | |||
|{{Grid/Crafting Table | |||
|A1=RE Battery|B1=Copper Cable|C1=Iron Casing | |||
|A2=RE Battery|B2=Electronic Circuit|C2=Electric Motor | |||
|A3=RE Battery|B3=Copper Cable|C3=Iron Casing | |||
|Output=Power Unit | |||
}} | |||
|Used to craft [[Mining Drill]] and [[Chainsaw]]. | |||
|- | |||
![[Mining Drill]] | |||
|{{Grid/Crafting Table | |||
|A1=|B1=Iron Plate|C1= | |||
|A2=Iron Plate|B2=Iron Plate|C2=Iron Plate | |||
|A3=Iron Plate|B3=Power Unit|C3=Iron Plate | |||
|Output=Mining Drill | |||
}} | |||
|Electric pickaxe + shovel which is faster than a pickaxe and shovel. | |||
|- | |||
![[Diamond Drill]] | |||
|{{Grid/Crafting Table | |||
|B2=Diamond | |||
|A3=Diamond | |||
|C3=Diamond | |||
|B3=Mining Drill | |||
|Output=Diamond Drill | |||
|infobox=y | |||
}} | |||
|Upgraded [[Mining Drill|mining drill]] which is faster and can break obsidian at a faster speed. | |||
|- | |||
![[Iridium Drill]] | |||
|{{Grid/Crafting Table | |||
|B1=Iridium Plate | |||
|A2=Iridium Plate|B2=Diamond Drill|C2=Iridium Plate|B3=Energy Crystal | |||
|Output=Iridium Drill | |||
}} | |||
|Upgraded [[Mining Drill|mining drill]] which is faster and can break obsidian at a faster speed. | |||
|- | |||
![[Chainsaw]] | |||
|{{Grid/Crafting Table | |||
|B1=Iron Plate|C1=Iron Plate | |||
|A2=Iron Plate|B2=Iron Plate|C2=Iron Plate | |||
|A3=Power Unit|B3=Iron Plate | |||
|Output=Chainsaw | |||
}} | |||
|More efficient electric axe with the plus of being an effective mob stopper. Since 1.70, the Chainsaw now also works as shears. Just right-click on a sheep. The same goes with grass or anything else you could shear with normal shears.... Cheers. | |||
|- | |||
![[Electric Wrench]] | |||
|{{Grid/Crafting Table | |||
|B1=Wrench | |||
|B2=Small Power Unit | |||
|Output=Electric Wrench | |||
}} | |||
|Like a [[Wrench]], right-clicking on a machine with an electric wrench removes it. Post 1.46v, electric wrench's toggle ability has a 100% chance to remove the machine. Tool is toggled by holding the "M" key and right clicking. | |||
|- | |||
![[Nano Saber]] | |||
|{{Grid/Crafting Table | |||
|A1=Glowstone Dust|B1=Advanced Alloy | |||
|A2=Glowstone Dust|B2=Advanced Alloy | |||
|A3=Carbon Plate|B3=Energy Crystal|C3=Carbon Plate | |||
|Output=Nano Saber | |||
}} | |||
|Sword that deals 20 damage when charged. | |||
|- | |||
![[Electric Treetap]] | |||
|{{Grid/Crafting Table | |||
|B1=Treetap | |||
|B2=Small Power Unit | |||
|Output=Electric Treetap | |||
}} | |||
|Treetap which uses EU. | |||
|- | |||
![[Mining Laser]] | |||
|{{Grid/Crafting Table | |||
|A1=Redstone|B1=Redstone|C1=Energy Crystal | |||
|A2=Advanced Alloy|B2=Advanced Alloy|C2=Advanced Circuit | |||
|B3=Iron Turning Blank|B3-tooltip=Iron Turning Blank\Handle|C3=Advanced Alloy | |||
|Output=Mining Laser | |||
}} | |||
|Multipurpose laser which instantly breaks blocks. | |||
|- | |||
![[Electric Hoe]] | |||
|{{Grid/Crafting Table | |||
|A1=Iron Plate|B1=Iron Plate|C1= | |||
|A2=|B2=Iron Plate|C2= | |||
|A3=|B3=Small Power Unit|C3= | |||
|Output=Electric Hoe | |||
}} | |||
|Hoe which uses EU. | |||
|- | |||
![[OD Scanner]] | |||
|{{Grid/Crafting Table | |||
|A1=Gold Casing|B1=Glowstone Dust|C1=Gold Casing | |||
|A2=Electronic Circuit|B2=Advanced RE-Battery|C2=Electronic Circuit | |||
|A3=Insulated Copper Cable|B3=Insulated Copper Cable|C3=Insulated Copper Cable | |||
|Output=OD Scanner | |||
}} | |||
|The OD Scanner (Ore Density Scanner) is a tool that helps the player determine a relative amount of valuable resources. The OD Scanner can also be inserted into a Miner to give it a mining area of 5x5. | |||
|- | |||
![[OV Scanner]] | |||
|{{Grid/Crafting Table | |||
|A1=Gold Casing|B1=Energy Crystal|C1=Gold Casing | |||
|A2=Glowstone Dust|B2=Advanced Circuit|C2=Glowstone Dust | |||
|A3=2xIns. Gold Cable|A3-link=Insulated Gold Cable|B3=OD Scanner|C3=2xIns. Gold Cable|C3-link=Insulated Gold Cable | |||
|Output=OV Scanner | |||
}} | |||
|The OV Scanner (Ore Value Scanner) is the improved version of the OD Scanner. This device not only calculates how much ore there is in the scanned area, but outputs its value based on how valuable the ores are. The OV Scanner can also be inserted into a Miner to increase the Miner's mining area from 5x5 to 9x9. | |||
|} | |||
=== Agriculture === | |||
IC2 adds new capabilities in the field of agriculture as well. | |||
{| class="wikitable" | |||
|- | |||
!width=120px|Name | |||
!width=256px|Recipe IC2 [[v2.X|experimental]] | |||
!Description | |||
|- | |||
![[Crops]] | |||
|{{Grid/Crafting Table | |||
|A1=|B1=|C1= | |||
|A2=Stick|B2=|C2=Stick | |||
|A3=Stick|B3=|C3=Stick | |||
|Output=Crops|OA=2 | |||
}} | |||
|Necessary for using the IC2 agriculture system. | |||
|- | |||
![[Cropnalyzer]] | |||
|{{Grid/Crafting Table | |||
|A1=Cable|B1=Cable|C1= | |||
|A2=Redstone|B2=Glass|C2=Redstone | |||
|A3=Redstone|B3=Electronic Circuit|C3=Redstone | |||
|Output=Cropnalyzer | |||
}} | |||
|Used to scan seed bags to identify the properties of the plant, such as the plant type, its tier, and its growth, gain, and resistance ratings. | |||
|- | |||
![[Fertilizer]] | |||
|{{Grid/Crafting Table | |||
|A1= |B1= |C1= | |||
|A2= |B2=Some random scrap |C2= | |||
|A3= |B3=Bone Meal |C3= | |||
|Output=Fertilizer|OA=2 | |||
}} {{Grid/Crafting Table | |||
|A1= |B1= |C1= | |||
|A2=Some random scrap |B2=Some random scrap |C2=Fertilizer | |||
|A3= |B3=|C3= | |||
|Output=Fertilizer|OA=2 | |||
}} | |||
|Used to speed up the growth of plants. Bonemeal by itself does not work on IC2 plants. | |||
|- | |||
|} | |||
Latest revision as of 12:43, 11 August 2019
The most recent version of IC² is V2.8.<html>.
Resources[edit]
Changed vanilla blocks & items[edit]
| Name | Picture | Description |
|---|---|---|
| Obsidian | 
|
Explosion resistance changed from 6000 to 60, this allows nuke and reactor to destroy obsidian on default power (up to 6 blocks). |
| Water | 
|
Explosion resistance changed from 500 to 30, this allows TNT and ITNT to destroy water blocks. |
| Lava | 
|
Explosion resistance changed from 500 to 30, this allows TNT and ITNT to destroy lava blocks. |
| Lava bucket |
|
Only smelts 12 items in an Iron Furnace. |
| Redstone | 
|
Can be used as power source with electric machines, provides 500 EU per item, acts just like Single-Use Battery. |
| Cacti | 
|
Can now be burned in any furnace for 50 fuel points. |
| Sugar Cane | 
|
Can now be burned in any furnace for 50 fuel points. |
Ores[edit]
| Name | Picture | Description |
|---|---|---|
| Copper Ore | 
|
Found on layers 10 to 70 (rate 15:10). Used most notably to make Copper Cable, Bronze and some Reactor components. |
| Tin Ore | 
|
Found on layers 0 to 40 (rate 25:6). Used most notably to make Rechargeable Batteries, Cells, Bronze and some Reactor components. |
| Lead Ore | 
|
Found on layers 0 to 65 (rate ?). Used to make Advanced RE-Batteries and Reactor Chambers. |
| Uranium Ore | 
|
Found on layers 0 to 64 (rate 20:3). Needed to run a Nuclear Reactor. |
Generation rate is number of generation attempts per chunk : number of ore generated per attempt. 20:3 means that ore will attempt to generate up to 20 times and will generate up to 3 ore per attempt, generation attempts can fail.
Overworld[edit]
| Name | Picture | Description |
|---|---|---|
| Rubber Tree | 
|
Mod-related trees which have dark yellow logs and light green leaves. Cannot be found anywhere except Swamp, Forest and Taiga biomes. They are extremely abundant in Swamp, Forest and Taiga biomes and are easy to find due to their unique "wing" on their leaf design. Their wood is special and sometimes has resin holes that may be right-clicked on with a Treetap to get Sticky Resin, used in Rubber production.
Can be crafted into 3 jungle planks or smelted into spruce logs. Leaves can be harvested with Shears and have a 2% chance of dropping a sapling. |
World generation rate of Rubber Trees depends on biome:
| Forest 2-12% chance to generate 1-6 Rubber Trees per chunk. |
| Taiga 0-6% chance to generate 0-3 Rubber Trees per chunk. |
| Swampland 10-30% chance to generate 5-15 Rubber Trees per chunk. |
The minimum tree height is 2, and the maximum is 8. Every log has a 25% chance of having a resin hole, with a maximum of 3 holes per tree.
Fluids[edit]
| Name | Picture | Description |
|---|---|---|
| UU-Matter | 
|
Made by the Mass Fabricator. Needs EU and optional Scrap.
Used to replicate items by Replicator |
| Construction Foam | 
|
Made by the Canning Machine. Needs water and CF Powder.
Used to fill the CF Sprayer/CF Backpack and to make Reinforced Stone. |
| Coolant | 
|
Made by the Canning Machine using 1 bucket of water and 8 Lapis Dust or 1 bucket of Distilled Water and 1 Lapis Dust.
Used to make 10k Coolant Cells or to cool Nuclear Reactors in heat mode. |
| Hot Coolant | 
|
Made in a Fluid reactor transferring heat from Uranium into the coolant.
Used to to make Heat Units in a Liquid Heat Exchanger. |
| Pahoehoe Lava | 
|
Made by putting lava in a Liquid Heat Exchanger.
Used to make Basalt. |
| Biomass | 
|
Made by the Canning Machine. Needs water and Bio Chaff.
Used to make Biogas. |
| Biogas | 
|
Made by the Fermenter. Needs Biomass.
Used to power the Semifluid Generator or Jetpack |
| Distilled Water | 
|
Made by the Solar Distiller or by putting Steam in a Condenser. Needs water and Solar Energy.
Used to craft Overclocker Upgrade |
| Steam | 
|
Made by putting Water in a Steam Generator heated past 100°C |
| Superheated Steam | 
|
Made by putting Water in a Steam Generator heated past 374°C |
Cables[edit]
| Name | Recipe IC2 experimental | Description Crossed out text only applies to Minecraft version 1.9.4 and above |
|---|---|---|
| Tin Cable |
|
Uninsulated tin cable Uninsulated cables cannot be painted.
|
| Insulated Tin Cable | Insulated tin cable Used in crafting recipes, such as RE Batteries. | |
| Copper Cable |
|
Uninsulated copper cable
|
| Insulated Copper Cable | Insulated copper cable
| |
| Gold Cable |
|
Uninsulated gold cable
|
| Insulated Gold Cable | Double-insulated gold cable
| |
| HV Cable |
|
Uninsulated HV cable
|
| Insulated HV Cable | Triple-insulated HV cable | |
| Glass Fibre Cable | Special glass fibre cable | |
| Detector Cable | Outputs Redstone current when powered
| |
| Splitter Cable | Prevents the transfer of EU while being powered by Redstone
|

EU Storage[edit]
Blocks[edit]
| Name | Recipe IC2 experimental | Description |
|---|---|---|
| BatBox | EU storage block which stores up to 40,000 EU and accepts up to and outputs 32 EU/t (low voltage). Accepts current from any side, except the one with a dot, which is the output. | |
| CES Unit | EU storage block which stores up to 300,000 EU an accepts up to and outputs 128 EU-p (medium voltage). Accepts current from any side, expect the one with a dot, which is the output. | |
| MFE Unit | EU storage block which stores up to 4,000,000 EU and accepts up to and outputs 512 EU/t (high voltage). Accepts current from any side, except the one with a dot, which is the output. | |
| MFS Unit | EU storage block which stores up to 40,000,000 EU and accepts up to and outputs 2048 EU-p (extreme voltage). Accepts current from any side, except the one with a dot, which is the output. |
Items[edit]
| Name | Recipe IC2 experimental | Description |
|---|---|---|
| Single-Use Battery | EU storage item which stores 1,000 EU and can only be used once, but are stackable in up to 64. It can also be used to power most machines from their bottom slot. | |
| RE Battery | EU storage item which stores up to 10,000 EU and can be charged or discharged in a BatBox, CES Unit, MFE Unit or MFS Unit. It can also be used to power most machines from their bottom slot, and be charged in generators through their top (or middle) slot.
Empty ones can stack, but must be destacked to charge. | |
| Advanced RE-Battery | EU storage item which stores up to 100,000 EU and can be charged or discharged in a CES Unit, MFE Unit or MFS Unit. | |
| Energy Crystal | EU storage item which stores up to 1,000,000 EU and can only be charged or discharged in a MFE Unit or a MFS Unit. | |
| Lapotron Crystal | EU storage item which stores up to 10,000,000 EU and can only be charged or discharged in a MFS Unit. | |
| Electrolyzed Water Cell | Created in an Electrolyzer when the adjacent power storage (any tier) is more then 70.01% full, these cells adsorb 20k EU, but lose 1500 per energy storage tier (with minimal 1500 loss on MFS Unit) when discharged (discharged when energy storage 25% or less). |

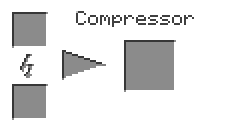
Transformers[edit]
| Name | Recipe IC2 experimental | Description |
|---|---|---|
| LV Transformer | Either:
| |
| MV Transformer | Either:
| |
| HV Transformer | Either:
| |
| EV Transformer | Either:
|
Machine Components[edit]
| Name | Recipe IC2 experimental | Description |
|---|---|---|
| Refined Iron | Refined Iron is a mid-game metal. It can be made in a Blast Furnace and is used for advanced machines. | |
| Universal Fluid Cell | Used in some recipes, such as the CF Sprayer recipe. | |
| Machine | Base component for machines and the Quantum Leggings. | |
| Advanced Machine | Base component for tier 2 and tier 3 machines. | |
| Electronic Circuit | Base component for machines, smart items and the Advanced Circuit. | |
| Advanced Circuit | Base component for tier 2 and tier 3 tools and machines. | |
| Coil | Used to make Electric Motor and some other things. Also required inside the Electric Heat Generator in order to make it produce Heat. | |
| Electric Motor | ||
| Heat Conductor | Used to create Heat Generators like Electric Heat Generator | |
| Crystal Memory (raw) | Used to make Crystal Memory. See the Replication tutorial for more information. | |
| Crystal Memory | Used to make Pattern Storage and store scanned information. See the Replication tutorial for more information. |
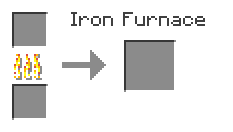
Generators[edit]
EU[edit]
| Name | Recipe IC2 experimental | Description |
|---|---|---|
| Generator | Simple generator which accepts fuel (43,200 EU for coal fuel, 16,200 EU for bio fuel), coal (4000 EU), scrap (825 EU), wood (750 EU), planks (750 EU), wooden blocks (750 EU), sticks (250 EU), saplings (250 EU, 200 EU for rubber tree saplings), sugar cane (125 EU) and cactus (125 EU) and outputs 10 EU/t. If there is no destination for the current, it can store up to 4000 EU. It is also a base component for other generators. | |
| Geothermal Generator | Generator which accepts lava buckets and cells and outputs 20 EU/t for a total of 10,000 EU per lava unit. It can store 2400 EU and 24 units of lava inside.
Any stored lava is lost if blocked removed. | |
| Solar Panel | Generator which, when exposed to direct sunlight through its top, outputs 1.0 EU/t for a total of 13500 EU per Minecraft day. | |
| Water Mill | Generator which accepts water buckets and adjacent water and outputs either 2 EU/t for a total of 1000 EU per water bucket, or 0.010 EU/t per adjacent water block for a maximum of 0.25 EU/t with a 3x3 cube of water with the water mill in the middle and cable on top. | |
| Wind Mill | Generator which outputs 0-6 EU/t (can melt tin cable!) for a total of an average of 250 EU/t multiplied by its height in the Minecraft world. The generation power can be hindered by any block in a 9x9x7 area around it, reducing the effective height by 1 for each block in said area. Will break on heavy load, replacing itself with normal generator. | |
| Semifluid Generator | Can burn Biogas, oil and fuel (Buildcraft, except in Minecraft 1.11.x or 1.12.x), biomass and ethanol (Forestry). | |
| Stirling Generator | A Heat acceptor which turns Heat Units (hU) into EU. | |
| Radioisotope Thermoelectric Generator | Uses Pellets of RTG Fuel to produce energy. Depending on the amount of fuel in the generator, it produces between 1 EU/t and 16 EU/t. The fuel pellets are not consumed after many years, making this generator a source of unlimited power. | |
| Kinetic Generator | Connects to Kinetic Wind Generator or Kinetic Steam Generator to change Kinetic Energy Units into Energy Units. |
Heat[edit]
| Name | Recipe IC2 experimental | Description |
|---|---|---|
| Electric Heat Generator | Creates Heat/hU out of EU. Heat can be used for Blast Furnace | |
| Solid Heat Generator | Creates Heat/hU by burning solid stuff (e.g. Coal). Heat can be used for Blast Furnace | |
| Fluid Heat Generator | Creates Heat/hU by burning fluids (e.g. Fuel). Heat can be used for Blast Furnace | |
| Liquid Heat Exchanger | Creates Heat/hU from specific fluids (Lava and Hot Coolant) | |
| Radioisotope Heat Generator | Creates Heat/hU by using Pellets of RTG Fuel. Heat can be used for Blast Furnace |
Kinetic[edit]
| Name | Recipe IC2 experimental | Description |
|---|---|---|
| Electric Kinetic Generator | Creates Kinetic Energy/kU out of EU. Can be used for Turning Table. | |
| Kinetic Wind Generator | More powerful than the standard Wind Generator, Kinetic Wind Generators use Rotors of varying types to capture the wind to turn an internal crankshaft. Requires a large, clear space in front of the machine to operate and a Kinetic Generator hooked up to convert rotation energy into EU. | |
| Manual Kinetic Generator | Another source of "free" energy. Each time a player clicks on the machine it will generate a small charge of EU if hooked up to a Kinetic Generator. | |
| Kinetic Steam Generator | Not to be confused with the Steam Generator, the Kinetic Steam Generator takes in Steam or super-heated steam generated from the Steam Generator to turn an internal turbine. Again, it requires not only a Kinetic Generator to actually produce EU but, also requires a means to remove excess condensation from inside the turbine chamber. |
Nuclear Reactor[edit]
| Name | Recipe IC2 experimental | Description |
|---|---|---|
| Nuclear Reactor | Complex generator whose output and total EU varies depending on the setup. Refer to Nuclear Reactor for Dummies for more info.
Needs indirect redstone current to run. | |
| Reactor Chamber | Can be attached to a reactor to increase its space by 1 column, provides no bonuses, valid output and input. | |
| Tiny Pile of Uranium 235 |
|
Used to craft Enriched Uranium Nuclear Fuel, Uranium 235 and can be used for something very explosive. Warning: This Item is radioactive! You need a full Hazmat Suit to transport it! |
| Uranium 238 |
|
Used to craft Enriched Uranium Nuclear Fuel, MOX Nuclear Fuel and Uranium Block. Warning: This item is radioactive! You need a full Hazmat Suit to transport it! |
| Enriched Uranium Nuclear Fuel | Used to craft a Uranium Cell. Warning: This item is radioactive! | |
| MOX Nuclear Fuel | (MOX=Mixed oxide, see the wikipedia article for more info)
Used to craft Fuel Rod (MOX). Warning: This item is radioactive! | |
| Reactor Plating | +1000 Maximum Reactor Temperature
-5% Explosion Range | |
| Heat-Capacity Reactor Plating | +1700 Maximum Reactor Temperature
-1% Explosion Range | |
| Containment Reactor Plating | +500 Maximum Reactor Temperature
-10% Explosion Range | |
| Heat Exchanger | These will first exchange up to 12 heat with each surrounding component, and then up to 4 with the reactor itself. | |
| Advanced Heat Exchanger | These transfer up to 24 heat with each surrounding component, and then up to 8 with the reactor. | |
| Core Heat Exchanger | These transfer up to 72 heat with the reactor, put will not move heat to or from nearby components. These will usually be at the same percent capacity as the reactor, so they are useful as a kind of thermometer for your reactor. | |
| Component Heat Exchanger | These transfer up to 36 heat with each adjacent component, but does not transfer any with the reactor itself. | |
| Heat Vent | The basic vent dissipates 6 heat from itself every second. | |
| Advanced Heat Vent | An improvement to a basic heat vent, this component dissipates 12 heat from itself. | |
| Reactor Heat Vent | This vent moves 5 heat from the reactor vessel to itself and dissipates 5 heat every second. This has the advantage that it can function effectively anywhere in the reactor, not just next to the uranium cell. | |
| Component Heat Vent | This vent dissipates 4 heat from each surrounding component. | |
| Overclocked Heat Vent | This vent moves 36 heat from the reactor to itself and then dissipates 20 heat from itself. This will cause the component to overheat if steps are not taken to cool this component. | |
| Neutron Reflector | These reflect neutron pulses back to the uranium cell which produced them. The neutron reflector can reflect 10,000 pulses (one complete cycle from one uranium cell). | |
| Thick Neutron Reflector | The thick neutron reflector is more durable, allowing it to reflect 40,000 pulses before failure. | |
| 10K Cooling Cell | Holds 10,000 heat before melting. | |
| 30K Cooling Cell | Holds 30,000 heat before melting. | |
| 60K Cooling Cell | Holds 60,000 heat before melting. | |
| RSH-Condensator | Holds 20,000 heat. Can be restored with redstone (10,000 each). | |
| LZH-Condensator | Holds 100,000 heat. Can be restored with lapis lazuli dust (40,000 each) and redstone (5,000 each). | |
| Uranium Cell | Generates 1,000,000-5,000,000 EU at 5-25 EU/t (depending on efficiency, that is, cell adjacency), but generates excess heat which must be eliminated through cooling. When it decays, 25% of time turns into a Near-Depleted Uranium Cell, which once recharged, turns into a fresh new cell. | |
| Dual Uranium Cell | These act as if they're 2 cells in a Grid pattern. 1 Dual cell acts as 2x Uranium Cells are side-by-side. The output from a single slot used is 20EU/t because of 5EU/t per cell, as well as the +5EU/t per cell adjacent to another. | |
| Quad Uranium Cell | 4 Uranium Cells forged together to only take one space in the reactor slot; Output for these are 60EU/t. These new Uranium components allow for much more compact Nuclear Reactor designs - However you still have to manage that heat produced. | |
| Fuel Rod (MOX) | Much like Uranium Cell but with higher energy output on higher reactor heat. | |
| Dual Fuel Rod (MOX) | These act as if they're 2 cells in a Grid pattern. 1 Dual cell acts as 2x MOX Cells are side-by-side. The output at 0 heat from a single slot used is 20EU/t because of 5EU/t per cell, as well as the +5EU/t per cell adjacent to another. | |
| Quad Fuel Rod (MOX) | 4 MOX Cells forged together to only take one space in the reactor slot; Output with no heat for these are 60EU/t. These new reactor components allow for much more compact Nuclear Reactor designs - However you still have to manage that heat produced. |
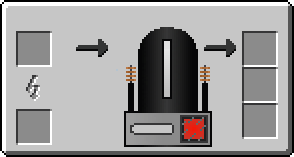
Processors[edit]
| Name | Recipe IC2 experimental | Description |
|---|---|---|
| Iron Furnace | Non-electric machine, 25% faster and 125% fuel effective, can burn lava and fuel. | |
| Electric Furnace | Energy-powered furnace which is 150% faster then normal and 125% fuel effective. Takes 400 EU per operation (at least 3 EU/t needed for continuous usage), up to low voltage (32 EU/t). | |
| Blast Furnace | Heat powered machine used for the creation of Refined Iron. Require 1 Iron(Ingot, Ore, Crushed Ore, Purified Crushed Ore, or Dust) and 6 Compressed Air Cells per operation. Outputs 1 Refined Iron Ingot and 1 Slag. | |
| Macerator | Turns ore into Crushed Ore and some other things - look for more recipes on this page. Takes 800 EU per operation (at least 2 EU/t needed for continuous usage), up to low voltage (32 EU/t). | |
| Ore Washing Plant | Turns Crushed Ore into Purified Crushed Ore, Stone Dust and a tiny pile of dust - look for more recipes on this page. Takes 8000 EU per operation (at least 16 EU/t needed for continuous usage), up to low voltage (32 EU/t). | |
| Thermal Centrifuge | Turns Crushed Purified Ore into Dusts and some other things - look for more recipes on this page. Takes (?) EU per operation (at least 48 EU/t needed for continuous usage), up to medium voltage (128 EU/t). | |
| Metal Former | Has 3 modes: Rolling, Extruding and Cutting. Used to craft plates, casings, cables and some other things - look for more recipes on this page. | |
| Block Cutting Machine | Cuts metal blocks into plates, faster than a metal former would roll 9 plates. | |
| Extractor | Extracts resin into 3 rubber (triple the efficiency) and turns simple fuel cells into liquid fuel ones and some other things - look for more recipes on this page. Takes 313 EU per operation (at least 2 EU/t needed for continuous usage), up to low voltage (32 EU/t). | |
| Compressor | Compresses Mixed Metal Ingots into Advanced Alloy and Plantballs into Compressed Plants and some other things - look for more recipes on this page. Takes 625 EU per operation (at least 2 EU/t needed for continuous usage), up to low voltage (32 EU/t). | |
| Recycler | Has a 6% chance of turning anything inserted into it to Scrap. Takes 35 EU per operation (at least 1 EU/t needed for continuous usage), up to low voltage (32 EU/t). | |
| Canning Machine | Turns food (top slot) and tin cans (bottom slot) into several canned food (see the Food List). Canned food instantly heals you 1 heart per unit. It is also used to fill fuel cans using Biofuel Cells and Coalfuel Cells, and refuel Jetpacks using those cells. Takes 35 EU per operation, up to low voltage (32 EU/t). | |
| Steam Generator | Makes Steam and Superheated Steam. | |
| Bottling Plant | Empties cells or other liquid containers (top slot) into tank or fills containers from tank (bottom slot). Takes 5 EU per operation, up to low voltage (32 EU/t). | |
| Induction Furnace | Special two-input two-output furnace which increases its smelting speed as it heats up through smelting. When it's not smelting anything, it will quickly lose heat, but the furnace can be applied a Redstone current to keep itself heated for 1 EU/t. Takes 6000 (0% heat) to 208 (100% heat) EU per operation (at least 16 EU/t needed for continuous usage), up to medium voltage (128 EU/t). | |
| Mass Fabricator | Generates Matter for a vast amount of energy, but said amount can be reduced and the generation speed increased by feeding Scrap to the bottom slot. Takes up to high voltage (512 EU/t). See the Replication tutorial for more information. | |
| Scanner | Used to scan items to get their Pattern. The Pattern can be saved in a Memory Crystal or a Pattern Storage next to the scanner. See the Replication tutorial for more information. | |
| Replicator | Uses Uu-Liquid and energy to produce any item which pattern is in an adjacent Pattern Storage. See the Replication tutorial for more information. |
Agriculture[edit]
| Name | Recipe IC2 experimental | Description |
|---|---|---|
| Crop-Matron | The Crop-Matron will monitor nearby crop sticks and will automatically apply Fertilizer, Hydration Cells and Weed-EX as needed. | |
| Crop Harvester | The Crop Harvester will monitor nearby crop sticks and automatically harvest them. A Cropnalyzer will make sure it harvests at the optimum growth stage. |
Utility[edit]
| Name | Recipe IC2 experimental | Description |
|---|---|---|
| Luminator | Produces light when powered. | |
| Personal Safe | Chest which can only be opened by you once you right-click it for the first time. It also has the space of a double chest. Useful for SMP. | |
| Trade-O-Mat | Allows a certain item to be traded by another, giving or taking from an adjacent chest or Personal Safe. Useful for SMP. See its article for a full guide on how to set one up. Does not require energy. | |
| Magnetizer | Turns Iron Fences stacked vertically (up and/or down) into a faster alternative to ladders. When a player wearing metal boots (iron, gold, bronze, nano or quantum) approaches the fences, said player is quickly propelled upwards while the Magnetizer uses energy. Takes 2 EU/t while a player is being propelled, up to low voltage (32 EU/t). | |
| Electrolyzer | When placed adjacent to energy storage and filled with Water Cells, once the EU storage is 70.01% or more, starts turning the cells into Electrolyzed Water Cells, but once it's 25%, starts using up the electrolyzed cells to supply power. Speed depend on energy storage block tier. | |
| Tesla Coil | When charged and applied a Redstone current, it starts finding NPCs and players at a range of 4 blocks at the cost of 2 EU/t. If a NPC/player is found, it will apply 10 hearts of damage to it and discharge. Useful for placing monster traps outside your base. Takes 5000 EU to charge, up to medium voltage (128 EU/t). | |
| Teleporter | Teleports a player to another Teleporter defined by a FreqTrans once it is applied Redstone current. Takes a variable amount of EU depending on the distance, kind of creature (human/monster/animal), inventory and worn armor (from Distance*100 for an animal to Distance*3100 for a player with a full inventory of stacks of 64 and all armor pieces worn), up to high voltage (512 EU/t). Please note that a teleporter does not accept cables as energy inputs - only EU storage blocks (MFS Unit recommended) adjacent to it. | |
| Industrial TNT | Much like TNT, but with less power so as not to destroy ores or deal as much damage. It will fuse when broken. | |
| Dynamite | Smaller version of Industrial TNT which can be thrown or placed. | |
| Sticky Dynamite | Dynamite that will stick to a wall when thrown. | |
| Rubber Trampoline | Jumping off of a height onto this rubberized sheet will cause you to bounce back up, effectively negating fall damage. The rubber trampoline must be connected on at least 2 sides to blocks on the same level as it, and must have a gap underneath, similar to a real trampoline. | |
| Wool Sheet | The wool sheet allows you to fall from twice the height before taking damage (6 blocks as opposed to 3). | |
| Iron Fence |
|
Iron Fences can serve as a normal fence. Iron Fences can be stacked on top of one another, and if a player approaches the resulting pole while holding the Crouch button, he will quickly slide down the pole, much faster than down a ladder, but still not fast enough to receive fall damage upon touching the ground. |
Miner[edit]
| Name | Recipe IC2 experimental | Description |
|---|---|---|
| Miner | Mines vertically by laying down Mining Pipes placed in the top-center slot, using the Mining Drill or Diamond Drill (faster but consumes more energy) in the top-left slot and scanning for ores using the OD Scanner (5x5 area) or OV Scanner (9x9 area) in the top-right slot, either throwing anything out or placing in an adjacent chest. Any kind of block may be placed in the pipe slot too, causing the pipes to be retracted and refunded. Takes a variable amount of EU per operation based on the scanner and drill (460 EU for Mining Drill or 890 EU for Diamond Drill + 70 EU for OD Scanner or 180 EU for OV Scanner), up to low voltage (32 EU/t). | |
| Advanced Miner | ||
| Pump | When placed next to a miner and filled with empty cells, fills the cells with any liquid the miner comes across. When alone, fills an empty cell with a liquid one block directly below the pump. Takes 200 EU per operation, up to low voltage (32 EU/t). | |
| Mining Pipe | Placed in the miner's top-center slot. |
Terraformer[edit]
| Name | Recipe | Description |
|---|---|---|
| Terraformer | Alters (terraforms) nearby landscape following a Terraformer Blueprint inserted in it (by right-clicking the machine with the blueprint). Takes a unlimited amount of EU/t (just like mass fab), up to high voltage (512 EU/t). | |
| Empty Blueprint | Empty Terraformer blueprint used to craft functional ones. | |
| Chilling Blueprint | Simulates a Snow biome by placing snow (and later snow blocks) on top of blocks and freezing water. Takes 4 EU/t. | |
| Cultivation Blueprint | Simulates a Plains biome by replacing sand with dirt, growing grass on top of dirt and randomly adding plantlife. Takes 20 EU/t. | |
| Desertification Blueprint | Simulates a Desert biome by replacing dirt with sand, destroying plants, melting ice/snow and causing forest fires. Takes 4 EU/t. | |
| Flatificator Blueprint | Removes all natural blocks (except stone) above the Terraformer and fills land below the Terraformer with dirt. Takes 40 EU/t. | |
| Irrigation Blueprint | Replaces sand with dirt, grows grass on top of dirt, causes plants to grow faster, lets sugar cane grow past 3 blocks and rarely spawns water below the Terraformer. Takes 8 EU/t. |
Upgrades[edit]
Place one or more upgrades into the four right-most slots of a machine to upgrade said machine.
| Name | Recipe IC2 experimental | Description |
|---|---|---|
| Overclocker Upgrade | Used to speed up machines at the cost of higher energy consumption. Each upgrade reduces the operating time to 70% of the previous value and increases energy consumption by 60%. The effect is multiplicative. | |
| Transformer Upgrade | Used to upgrade a machine's power input rate or tier. One upgrade enables a tier 1 machine to receive 128EU/t. Two upgrades enables it to receive 512EU/t and three for more than 512 EU. | |
| Energy Storage Upgrade | Used to upgrade a machine's internal power storage. Each upgrade increases the storage capacity by 10,000 EU. | |
| Ejector Upgrade | Used to allow a machine to automatically eject it's item output | |
| Fluid Ejector Upgrade | Used to allow a machine to automatically eject it's liquid output | |
| Redstone Signal Inverter Upgrade | Inverts the redstone signal a machine is receiving |
Armor[edit]
Material[edit]
| Name | Recipe | Description |
|---|---|---|
| Bronze Helmet | Helmet with 30% more durability than iron (same durability in v2.X). | |
| Bronze Chestplate | Chestplate with 30% more durability than iron (same durability in v2.X). | |
| Bronze Leggings | Leggings with 30% more durability than iron (same durability in v2.X). | |
| Bronze Boots | Boots with 30% more durability than iron (same durability in v2.X). |
Energy[edit]
| Name | Recipe IC2 experimental | Description |
|---|---|---|
| Nightvision Goggles | Energy-based helmet that allows the user to see in the dark (night vision). Use [ALT] + M to activate Night Vision. HAYO: Don't be an | |
| Nano Helmet | Energy-based helmet which absorbs part of your damage while charged. Night Vision can be enabled using [ALT] + M. | |
| Nano Body Armor | Energy-based chestplate which absorbs part of your damage while charged. | |
| Nano Leggings | Energy-based leggings which absorb part of your damage while charged. | |
| Nano Boots | Energy-based boots which absorb part of your damage while charged. | |
| Iridium Plate | Material used to craft QuantumSuit armor. | |
| Quantum Helmet | Energy-based helmet which lets you breathe underwater, replenishes your hunger and cures poison while charged. | |
| Quantum Body Armor | Energy-based chestplate which absorbs a lot of your damage while charged. Jetpack can be enabled using CTRL-M. | |
| Quantum Leggings | Energy-based leggings which let you sprint more than 3 times faster. | |
| Quantum Boots | Energy-based boots which absorb all of your fall damage while charged, and while pressing CTRL, let you jump higher. |
Utility[edit]
| Name | Recipe IC2 experimental | Description |
|---|---|---|
| Bat-Pack | Chestplate which powers your electric tools using its energy of up to 60,000 EU while you are wearing it. | |
| Advanced Bat-Pack | Chestplate which powers your electric tier 2 tools using its energy of up to 600,000 EU while you are wearing it. | |
| Energy-Pack | Chestplate which powers your electric tier 3 tools using its energy of up to 2,000,000 EU while you are wearing it. | |
| Composite Armor | Super-durable chestplate, more than 3 times the durability of a diamond chestplate. | |
| Electric Jetpack | Energy-powered jetpack worn as a chestplate. It has a limited maximum flying height and a smaller operational time, unlike the normal fuel-powered Jetpack. | |
| Jetpack | Fuel-powered tool that allows the player to fly while worn as a chestplate. It lasts for 90 seconds when fully charged. | |
| CFPack | Chestplate that stores additional CF Pellets to automatically reload a CF Sprayer. | |
| Scuba Helmet | Helmet that refills your breath bar as long as you have compressed air cells in your inventory. | |
| Hazmat Suit | A chestplate that provides protection from environmental dangers such as fire, lava, Nuclear Reactors, and other effects. | |
| Hazmat Suit Leggings | A pair of leggings that provide protection from environmental dangers such as fire, lava, Nuclear Reactors, and other effects. | |
| Rubber Boots | Boots that reduce your fall damage. | |
| Static Boots | Energy-based boots that will charge a BatPack or a LapPack while walking. | |
| Solar Helmet | Energy-based helmet that will charge a BatPack or a LapPack from the sunlight. |
Tools[edit]
Material[edit]
| Name | Recipe | Description |
|---|---|---|
| Bronze Pickaxe | Pickaxe with the same durability as iron. | |
| Bronze Shovel | Shovel with the same durability as iron. | |
| Bronze Axe | Axe with the same durability as iron. | |
| Bronze Sword | Sword with the same durability as iron. | |
| Bronze Hoe | Hoe with the same durability as iron. |
Utility[edit]
| Name | Recipe IC2 experimental | Description |
|---|---|---|
| Forge Hammer | Used to craft Metal Plates out of ingots. | |
| Treetap | Extracts Sticky Resin from rubber wood with resin holes in them upon right-clicking the wood. | |
| Wrench | Removes machine with right-click (there is a small chance that a machine will be gutted and drop only machine block or generator). | |
| Cutter | When left-clicked on a cable, removes one layer of insulation, dropping the rubber. When right-clicked on a cable, adds one layer of insulation, using rubber from your inventory. It is also used to make wire when used with Plates. | |
| Painter | When dyed and right-clicked on a cable, paints the cable. Painted cables only connect with unpainted cables or painted cables of the same color. It cannot paint uninsulated cable, except for Glass Fibre Cable. Each dye lasts 16 uses.
Has auto-refill mode (via M key). | |
| EU-Reader | Detects how many EU are passing through a cable upon right-clicking on one.
Will provide misleading readings on many cases. | |
| Scaffold | Easy to place, easy to demolish platforms that also work like ladders. Try with Construction Foam.
Provides better fuel than anything, since every scaffold provides 750 EU when burned. Blacklisted in recycler. | |
| Iron Scaffold | A sturdier version of the wooden scaffolding. Can now be used to make Reinforced Stone. | |
| Reinforced Glass | Reinforced Glass can withstand a nuclear explosion, if you build a wall with at least 4 blocks.
Also see Reinforced Stone | |
| Reinforced Stone | See Reinforced Stone page | In IC2.x, Reinforced Stone is no longer made with a crafting recipe. Rather, it is made by spraying Construction Foam from a CF Sprayer onto Iron Scaffold. When the Construction Foam hardens around the scaffold, it turns into Reinforced Stone. This can be sped up by right-clicking the Scaffold with a block of Sand. |
| Reinforced Door | Reinforced Door can withstand a nuclear explosion.
Also see Reinforced Stone | |
| CF Sprayer | Sprays Construction Foam. It can be recharged in a crafting table using CF pellets. | |
| Lathing Tool | Is needed to use the Turning Table. | |
| Wooden Turning Blank | Wooden version of the Iron Turning Blank. Can be used in the Turning Table but is useless currently. | |
| Iron Turning Blank | Material to craft the Diamond Drill and the Mining Laser.
For more information see Turning Table. |
Electric[edit]
Electric tools use energy instead of durability. They need recharging when they run out of energy, but they never wear out.
| Name | Recipe IC2 experimental | Description |
|---|---|---|
| Small Power Unit | Used to craft Electric Hoe, Electric Wrench and Electric Treetap. | |
| Power Unit | Used to craft Mining Drill and Chainsaw. | |
| Mining Drill | Electric pickaxe + shovel which is faster than a pickaxe and shovel. | |
| Diamond Drill | Upgraded mining drill which is faster and can break obsidian at a faster speed. | |
| Iridium Drill | Upgraded mining drill which is faster and can break obsidian at a faster speed. | |
| Chainsaw | More efficient electric axe with the plus of being an effective mob stopper. Since 1.70, the Chainsaw now also works as shears. Just right-click on a sheep. The same goes with grass or anything else you could shear with normal shears.... Cheers. | |
| Electric Wrench | Like a Wrench, right-clicking on a machine with an electric wrench removes it. Post 1.46v, electric wrench's toggle ability has a 100% chance to remove the machine. Tool is toggled by holding the "M" key and right clicking. | |
| Nano Saber | Sword that deals 20 damage when charged. | |
| Electric Treetap | Treetap which uses EU. | |
| Mining Laser | Multipurpose laser which instantly breaks blocks. | |
| Electric Hoe | Hoe which uses EU. | |
| OD Scanner | The OD Scanner (Ore Density Scanner) is a tool that helps the player determine a relative amount of valuable resources. The OD Scanner can also be inserted into a Miner to give it a mining area of 5x5. | |
| OV Scanner | The OV Scanner (Ore Value Scanner) is the improved version of the OD Scanner. This device not only calculates how much ore there is in the scanned area, but outputs its value based on how valuable the ores are. The OV Scanner can also be inserted into a Miner to increase the Miner's mining area from 5x5 to 9x9. |
Agriculture[edit]
IC2 adds new capabilities in the field of agriculture as well.
| Name | Recipe IC2 experimental | Description |
|---|---|---|
| Crops | Necessary for using the IC2 agriculture system. | |
| Cropnalyzer | Used to scan seed bags to identify the properties of the plant, such as the plant type, its tier, and its growth, gain, and resistance ratings. | |
| Fertilizer | Used to speed up the growth of plants. Bonemeal by itself does not work on IC2 plants. |
| |||||||||||||||||||||||||||||||||||||||||||||||||||||||||||||||||||||||||||||||||||||||||||||||||||||||||||||||||||||||||||||||||||||||||||||||||||||||||||||||||||||||||||||||||||||||||||||||||||||||||||||||||||||||||||||||||||||||||||||||||||||||||||||