Tutorial:First Steps
The tutorial is regularly updated, you can see the first version of it here. Whilst waiting for a corrected version, you can download the last unfinished version here: First Steps in the IndustrialCraft mod for Minecraft V0.5.pdf (texture pack used: Soartex)
Basics steps in a new world[edit]
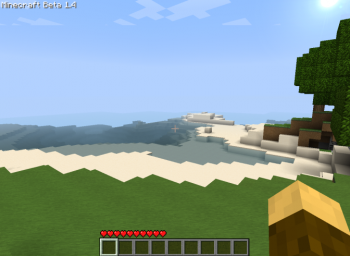
Now that you have downloaded and installed the mod and generated a new map, you really don’t know where to begin. Like all other maps you begin in, gather some wood, then some cobblestone and coal and build a little house (or a cave if you wish) for your first night.
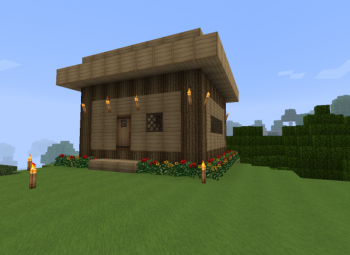
Here is mine with some flowers. Having a pretty house is always a plus, even if it’s just for you, and I can easily expand it.
Beware of the mobs if you are not playing in Peaceful mode, the creepers can blow up what you built. If you want to, use some torches to light the area.
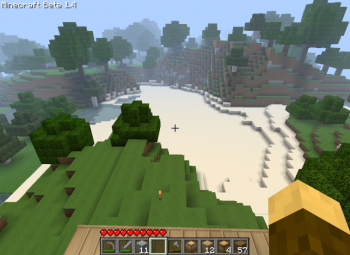
Keep in mind you will need a lot of room for your industry. Try to get a good spot with a lot of space not too far away, like that sand plain I can see from my roof (you will also need lots of sand for other purposes). Don’t forget to add some chests and a bed in your little place.
Nothing new here, but you must begin with a good base if you want to go further. The next part will introduce some new things.
First Ingredients and Machines[edit]
You now have a little base with four walls, a roof, some chests, a bed, a furnace, and a crafting table, but you want more new stuff. Now, you need to gather Rubber. You will need a lot of lumber to build our first machine, and a basic generator: 34 logs precisely. However, you should take more to use as fuel.
Can you smell the fresh air of new toys? Use 5 planks to create a Treetap. You will need 5 tree taps total, one for extracting Sticky Resin and four for crafting an Extractor, but wait until later to make the other four to save space.
Now, extract 6 Sticky Resin from the rubber trees. Rubber trees are somewhat random, but I can tell you they're most abundant in Swamp biomes and they never grow in Desert biomes.
For now drop that into a chest, and gather torches, pickaxes, and food, for you will have to go to the center of the earth! The second thing you must gather is Redstone, that next-to useless red powder you have in astronomical quantity is the base of industrial electricity. Of course, you will need an iron pickaxe to extract it, but you must be really unlucky if you don’t find any along the way. Also, you should mine any Copper or Tin you see.
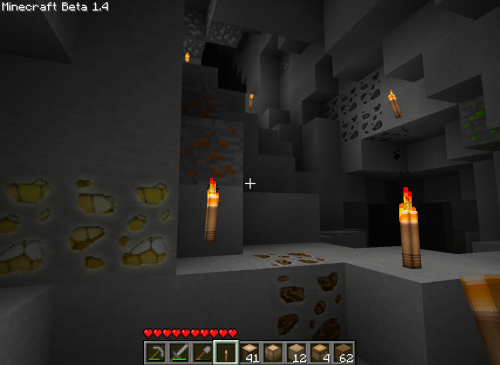
Here is a screenshot of a natural cave where you can see all but three types of ores you can gather, from left to right:
- Gold. Its value is much higher in IC, especially in its dust form. It's involved in many mid-tech machines. You should mine it - it will become more useful in the future
- Tin. It is required for many things, but it is fairly common.
- Copper. Like Tin, it is required for most things in IC, such as cables, so you must gather a good stock in the beginning. Like Tin, there's plenty in the world.
- Iron. Every machine uses Iron, so it will be the ore you must hunt the most. You will be always short of Iron.
- Coal. It's value was increased, so if you want torches or furnace fuel, use Charcoal. Use Coal for other, more important things. Coal Dust is used to build Solar Collectors, it's a more efficient Fuel, and lots of things like the nano-suit use it. In others worlds, you might not care about Coal, but in IC, its invaluable.
- Uranium. You will need it to power your future nuclear reactor or to craft a nuke to blow up a mountain. Besides that, they are not involved in other recipes. They are rarer than other ores, but can be found at every layer. You will need an iron pickaxe to gather them.
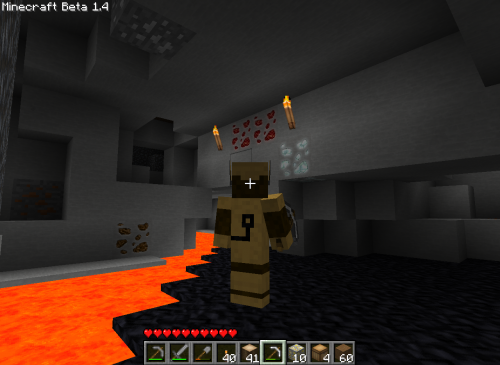
Further away in the cave:
- Redstone: Good news: it’s much faster to mine with IC (Alblaka fixed the bug Mojang left); it will not take you ages, like I said in the beginning of that part. The Redstone is involved in most parts of IC crafting, especially the basic ones. We need some for crafting the first part of a machine, and later, other things.
- Diamond: Ha the diamond, everybody runs after them, try to get 3 of them and keep them in a chest, we will craft something awesome with them. You should know that you can produce diamonds with coal, I’ll show you later. There is something else to do with them other than waste them in tools or one-use armor.
- It's not shown here, but you know it: the Lapis-lazuli. Involved in the more advanced machines, you need BLOCKS of lapis to craft them, so if you find them now, just keep them until you have need of them
-Lava: I know, it’s not a mineable resource, but it’s used to power one of the most powerful generators: the Geothermal Generator. Keep in mind where are some lava lakes are to go back to later.
-Obsidian: you need some Obsidian to go in the Nether and because you will need some glowing dust for mid-tech machines (alternatively Glowstone Dust can be crafted using Gold Dust and Redstone Dust). Obsidian is also a part of the process of producing Diamonds out of Coal.
You know what you can gather under the surface, continue to collect some resources and go back to your base for the next step.
Now you’re safe at your base, you could smelt some of the ore you gathered from your trip, but be patient and don’t smelt any more ore than you must. Soon you will be able to craft an incredible machine: the Macerator, which will give you 2 ore dust from one ore and other stuff I'll explain later. However, before you build a Macerator, you need an Extractor and a Generator, but to build them, you must craft some Electric circuits, which need some Cables. Yeah, it seems complicated, and it is. That's why I'm writing a little tutorial just for you.
Iron Furnace[edit]
One of the first IC2-related things you'll probably want to create is an Iron Furnace. This is an upgrade over the regular Furnace from vanilla Minecraft (a.k.a. Stone Furnace by IC2 users). It operates faster and uses fuel more efficiently. Click on the link for details. There are two recipes available, but you should go with the one that uses less Iron:
All you need for this is five Iron Ore and one piece of Charcoal (or several pieces of Wood) for fuel. Smelt five Iron Ore into ingots in your regular stone Furnace, then pick up your Furnace and use it to craft an Iron Furnace as shown above. An Iron Furnace is an important part of making an Electro Furnace later, so making it now lets you use it until we get to that step.
Extractor[edit]
You can optionally exchange the Extractor with the Macerator listed below if you have several Rubber trees nearby.
For this project you'll need:
- 6 Sticky Resin
- 3 Copper Ore
- 9 Iron Ore
- 2 Redstone
You remember the Sticky Resin you kept in the chest? Take it, and your Copper Ingots too. We will create some Copper Cables. You see it takes 6 Rubber and 3 Copper Ingots for every 6 cables. Later you will need a large amount of them, but first you want just enough to make an Extractor. Once you have that, you can make Rubber much more efficiently.
Smelt your 6 Sticky Resin in any furnace to get 6 Rubber.
Prepare one batch of 6 cables using the recipe that uses 6 Rubber and 3 Copper Ingots.
Smelt 9 Iron Ore into Iron Ingots, and then smelt the Iron Ingots again to get 9 Refined Iron.
Now we will craft our first Electronic Circuit. You need 6 cables, 2 Redstone, and one Refined Iron. Like all other things on that page, it’s the base of the industry, so you'll be using it a lot.
Next we must craft the recipe of all machines: the Machine Block.
Just take 8 Refined Iron and draw a box with them in the craft interface.
FINALLY we can craft our first machine. We just need 4 more tree taps. Take 20 planks and craft them. After that, put the 4 tree taps, the machine block, and the Electronic Circuit on the crafting bench and TADA you can plant your Extractor where you want. Be careful though: you can’t remove any machine by hand. It will be destroyed if you do. You will need a special tool made with a new metal. We will see that later.
Ok, you have your Extractor, but how does it work? You need ELECTRICITY, made by a GENERATOR. Now you know what we need to make next.
Generator[edit]
For this project you'll need:
- 2 Sticky Resin (using Extractor)
- 3 Copper Ore
- 8 Tin Ore
- 4 Redstone
- 8 Cobblestone
- 8 Iron Ore
There are 2 ways to craft a Generator:
First, you can use a RE Battery, a Machine Block and a Furnace (8 Iron needed).
Or, you can use a RE Battery, 3 Refined Iron and an Iron Furnace (8 Iron needed).
Both recipes cost the same amount of Iron overall, but the second recipe requires less smelting. Do no use your existing Iron Furnace. You will need it later, and you will need something to smelt with in the meantime.
I know you are asking yourself: How do I create an RE Battery? Let's do that now!
1 Cable, 4 Tin and 2 Redstone. Easy, no?
Time to remember that recipe.
You need to assemble two Rechargeable Batteries. One is needed to build the Generator, and the second is needed to power your Extractor.
But wait! You just used your last Cable. It’s time to craft more, but this time we will not waste great quantities of resin. Go back in front of your Extractor, put 2 Sticky Resin into the top hole, and put some Redstone into the bottom hole (pure Redstone is like a 1 use low-efficient battery, but it works). With the Extractor, you get 3 Rubber for each Sticky Resin instead of just 1. Next smelt 3 Copper Ore into Copper Ingots. Craft a batch of 6 Insulated Copper Cables with your Rubber.
Lastly, smelt 8 Tin Ore into Tin Ingots.
Now you can assemble your two RE Batteries.
Next create a regular Furnace and follow one of the two recipes above to craft the Generator.
Don't place the generator next to anything; I’ll explain why in the wiring section. Put your empty battery in the upper slot and put some (char)coal or other things that burn in the lower slot. You will need 2.5 (char)coal to fill up a single battery. I usually don't worry about completely filling my battery at this point. Feel free to make more RE Batteries. However, we'll be adding a cable shortly which will make the batteries unnecessary.
The empty Rechargeable Batteries can stack up to 16, but the fully charged ones can’t be stacked. It’s the drawback of the re-usability. You can place a chest right next to the generator and it will gather your full batteries.
For now, you can use a partially or fully charged battery to power the Extractor. This will give you a lot more Rubber for making cables, which in turn will make it easier to build other machines.
Macerator[edit]
For this project you'll need:
- 3 Flint
- 2 Cobblestone
- 9 Iron Ore
- 2 Sticky Resin (using Extractor)
- 3 Copper Ore
- 2 Redstone
And now, ladies and gentlemen, the moment you’ve all been waiting for: the incredible MACERATOR which can double your mining productivity. Craft another electronic circuit, another Machine Block and collect the needed Cobblestone and Flint. If you didn't already know, you occasionally get Flint when you break Gravel blocks.
Put your ore in the upper slot, and a battery in the bottom one, and wait for 2 dust to magically appear from one ore, then, put that dust in an Electro Furnace (actually any furnace) and you will have 2 ingots for one ore. What, you don’t know how to create an Electro Furnace? It will be our next step in this long section.
You must know that the Macerator can do more things than create dust from ore. It can create dust from coal too. The coal dust is used in a lot of things. The Macerator can make Flint out of Gravel. This may not seem so, but it’s really useful. It can also make Cobblestone from smooth Stone, and incredibly, make SAND out of Cobblestone. Cool, isn’t it?
Note: It's easier to store ores and Macerate as needed since dusts use up twice the chest space.
Electro Furnace[edit]
For this project you'll need:
- 1 Iron Furnace (existing)
- 2 Sticky Resin (using Extractor)
- 2 Copper Ore (using Macerator)
- 4 Redstone
The Electro Furnace will allow you to smelt using electricity instead of using Char(Coal). This is where you'll say goodbye to your Iron Furnace.
I know, it’s another circuit to craft, but I warned you it would be everywhere.
Like the other furnaces, you put the stuff you want to heat in the upper part, and a battery in the bottom. It's 12.5% faster than the Iron Furnace, and there is no energy waste. If there is nothing left in the top, it immediately stops consuming energy.
You now have 1 Extractor, 1 Generator, 1 Macerator and 1 Electro Furnace. It’s not much. If you think you can use more things, you're right.
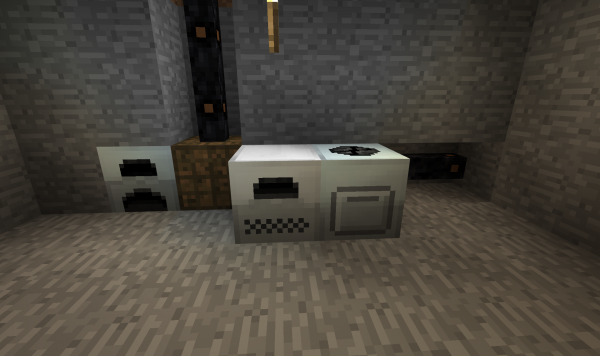
In this image you can see the BatBox, with the Generator to its left, and a length of copper cable four squares long to its right. Up to four machines can then be placed directly in front of the cable. Going up from the BatBox is a four square long copper cable that connects to a second BatBox, and then from there to solar panels using tin cables.
BatBox[edit]
Adding a BatBox will provide a much larger energy storage buffer for your Generator and therefore simplify its operation. You'll need three Rechargeable Batteries to build it.
Run Copper Cable from the output face of the BatBox to your machines. Don't make the cable longer than four segments to avoid wasting energy. Once you have the machines connected to the BatBox via cable, you won't need to use batteries to run them anymore. Place your Generator on the opposite side of the BatBox from the Output facing. If you find you need to change the direction of the BatBox's output facing, you'll need to look at The Power of Bronze section below for information on how to make a Bronze Wrench.
BatBoxes can be daisy-chained to provide more EU storage. They can also be used to break up lengths of cable avoid energy loss. The maximum length you can have of Copper Cable is four before it loses 1 EU/t. By placing a BatBox at the end of four segments of Copper Cable, you can then go another four segments without energy loss. Keep these ideas in mind as you expand.
Solar Panel[edit]
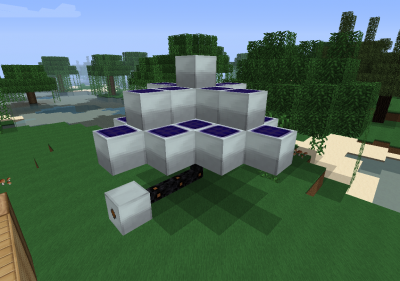
Next you can add a Solar Panel to reduce your Coal/Charcoal usage. Keep in mind that Solar Panels require an unobstructed view of the sky and they only work in the daytime.
Connect your Solar Panel (with or without a cable) to the top of the BatBox. Now your BatBox will receive a constant trickle from the Solar Panel and can also receive energy from your Generator. Don't make long cables. If your cable to your Solar Generator is more than four segments long, you won't get any power since Copper Cable loses 1 EU for every five segments, rounded down.
You can also connect Solar Panels using Tin Cables. However, Tin Cables cannot be insulated.
Etcetera[edit]
For more production, craft 1 more Generator, 2 Macerators and 2 Electro Furnaces, and all will be faster.
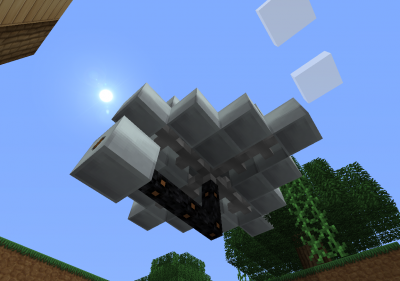
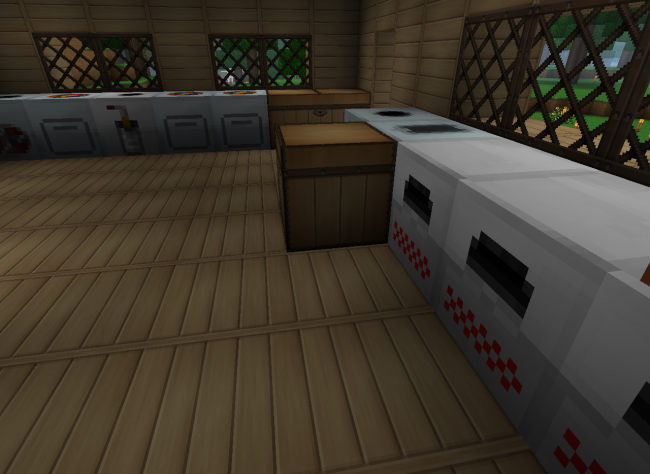
You can see the inside of my little home, 3 Macerators, 3 Electro Furnaces, 1 Extractor, 1 Generator in view and 2 unknown machines. You can see I’ve put a chest in front of my generator to gather the charged batteries when I stalk outdoors.
The Power of Bronze[edit]
Now you have a small, but fully functional base that allows you to get twice as many ingots for every mining run. Unfortunately, you can’t move any of the machines or you'll have to rebuild it from scrap.
Now we will craft the engi-friend tool: the Bronze Wrench. The Bronze Wrench is made from BRONZE. I can hear your little voice: "A new ore I haven't found? How can it be so rare?" YOU FOOL, Bronze is made from COPPER + TIN.
You need to use a Macerator to grind Copper and Tin into dust, then take the dust from those 2 ores and mix them in a 3:1 ratio (location in the crafting grid doesn’t matter). This gives you Bronze dust. To smelt Bronze Dust into ingots, put them in a furnace.
You'll need six Bronze Ingots to make a Bronze Wrench:
The Recipes and Resources page has a list of all available Bronze tools.
Iron!
A very important topic. Every machine is based on Iron. It also costs a lot of Iron for minecarts and rails. But we have bronze! Why we can't use bronze for rails?
The use of a Bronze Wrench is incredibly easy: just right click on the machine you want to remove; be careful, if the machine wasn’t empty you will lose everything it contained. And sometimes you can make a mistake, and you can’t retrieve the machine you craft, its unlucky, but it happens. Only 4 machines can be retrieved safely every time: MFE Unit, HV Transformer, Terraformer and MINERs.
Also, you can craft armor from Bronze.


