Difference between revisions of "Template:Grid/Centrifuge"
Jump to navigation
Jump to search
m (Bumped all the numbers up 5 pixels) |
m (Oops) |
||
| (26 intermediate revisions by 2 users not shown) | |||
| Line 1: | Line 1: | ||
<div style="float:{{#if:{{{float|}}}|{{{float}}}|left}};"><div style="left:0px; top:0px; width:294px; height:157px; position:relative;"> | |||
<div style="left:0px; top:0px; width: | <div style="left:0px; top:0px; width:294px; height:157px; position:absolute;">[[Image:Thermal_Centrifuge_GUI.png|294px|link=|alt=]]</div> | ||
<div style="width:294px; text-align:center; display:inline-block; top:8px; font-family:Minecraftia; font-size:14px; position:relative;">[[Thermal Centrifuge]]</div> | |||
<div style="left:26px; top:75px; width:14px; height:26px; position:absolute;">[[File:Power Bolt.png|14px|link=|alt=]]</div> | |||
{{#if:{{{ | {{#if:{{{Heat|{{{heat|}}}}}}|<div class="tooltip" style="left:132px; top:119px; width:14px; height:26px; position:absolute;" title="{{{Heat|{{{heat}}}}}} Heat Required">[[File:Thermal_Centrifuge_GUI Heat.png|40px|link=|alt=]]</div>}} | ||
{{#if:{{{Top|}}}|<div style="left:18px; top:33px; width:32px; height:32px; position:absolute;"><!-- | |||
-->{{#if:{{{Top-image|}}}|[[Category:Crafting Grids in need of fixing]]}}<!-- | |||
-->{{Gc|{{#if:{{{Top-tooltip|}}}|[{{{Top-tooltip}}}]}}{{{Top}}}{{#if:{{{Top-link|}}}|~{{{Top-link}}}}}}} | |||
</div>}} | </div>}} | ||
{{#if:{{{Bottom|}}}|<div style="left:18px; top:111px; width:32px; height:32px; position:absolute;"><!-- | |||
{{#if:{{{Bottom|}}}|<div style="left:18px; top: | -->{{#if:{{{Bottom-image|}}}|[[Category:Crafting Grids in need of fixing]]}}<!-- | ||
-->{{Gc|{{#if:{{{Bottom-tooltip|}}}|[{{{Bottom-tooltip}}}]}}{{{Bottom}}}{{#if:{{{Bottom-link|}}}|~{{{Bottom-link}}}}}}} | |||
</div>}} | </div>}} | ||
{{#if:{{{IA|}}}| | |||
<div style="left:30px; top:57px; width:16px; height:16px; position:absolute; overflow:hidden;"> | |||
<div style="left:{{#expr:-16 * (floor({{{IA|}}}/10) - 1)}}px; top:-7px; width:160px; height:16px; position:absolute;"> | |||
[[Image:GridNumbersCSS.png|160px|link={{#if:{{{Top-link|}}}|{{{Top-link}}}|{{{Top}}}}}|alt={{{Top}}}]] | |||
</div> | |||
</div> | |||
<div style="left:42px; top:57px; width:16px; height:16px; position:absolute; overflow:hidden;"> | |||
<div style="left:{{#expr:-16 * (({{{IA|}}} - 1) mod 10)}}px; top:-7px; width:160px; height:16px; position:absolute;"> | |||
[[Image:GridNumbersCSS.png|160px|link={{#if:{{{Top-link|}}}|{{{Top-link}}}|{{{Top}}}}}|alt={{{Top}}}]] | |||
</div> | |||
</div> | |||
}} | |||
{{#if:{{{Output1|}}}|<div style="left:244px; top:33px; width:32px; height:32px; position:absolute;"> | |||
{{#if:{{{Output1|}}}|<div style="left:244px; top: | {{#if:{{{Output1-image|}}}|[[Category:Crafting Grids in need of fixing]]}} | ||
{{Gc|{{#if:{{{Output1-tooltip|}}}|[{{{Output1-tooltip}}}]}}{{{Output1}}}{{#if:{{{Output1-link|}}}|~{{{Output1-link}}}}}}} | |||
</div>}} | </div>}} | ||
{{#if:{{{Output2|}}}|<div style="left:244px; top: | {{#if:{{{Output2|}}}|<div style="left:244px; top:69px; width:32px; height:32px; position:absolute;"> | ||
{{#if:{{{Output2-image|}}}|[[Category:Crafting Grids in need of fixing]]}} | |||
{{Gc|{{#if:{{{Output2-tooltip|}}}|[{{{Output2-tooltip}}}]}}{{{Output2}}}{{#if:{{{Output2-link|}}}|~{{{Output2-link}}}}}}} | |||
</div>}} | </div>}} | ||
{{#if:{{{Output3|}}}|<div style="left:244px; top: | {{#if:{{{Output3|}}}|<div style="left:244px; top:105px; width:32px; height:32px; position:absolute;"> | ||
{{#if:{{{Output3-image|}}}|[[Category:Crafting Grids in need of fixing]]}} | |||
{{Gc|{{#if:{{{Output3-tooltip|}}}|[{{{Output3-tooltip}}}]}}{{{Output3}}}{{#if:{{{Output3-link|}}}|~{{{Output3-link}}}}}}} | |||
</div>}} | </div>}} | ||
{{#if:{{{OA1|}}}| | {{#if:{{{OA1|}}}| | ||
<div style="left:256px; top: | <div style="left:256px; top:51px; width:16px; height:16px; position:absolute; overflow:hidden;"> | ||
<div style="left:{{#expr:-16 * (floor({{{OA1|}}}/10) - 1)}}px; top:- | <div style="left:{{#expr:-16 * (floor({{{OA1|}}}/10) - 1)}}px; top:-7px; width:160px; height:16px; position:absolute;"> | ||
[[Image:GridNumbersCSS.png|160px|link={{#if:{{{Output1-link|}}}|{{{Output1-link}}}|{{{Output1}}}}}|alt={{{Output1}}}]] | [[Image:GridNumbersCSS.png|160px|link={{#if:{{{Output1-link|}}}|{{{Output1-link}}}|{{{Output1}}}}}|alt={{{Output1}}}]] | ||
</div> | </div> | ||
</div> | </div> | ||
<div style="left:268px; top: | <div style="left:268px; top:51px; width:16px; height:16px; position:absolute; overflow:hidden;"> | ||
<div style="left:{{#expr:-16 * (({{{OA1|}}} - 1) mod 10)}}px; top:- | <div style="left:{{#expr:-16 * (({{{OA1|}}} - 1) mod 10)}}px; top:-7px; width:160px; height:16px; position:absolute;"> | ||
[[Image:GridNumbersCSS.png|160px|link={{#if:{{{Output1-link|}}}|{{{Output1-link}}}|{{{Output1}}}}}|alt={{{Output1}}}]] | [[Image:GridNumbersCSS.png|160px|link={{#if:{{{Output1-link|}}}|{{{Output1-link}}}|{{{Output1}}}}}|alt={{{Output1}}}]] | ||
</div> | </div> | ||
| Line 41: | Line 59: | ||
{{#if:{{{OA2|}}}| | {{#if:{{{OA2|}}}| | ||
<div style="left:256px; top: | <div style="left:256px; top:87px; width:16px; height:16px; position:absolute; overflow:hidden;"> | ||
<div style="left:{{#expr:-16 * (floor({{{OA2|}}}/10) - 1)}}px; top:- | <div style="left:{{#expr:-16 * (floor({{{OA2|}}}/10) - 1)}}px; top:-7px; width:160px; height:16px; position:absolute;"> | ||
[[Image:GridNumbersCSS.png|160px|link={{#if:{{{Output2-link|}}}|{{{Output2-link}}}|{{{Output2}}}}}|alt={{{Output2}}}]] | [[Image:GridNumbersCSS.png|160px|link={{#if:{{{Output2-link|}}}|{{{Output2-link}}}|{{{Output2}}}}}|alt={{{Output2}}}]] | ||
</div> | </div> | ||
</div> | </div> | ||
<div style="left:268px; top: | <div style="left:268px; top:87px; width:16px; height:16px; position:absolute; overflow:hidden;"> | ||
<div style="left:{{#expr:-16 * (({{{OA2|}}} - 1) mod 10)}}px; top:- | <div style="left:{{#expr:-16 * (({{{OA2|}}} - 1) mod 10)}}px; top:-7px; width:160px; height:16px; position:absolute;"> | ||
[[Image:GridNumbersCSS.png|160px|link={{#if:{{{Output2-link|}}}|{{{Output2-link}}}|{{{Output2}}}}}|alt={{{Output2}}}]] | [[Image:GridNumbersCSS.png|160px|link={{#if:{{{Output2-link|}}}|{{{Output2-link}}}|{{{Output2}}}}}|alt={{{Output2}}}]] | ||
</div> | </div> | ||
| Line 54: | Line 72: | ||
{{#if:{{{OA3|}}}| | {{#if:{{{OA3|}}}| | ||
<div style="left:256px; top: | <div style="left:256px; top:122px; width:16px; height:16px; position:absolute; overflow:hidden;"> | ||
<div style="left:{{#expr:-16 * (floor({{{OA3|}}}/10) - 1)}}px; top:- | <div style="left:{{#expr:-16 * (floor({{{OA3|}}}/10) - 1)}}px; top:-7px; width:160px; height:16px; position:absolute;"> | ||
[[Image:GridNumbersCSS.png|160px|link={{#if:{{{Output3-link|}}}|{{{Output3-link}}}|{{{Output3}}}}}|alt={{{Output3}}}]] | [[Image:GridNumbersCSS.png|160px|link={{#if:{{{Output3-link|}}}|{{{Output3-link}}}|{{{Output3}}}}}|alt={{{Output3}}}]] | ||
</div> | </div> | ||
</div> | </div> | ||
<div style="left:268px; top: | <div style="left:268px; top:122px; width:16px; height:16px; position:absolute; overflow:hidden;"> | ||
<div style="left:{{#expr:-16 * (({{{OA3|}}} - 1) mod 10)}}px; top:- | <div style="left:{{#expr:-16 * (({{{OA3|}}} - 1) mod 10)}}px; top:-7px; width:160px; height:16px; position:absolute;"> | ||
[[Image:GridNumbersCSS.png|160px|link={{#if:{{{Output3-link|}}}|{{{Output3-link}}}|{{{Output3}}}}}|alt={{{Output3}}}]] | [[Image:GridNumbersCSS.png|160px|link={{#if:{{{Output3-link|}}}|{{{Output3-link}}}|{{{Output3}}}}}|alt={{{Output3}}}]] | ||
</div> | </div> | ||
| Line 67: | Line 85: | ||
</div> | </div> | ||
</div> | </div> | ||
{{#if:{{{nobreak|}}}||{{-}}}}< | {{#if:{{{nobreak|}}}||{{-}}}}<noinclude><!-- | ||
Just testing, don't mind me: | |||
< | |||
{{Grid/Centrifuge | {{Grid/Centrifuge | ||
|Top=Missing Texture | |Top=Missing Texture | ||
|IA=4 | |||
|Heat=150 | |||
|Bottom=Missing Texture | |Bottom=Missing Texture | ||
|Output1=Missing Texture|OA1=32 | |Output1=Missing Texture|OA1=32 | ||
| Line 79: | Line 96: | ||
|Output3=Missing Texture|OA3=5 | |Output3=Missing Texture|OA3=5 | ||
}} | }} | ||
-->{{Documentation}} | |||
[[Category:Updated Template]] | |||
</noinclude> | </noinclude> | ||
Latest revision as of 13:32, 22 March 2015
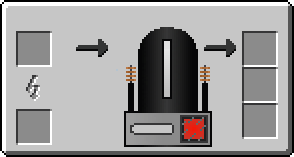
This template is used to create a machine GUI that looks similar to the Thermal Centrifuge's GUI screen.
Usage[edit]
{{Grid/Centrifuge
|Top=Purified Crushed Uranium Ore
|Bottom=RE Battery (Charged)
|Output1=Uranium 238
|OA1=5
|Output2=Tiny Pile of Uranium 235
|OA2=2
|Output3=Stone Dust
|Heat=3000
}}
makes:
Additional Usage Information[edit]
Just like all other crafting templates,
- -link can be added to change where an item links to (such as Iron going to Non-IC Items)
- |IA= can be added after the input to increase the inputted items
- |OA1-3= can be added after the output to increase the products
Note[edit]
When uploading images for this, or any other template, (if they are missing) then the following standard is used:
Grid_item name.png -- A 32x32 image of the item as it appears in a player's inventory.
See also[edit]
{{Grid/Machine}}
The above documentation is transcluded from Template:Grid/Centrifuge/doc. (edit | history)