Difference between revisions of "Tutorial:First Steps"
(SPAG; Wikification; Fixing broken recipes;) |
Tag: Undo |
||
| (204 intermediate revisions by 52 users not shown) | |||
| Line 1: | Line 1: | ||
< | {{Experimental}} | ||
This tutorial is regularly updated. You can see the first version of it here: <span class="pops">[http://www.mediafire.com/?j9gem0c4laoeyb5 First Steps in the IndustrialCraft mod for Minecraft V0.5.pdf]</span> | |||
(texture pack used: <span class="pops">[http://www.minecraftforum.net/viewtopic.php?f=1021&t=163329&sid=cdc70e1f885922f1354f76755c7c868d Soartex]</span>). | |||
'''Important: This tutorial is made for [[v2.X]] of IndustrialCraft².''' | |||
== Before you begin == | |||
== | If this is your first time playing Minecraft, don't be that hurry to try mods. IC2 is a mod (modification), which adds new things and changes some vanilla behaviors, making it different from vanilla Minecraft. Try vanilla survival to get a taste of what vanilla is like before you begin on your IC2 survival. In this way, you'll get a clear understanding of what IC2 adds to Minecraft, and what's the difference. | ||
If this is your first time playing with a mod, make sure that you have installed IC2 correctly. IC2 is based on Forge API, which needs installing Forge. | |||
If this is your first time playing IC2, it is highly recommended to create a creative world and test things like how machines work, how to place down machines to orientate them correctly, and many more things. By doing this you can reduce the need for testing things in your survival world as there is a chance of messing things up. You don't want half an hour of your work turns into a hole in the ground, right? | |||
If you find something mentioned in this tutorial not working, there is a high chance that your IC2 version is too old. There is a low chance that this tutorial is wrong, and a lower chance that you have actually discovered a bug. | |||
In order to complete the IC2 tech tree, you will need at least tens of hours of gameplay. Don't expect that you can complete everything within a single day. | |||
== Basic steps in a new world == | |||
[[file:first_steps1.png |350x350px| link=|left]] | [[file:first_steps1.png |350x350px| link=|left]] | ||
<br/> <br/> <br/> <br/> <br/> | <br/> <br/> <br/> <br/> <br/> | ||
Now that you have downloaded and installed the mod and generated a new map, you really don't know where to begin. Like all other maps you begin in, gather some wood, then some cobblestone, and set up a base for your first night, just as how you would do in vanilla survival. | |||
[[file:first_steps2.png |350x350px| link=|left]] | [[file:first_steps2.png |350x350px| link=|left]] | ||
<br/> <br/> <br/> <br/> <br/> | |||
Here is | Here is an example of a base with some decorative flowers. In the first days, having an pretty base is not recommended, as it will be much easier to do this in late game. | ||
Beware of the mobs if you are not playing in | Beware of the mobs if you are not playing in Peaceful mode; the creepers can blow up what you built. Lighting up wherever you go with torches is always a good thing to do. | ||
<br/> <br/> <br/> <br/> <br/> | |||
[[file:first_steps3.png |350x350px| link=|right]] | [[file:first_steps3.png |350x350px| link=|right]] | ||
<br/> <br/> <br/> <br/> <br/> | <br/> <br/> <br/> <br/> <br/> | ||
Keep in mind you will need a lot of room for your industry. | Keep in mind that you will need a lot of room for your industry. Try to get a good spot with a lot of open space not too far away, like the sandy beach in the picture. Don’t forget to add some chests and a bed in your little place. Once you acquire stone tools, growing trees and wheat are essential if you don't want to travel long distances to get wood and food. | ||
Don’t forget to add some chests and a bed in your little place. | |||
In this tutorial, wood and cobblestone will not be included in the material list unless a great amount is needed because of their abundance and how easy it is to get them. | |||
Nothing new here, but | Nothing new here, but a good base is a good start. The next part will introduce some new things. | ||
<br/> <br/> <br/> <br/> <br/> | <br/> <br/> <br/> <br/> <br/> | ||
== First Ingredients and Machines == | == First Ingredients and Machines == | ||
Now, you have a little basic survival base. Want to plant crops in IC2 style? Sure! However, keep in mind that empty [[Crops]], which is the IC2 block to plant crops on, will grow [[Weed]] after some time and it can destroy all of your farmed crops. Weed can be removed by breaking and replacing the crop block, or with a [[Weeding Trowel]], which needs iron. However, the advantage of the IC2 crops is that you don't need to re-plant the wheat after harvesting it. | |||
Of course, you should till some soil near a water source and gather a crop to plant. Wheat is a good crop to plant as wheat seeds are fairly simple to get in early game. For the hydration of farmland, use a natural water source if you can to save the iron needed to craft a bucket. | |||
If you have decided to go with the IC2 crops, take some wood and create some sticks for [[Crops]]. | |||
{{Grid/Crafting Table | |||
|A1=|B1=|C1= | |||
|A2=Stick|B2=|C2=Stick | |||
|A3=Stick|B3=|C3=Stick | |||
|Output=Crops | |||
}} | |||
[[File:Rubber_tree_farm_demo.png|thumb|right|An example of a rubber farm consisted of 25 rubber trees. A farm with the size of this is enough to provide plenty of rubber as long as you don't build something like a huge rubber trampoline. Note that in this farm there is a 4 block gap between the trees.]] | |||
Take these, and place one on each block of farmland. Go get some Wheat seeds by punching grass and then plant them. When your wheat is ready to harvest, you can right-click to harvest it and wheat seedlings will remain, saving you from having to use more seeds to replant! There's a lot more you can do with crops in IC2, but this will help get you basic food to survive. | |||
Now, you need to gather [[Rubber]]. Rubber is produced by smelting [[Sticky Resin]] in a furnace, and sticky resin can be collected by right clicking a [[Resin Hole]] on a [[Rubber Tree]] with a [[Treetap]]. While your crops are growing, go to a forest or a swamp biome to find a [[Rubber Tree]]. Harvest the tree, and take at least 1 sapling back to your base. With that sapling you can start a rubber tree farm. 3 to 5 rubber trees are enough for now, but more will be always beneficial in the long term. So just plant the tree, destroy the leaves to get the sapling back, and continue on until you have around 20 trees. That should be enough in the long term. Also, start a manual birch tree farm, as you main source of wood. In the meantime, you should always harvest your wheat and craft them into bread, to prepare enough food for mining. Always keep a stack of logs and half a stack of charcoal in your chest if you can. | |||
{| | |||
{{Grid/Crafting Table | |||
|B1=Wooden Planks | |||
|A2=Wooden Planks|B2=Wooden Planks|C2=Wooden Planks | |||
|A3=Wooden Planks | |||
|Output=Treetap | |||
}} | |||
|} | |||
Use 5 Wooden Planks to craft a [[Treetap]]. You will need more of them later, but one is enough for now. It doesn't have to be oak wood planks that works, any wood plank (including some of the modded ones) should work, as long as it is registered as plankWood in the oredict. | |||
Now, extract 7 [[Sticky Resin]] from the [[Rubber Wood|Rubber Trees]]. You can leave the rubber in the furnace, as it is needed later. | |||
For now, gather torches, stone pickaxes, an iron pickaxe and food, for you will have to go to the center of the earth! The second thing you must gather is Redstone; that next-to useless red powder you will have in astronomical quantity is the base of industrial electricity. Of course, you will need an iron pickaxe to extract it, but you must have a bad spawn point if you don’t find any along the way. The iron pickaxe is a luxury by now, so only use it when it is really needed, like mining redstone ores. | |||
[[file:first_steps6.png |500px| link=|center]] | |||
Here is a screenshot of a natural cave where you can see all but three types of ores you can gather, from left to right: | |||
*Gold. It's much more useful in IC2 than it was in vanilla Minecraft, especially in its dust form. It's involved in many mid-tech machines. You should mine it - it will become more useful in the future. | |||
*[[Tin]]. It is required for many things, but it is fairly common. | |||
*[[Copper]]. Like Tin, it is required for most things in IC, such as [[cable]]s, so you must gather a good stock in the beginning. Like Tin, there's plenty in the world. | |||
*Iron. '''Every''' machine uses Iron, so it will be the ore you must hunt the most. You will be always short of Iron. | |||
*Coal. Its value was increased, so if you want torches or furnace fuel, use Charcoal. Use Coal for other, more important things. [[Dusts|Coal Dust]] is used to build [[Solar Panel|Solar Panels]]; it's a more efficient [[Fuel]], and lots of things like the [[Nano-Bodyarmor|nano-suit]] use it. In other worlds, you might not care about Coal, but in IC, it is valuable. | |||
[[file: | *[[Uranium]]. You will need it to power your future [[Nuclear Reactor|nuclear reactor]] or to craft a [[Secret:Nuke|nuke]] to blow up a mountain. Besides that, it is not involved in other recipes. It is rarer than other ores, but can be found at every layer. You will need an iron pickaxe to gather it. | ||
[[file:first_steps7.png |500px| link=|center]] | |||
Further away in the cave: | |||
*Redstone: Redstone is involved in most parts of IC crafting, especially the basic ones. We need some for crafting the first part of a machine, and later, other things. | |||
*Diamond: Ha, the diamond. Everybody runs after them. Only get 3 of them and keep them in a chest; leave the rest of the diamond ores. It is not beneficial to mine diamond ores without a fortune pickaxe unless it is really necessary. We will craft something awesome with them(Not the vanilla diamond pickaxe!). You should know that you can produce diamonds with coal. This will be shown later. There is something else to do with them other than wasting them in one-use tools or armor. | |||
*Lapis lazuli: Not shown here, but you know it. Involved in the more advanced machines, you need '''BLOCKS''' of lapis to craft them, so if you find it now, just keep it until you have a need to use it. | |||
*Lava: I know, it’s not a mineable resource, but it’s used to power one of the most powerful generators: the [[Geothermal Generator]]. Also, it can be used to create a nether portal without a diamond pickaxe. Keep in mind where some lava lakes are to go back to later. | |||
*[[Lead]]: Not shown here. You won't need lead for a quite a while, and even then only in small quantities. It's primary used in nuclear reactors, but is also used in intermediate batteries. | |||
*Obsidian: You need some Obsidian to go in the Nether because you will need some Glowstone Dust for mid-tech machines (alternatively, Glowstone Dust can be crafted using Gold Dust and Redstone Dust). Obsidian is also a part of the process of producing Diamonds out of Coal. | |||
Now you know what you can gather underground. To continue, you need to have the following materials: | |||
*27 Iron Ores | |||
*7 Rubbers | |||
*4 Redstone Dusts | |||
*3 [[Copper Ore]]s | |||
*3 [[Tin Ore]]s | |||
*3 Flint | |||
An alternate route is available: If you REALLY can't get that much iron but you are willing to spend 5 extra redstone dusts, you can save yourself 4 iron ore and a tin ore. HAYO! | |||
Now that you're safe at your base, smelt exactly 27 iron ore, 3 copper ore and 3 tin ore. | |||
For the alternate route: smelt exactly 19 iron ore, and 3 copper ore. Don't smelt the tin ore. | |||
Be patient and don't smelt any more ore than listed above. Soon you will be able to craft an incredible machine: the [[Macerator]], which will give you 2 crushed ores from one ore and other stuff which will be explained later. | |||
However, before you build a Macerator, you need basic crafting tools in IC2: The [[Forge Hammer]] and the [[Cutter]]. Grab 2 sticks and your freshly-smelted iron ingots to craft those tools. | |||
{| | |||
{{Grid/Crafting_Table | |||
|A1=|B1=Iron|C1=Iron | |||
|A2=Stick|B2=Stick|C2=Iron | |||
|A3=|B3=Iron|C3=Iron | |||
|Output=Forge_Hammer | |||
}} | |||
|{{Grid/Crafting_Table | |||
|A1=Iron|B1=Iron|C1= | |||
|A2=Iron|B2=Stick|C2=Stick | |||
|A3=Iron|B3=Iron|C3= | |||
|Output=Forge_Hammer | |||
}} | |||
|} | |||
{{Grid/Crafting Table | |||
|A1=Iron Plate|B1=|C1=Iron Plate | |||
|A2=|B2=Iron Plate|C2= | |||
|A3=Iron|B3=|C3=Iron | |||
|Output=Cutter|OA= | |||
}} | |||
Why are there two recipes for the forge hammer? Because it is SYMMETRICAL! HAYO! | |||
=== Your First Machine: the Macerator === | |||
Now that you have your tools ready, it's time to craft your first machine! Take ''all'' of your iron ingots and copper ingots, and craft all of them into iron and copper plates. | |||
{{Grid/Crafting_Table | |||
|A1=Iron|B1=Forge_Hammer|C1= | |||
|A2=|B2=|C2= | |||
|A3=|B3=|C3= | |||
|Output=Iron Plate | |||
}} | |||
{{Grid/Crafting_Table | |||
|A1=Copper|B1=Forge_Hammer|C1= | |||
|A2=|B2=|C2= | |||
|A3=|B3=|C3= | |||
|Output=Copper Plate | |||
}} | |||
Note that these recipes are shapeless, meaning that you can put the two ingredients anywhere you like, and you will still get the same output. Your crafting tool will not be consumed, but they will take 1 damage per use, and they ''will'' be consumed once they run out of durability, just like any other tool. | |||
You remember the rubber that you have smelted? Take it, and we will craft some [[Insulated Copper Cable]]s. Place the Copper Plates and the Cutter onto the crafting grid to cut them into Copper Wires. Then combine your wire with Rubber to insulate it. These recipes are also shapeless. | |||
{{Grid/Crafting Table | |||
|A2=Copper Plate|B2=Cutter | |||
|Output=Copper Cable|OA=2 | |||
}} | |||
{{Grid/Crafting Table | |||
|A1=Rubber|B1=Copper Cable | |||
|Output=Insulated Copper Cable | |||
}} | |||
Now we will craft our first [[Electronic Circuit]]. If you have followed this tutorial, all materials should be already prepared by now. Electronic Circuits are the basic circuit boards used in ''every'' machine. | |||
{{Grid/Crafting Table | |||
|A1=Insulated Copper Cable|B1=Insulated Copper Cable|C1=Insulated Copper Cable | |||
|A2=Redstone|B2=Iron Plate|C2=Redstone | |||
|A3=Insulated Copper Cable|B3=Insulated Copper Cable|C3=Insulated Copper Cable | |||
|Output=Electronic Circuit | |||
}} | |||
Next we must craft the recipe of all machines: the [[Basic Machine Casing]]. Just take 8 [[Iron Plate]]s and draw a box with them in the crafting interface. | |||
{{Grid/Crafting Table | |||
|A1=Iron Plate|B1=Iron Plate|C1=Iron Plate | |||
|A2=Iron Plate|C2=Iron Plate | |||
|A3=Iron Plate|B3=Iron Plate|C3=Iron Plate | |||
|Output=Machine | |||
}} | |||
FINALLY we can craft our first machine. We just need 3 more flint and 2 cobblestone. They should be lying somewhere in your chests or your inventory. Put the flints, the cobblestone, the Machine Casing, the Electronic Circuit on the crafting table and '''TADA'''! | |||
{{Grid/Crafting Table | |||
|A1=Flint|B1=Flint|C1=Flint | |||
|A2=Cobblestone|B2=Machine|C2=Cobblestone | |||
|B3=Electronic Circuit | |||
|Output=Macerator | |||
}} | |||
And now, ladies and gentlemen, the moment you've all been waiting for: the incredible '''[[Macerator|MACERATOR]]''' which can double your mining productivity. You placed down the Macerator, put your ores into it, but you are scratching your head thinking WHY IS THIS THING NOT WORKING? Because to use it, you need [[EU|ELECTRICITY]], made by a [[generator|GENERATOR]]. | |||
----- | |||
'''Alternate route''' | |||
Still remember there is an alternate route? This is where things will start to be a little different. Skip this section if you have smelted 27 iron ores at the beginning. | |||
What should you do with the 4 Iron Ores that you didn't smelt before? Macerate it! But power the Macerator with what? Redstone Dust! Redstone Dust can provide the Macerator (or any other machine) with 800 EU. Put your 4 iron ore into the top left slot of the Macerator, and then a single piece of Redstone Dust on the bottom left slot. BOOM! The Macerator magically starts to work! By hovering your mouse over the lightning icon, you can see how many EU the machine currently has. If a machine runs out of EU, it will stop working. When there is less than 400 EU, put another piece of Redstone Dust into the machine to continue powering it. After your Iron Ores are well-macerated, put 2 Iin Ores into it and repeat the same process. After all of them are complete, you should use 5 Redstone Dusts. | |||
Now you have 8 Crushed Iron Ore and 4 Crushed Tin Ore, throw them into a Furnace to smelt them. The magic appears: each Crushed Ore is smelted into an ingot! You've got double the ingots out of a single ore block! Awesome! | |||
Take Iron Ore as an example here. This works with any other ore generated in the Overworld. | |||
{{Grid/Machine | |||
|Type=Macerator | |||
|Top=Iron Ore | |||
|Output=Crushed Iron Ore | |||
|OA=2}} | |||
- | ----- | ||
=== Generator === | |||
Before making the [[Generator]], you also need to craft some items. | |||
[[ | Take 3 Tin Ingots, first craft all of them into plates, them craft '''only 2''' of them into [[Tin Item Casing]]s. Crafting item casings is the same with other metals. Time to remember this recipe. | ||
{{Grid/Crafting Table | |||
|A1=Tin|B1=Forge Hammer | |||
|Output=Tin Plate | |||
}} | |||
{{Grid/Crafting Table | |||
|A1=Tin Plate|B1=Forge Hammer | |||
|OA=2|Output=Tin_Casing | |||
}} | |||
[[ | Craft the remaining [[Tin Plate]] into [[Tin Cable]]s. | ||
{{Grid/Crafting Table | |||
|A1=Tin Plate|B1=Cutter | |||
|OA=3|Output=Tin Cable | |||
}} | |||
Insulate ''one'' of the Tin Cables as you just need one now. | |||
{{Grid/Crafting Table | |||
|A1=Tin Cable|B1=Rubber | |||
|Output=Insulated Tin Cable | |||
}} | |||
[[ | Then craft a [[RE Battery]]. | ||
{{Grid/Crafting Table | |||
|A1=|B1=Insulated Tin Cable|C1= | |||
|A2=Tin_Casing|B2=Redstone|C2=Tin_Casing | |||
|A3=Tin_Casing|B3=Redstone|C3=Tin_Casing | |||
|Output=RE Battery | |||
}} | |||
There. Now you have crafted one of the main ingredients of the Generator. | |||
There are 2 ways to craft a [[Generator]], but both actually requires the same amount of raw materials. First, you can use a [[RE Battery]], a [[Basic Machine Casing]], and a Furnace. | |||
{{Grid/Crafting Table | {{Grid/Crafting Table | ||
| Line 123: | Line 277: | ||
}} | }} | ||
Or, you can use a [[RE Battery]], 3 [[Iron Plate]]s, and an [[Iron Furnace]]. | |||
{{Grid/Crafting Table | {{Grid/Crafting Table | ||
|A1=|B1=RE Battery|C1= | |A1=|B1=RE Battery|C1= | ||
|A2=|B2= | |A2=Iron Plate|B2=Iron Plate|C2=Iron Plate | ||
|A3=|B3=Iron Furnace|C3= | |A3=|B3=Iron Furnace|C3= | ||
|linkB2=|linkC2= | |linkB2=|linkC2= | ||
| Line 134: | Line 288: | ||
}} | }} | ||
The Iron Furnace is crafted as following: | |||
{{Grid/Crafting Table | |||
|A1=|B1=Iron Plate|C1= | |||
|A2=Iron Plate|B2=|C2=Iron Plate | |||
|A3=Iron Plate|B3=Furnace|C3=Iron Plate | |||
|Output=Iron Furnace | |||
}} | |||
Both recipes cost the same amount of [[Iron Plate]]s overall, so take your pick. | |||
Now you have got yourself a Generator. Place it next to the Macerator, and put Charcoal into the Generator to generate EU from it. Remember only to put in fuel when needing EU - otherwise precious EU is likely to get wasted. | |||
=== The Power of Bronze === | |||
Now you have a small base that allows you to get twice as many ingots for every mining run. Unfortunately, you can’t move any of the machines. If you mine them with pickaxes, they will only drop a machine casing. Then you'll have to rebuild it from scrap. | |||
You can craft an optional engi-friendly tool dedicated for moving and rotating machines: the [[Bronze Wrench]]. The Bronze Wrench is made from [[Bronze|BRONZE]]. Your little voice is saying: "''A new ore I haven't found? How can it be so rare?''" '''YOU FOOL''', [[Bronze]] is a man-made alloy that is made from '''COPPER and TIN'''. You need to use a Macerator to grind Copper and Tin Ingots into dusts, then take the dust and mix them in a 3:1 ratio. This Bronze Dust recipe is shapeless. Note that although you can ''create'' Bronze, there is no way in vanilla IC2 to separate those metals once they have been mixed. Think carefully before you do that! | |||
{{Grid/Crafting Table | |||
|B2=Copper Dust|B3=Copper Dust | |||
|C2=Copper Dust|C3=Tin Dust | |||
|Output=Bronze Dust|OA=4}} | |||
To smelt Bronze Dust into ingots, put them in a Furnace. | |||
{{Grid/Machine | |||
|Type=Electro Furnace | |||
|Top=Bronze Dust | |||
|Bottom=RE Battery (Charged) | |||
|Output=Bronze}} | |||
You'll need six Bronze Ingots to make a Bronze Wrench: | |||
{{Grid/Crafting Table | |||
|A1=Bronze|A2=Bronze | |||
|B2=Bronze|B3=Bronze | |||
|C1=Bronze|C2=Bronze | |||
|Output=Wrench | |||
|Output-link=Bronze Wrench}} | |||
Using a Bronze Wrench is incredibly easy: just right-click on a machine and its ''primary'' side will rotate to that face; shift-right-click to rotate it to the opposite side you clicked; right-click the same face a second time and the machine will be removed; be careful: In some versions of IC2, if the wrenched machine isn't empty, you will lose everything it contains. ''<s>And sometimes you can make a ''mistake'' (about a 20% chance of failure), and you can’t retrieve the machine you craft; it's unlucky, but it happens. Only 4 machines can be retrieved safely every time: [[MFE Unit]], [[HV Transformer]], [[Terraformer]] and '''[[Miner|MINERs]]'''. However, if you upgrade your wrench into an [[Electric Wrench]], and toggle it to loss-less mode (this mode removed since IC2 v2.3.222), you are guaranteed to get your machines back no matter what, at a cost of 9000 EU per operation.</s>'' Now there is a 100% success rate in IC2 Experimental with the [[Wrench]] and the [[Electric Wrench]], so feel free to crank away! But removing [[EU storage block]]s will cause them to lose 20% of their stored power. | |||
The Recipes and Resources page has a list of all available [[Recipes and Resources#Tools|Bronze tools]]. | |||
Bronze can also be used to craft [[Bronze Chestplate|Bronze armor]] as a replacement of Iron armor. It will not be introduced here. Click on the link for more information. | |||
Another important use for Bronze is to craft the [[Tool Box]]. 2 Tool Boxes are needed to craft the [[Metal Former]], which will be introduced in the next section. It is better to craft them now. | |||
Materials you need to craft 2 Tool Boxes: | |||
*6 copper dusts | |||
*2 tin dusts | |||
*2 chests | |||
First, mix the dusts to create Bronze. Then smelt them to get ingots. Remember how to craft item casings? You need to craft 10 [[Bronze Item Casing]]s. In case you have already forgotten them, they are shown below. | |||
{{Grid/Crafting Table | |||
|A1=Bronze|B1=Forge Hammer | |||
|Output=Bronze Plate | |||
}} | |||
{{Grid/Crafting Table | |||
|A1=Bronze Plate|B1=Forge Hammer | |||
|OA=2|Output=Bronze Item Casing | |||
}} | |||
Now to craft two Tool Boxes: | |||
{{Grid/Crafting Table | |||
|A1=Bronze Item Casing|B1=Chest|C1=Bronze Item Casing | |||
|A2=Bronze Item Casing|B2=Bronze Item Casing|C2=Bronze Item Casing | |||
|A3=|B3=|C3= | |||
|Output=Tool Box | |||
}} | |||
==== Other uses of Bronze ==== | |||
Besides the uses mentioned above, bronze can also be used as a replacement for Iron. | |||
{{Grid/Crafting Table | |||
|A1=Bronze|A2=Bronze|A3=Bronze | |||
|B2=Stick | |||
|C1=Bronze|C2=Bronze|C3=Bronze | |||
|Output=Rail | |||
|OA=8}} | |||
|{{Grid/Crafting Table | |||
|A1=Wooden Planks|B1=Wooden Planks|C1=Wooden Planks | |||
|A2=Cobblestone|B2=Bronze|C2=Cobblestone | |||
|A3=Cobblestone|B3=Redstone|C3=Cobblestone | |||
|Output=Piston | |||
}} | |||
Also, Bronze can be crafted into [[Recipes_and_Resources_(experimental)#Material_2|tools]] and [[Recipes_and_Resources_(experimental)#Material|armor]]. Bronze tools performs exactly the same like Iron tools, but their durability is 100 point higher than that of iron. Bronze armor is the same as Iron ones, with the only difference of names and textures. | |||
=== Metal Former === | |||
Worried about having to keep crafting [[Cutter]]s and [[Forge Hammer]]s? Wondering if there is a machine that can do all this crafting without tools? Perhaps it's time for you built a [[Metal Former]]. It can craft metal into Plates, Casings, Cables, and some other miscellaneous things. Most importantly, it can craft 3 [[Copper Cable]]s out of a single ingot, while with your crafting tools you can only craft 2. | |||
Materials needed: | |||
*15 Copper Ingots (8 Copper Ores) | |||
*12 Iron Ingots (6 Iron Ores) | |||
*6 Rubber | |||
*2 Redstone Dusts | |||
Craft all 15 Copper Ingots into Copper Cables, and insulate 6 of them. Then craft only 9 Iron into Plates. You'll need to make three Copper [[Coil]]s. | |||
{{Grid/Crafting Table | |||
|A1=Copper Cable|B1=Copper Cable|C1=Copper Cable | |||
|A2=Copper Cable|B2=Iron|C2=Copper Cable | |||
|A3=Copper Cable|B3=Copper Cable|C3=Copper Cable | |||
|Output=Coil | |||
}} | |||
Then craft an electronic circuit and a basic machine casing. If you have already forgot those recipes, they are in [[Tutorial:First Steps#Your First Machine: the Macerator|section 2.1]]. | |||
Now you should have all materials needed to craft a metal former. | |||
[[File:Machine_placement_1.png|thumb|right]] | |||
{{Grid/Crafting Table | |||
|A1=|B1=Electronic Circuit|C1= | |||
|A2=Tool Box|B2=Machine|C2=Tool Box | |||
|A3=Coil|B3=Coil|C3=Coil | |||
|Output=Metal Former | |||
}} | |||
Place the Metal Former according to the picture on the right. It can be mirrored to the left. The cables can be either Tin or Copper, or a mix of them.. You might want to craft either of them if you don't have some left-over cables. Remember to insulate them: Uninsulated cables will electrify you if you get too close to them, causing unwanted but easily avoidable damage. | |||
The Metal Former has 3 modes: Rolling, Extruding and Cutting. Rolling takes the place of the Forge Hammer; turning Ingots into Plates and Plates into Casings. Cutting replaces the Cutter, though it has no real use, as the Extruding mode converts ingots directly into 3 to 4 cables (instead of 2 to 3 from cutting Plates, amount also depends on material, higher tier materials make more cables). The Extruding mode also makes most of the miscellaneous stuff, like Shafts for use in kinetic machines and [[Iron Fence]]s from [[Iron Item Casing]]s. | |||
=== Iron Furnace === | |||
One of the first IC2-related things you'll probably want to create is an [[Iron Furnace]]. This is an upgrade over the regular Furnace from vanilla Minecraft (a.k.a. Stone Furnace by some IC2 users). It operates faster and uses fuel more efficiently. Click on the link for details. | |||
Materials needed: | |||
* 5 Iron Ingots (3 Iron Ores) | |||
{{Grid/Crafting Table | |||
|A1=|B1=Iron Plate|C1= | |||
|A2=Iron Plate|B2=|C2=Iron Plate | |||
|A3=Iron Plate|B3=Furnace|C3=Iron Plate | |||
|Output=Iron Furnace | |||
}} | |||
If you have only crafted one of them, don't place it down yet. The Iron Furnace is an important part of making an [[Electric Furnace]] in the next step. | |||
=== Electric Furnace === | |||
Materials needed: | |||
* 6 Rubber | |||
* 4 Redstone Dusts | |||
* 2 Copper Ingots | |||
* 1 Iron Ingot | |||
* 1 Iron Furnace | |||
The [[Electric Furnace]] will allow you to smelt using electricity instead of using Charcoal. This is the thing you'll use your Iron Furnace to craft. Remember that you can craft 3 Copper Cables by extruding a Copper Ingot in the [[Metal Former]]? | |||
{{Grid/Crafting Table | |||
|B1=Electronic Circuit | |||
|A2=Redstone|B2=Iron Furnace|C2=Redstone | |||
|Output=Electric Furnace | |||
}} | |||
I know, it’s another [[Electronic Circuit|Circuit]] to craft, but you are warned that it would be everywhere. | |||
You can place the Electric Furnace next to the cable that is connected to the Metal Former. Don't put it next to the Cable directly connected to the generator. Something else will replace that Cable later. Like the vanilla furnace, you put the stuff you want to heat in the upper part, and an EU source in the bottom. It's 12.5% faster than the Iron Furnace, and there is no energy wasted. If there is nothing left in the top, it immediately stops consuming EU. | |||
You now have 1 [[Metal Former]], 1 [[Generator]], 1 [[Macerator]], and 1 [[Electro Furnace]]. It’s not much. If you think you can use more things, you're right. | |||
=== BatBox === | |||
Adding a [[BatBox]] will provide a much larger energy storage buffer for your Generator and therefore simplify your operation. You'll need three [[RE Battery|Rechargeable Batteries]] to build it. | |||
Materials needed: | |||
*8 Tin Ingots | |||
*6 Redstone Dusts | |||
*4 Rubber | |||
[[File:Machine_placement_2.png|thumb|right|Without the cable]] | |||
{{Grid/Crafting Table | |||
|A1=Wooden Planks|B1=Insulated Tin Cable|C1=Wooden Planks | |||
|A2=RE Battery|B2=RE Battery|C2=RE Battery | |||
|A3=Wooden Planks|B3=Wooden Planks|C3=Wooden Planks | |||
|Output=BatBox | |||
}} | |||
Replace the Cable next to the Generator with the BatBox that you just crafted. Make sure the output side, marked with a white dot, faces the cable. You can open a creative mode world to test how to place the BatBox in the correct direction. Don't make the cable longer than four blocks to avoid wasting energy. If you need to change the direction of the BatBox's output facing, you'll need to use the Bronze [[Wrench]]. | |||
[[File:Machine_placement_3.png|thumb|right|With the cable]] | |||
BatBoxes can be daisy-chained to provide more EU storage. They can also be used to break up lengths of cable to avoid energy loss. The maximum length you can have of Tin Cable and copper cable is four before it loses 1 [[EU]]/t. By placing a BatBox at the end of four blocks of Cables, you can then go another four blocks without energy loss. Keep these ideas in mind as you expand your base. | |||
=== Extractor === | |||
Thinking it is a waste of Rubber by simply smelting [[Sticky Resin]]? That's why we're going to craft the [[Extractor]]! | |||
Materials needed: | |||
* 9 Iron Ingots | |||
* 6 Rubber | |||
* 4 [[Treetap]]s | |||
* 2 Copper Ingots | |||
* 2 Redstone Dust | |||
The Treetap used in this recipe ''must'' be a new one, i.e. have a full durability of 16. | |||
{{Grid/Crafting Table | |||
|A1=Treetap|B1=Machine|C1=Treetap | |||
|A2=Treetap|B2=Electronic Circuit|C2=Treetap | |||
|Output=Extractor | |||
}} | |||
Now, extend your cable by a block and then place down your Extractor. With the Extractor, you an get 3 rubber out of a single Sticky Resin. Awesome! | |||
{{Grid/Machine | |||
|Type=Extractor | |||
|Top=Resin|Bottom=RE Battery (Charged) | |||
|Output=Rubber|OA=3}} | |||
From now on [[Rubber]] will be no longer included in material lists as it is easy to produce them in mass quantities. Always keep a stack of them in your chest. | |||
=== Introduction to the IC2 E-net === | |||
In IC2, a E-net is a series of blocks involved in the production, transportation and usage of EU. EU is produced by [[Generator (disambiguation)|Generator]]s, transported in [[EU/p|packet form]] by [[Cable]]s, [[Transformer]]s, [[EU storage block]]s or in item form by different kinds of Batteries, and consumed by mostly machines. The size of a [[EU/p|packet]] determines the voltage (rounded up, available voltages are 32 EU/p, 128 EU/p, 512 EU/p, 2048 EU/p and 8192 EU/p), and a voltage too high can melt cables and blow up machines. EU storage blocks have a certain output voltage, and only outputs if it has enough EU stored for a single packet unless it powers the machines directly. For example, BatBoxes, which sends out 32 EU per packet, won't output anything unless it has 32 EU. What is also worth noticing is that EU storage blocks can accept any packet sizes equal or lower to its own output packet size without exploding, meaning that a [[CESU]] can accept power from a BatBox, but not vice versa. | |||
Machines, batteries and electric tools each have their own [[Power tier|Power Tiers]], usually labelled in the tooltips. Power tier is just another name for voltage, or EU per packet. Since packets don't apply to items, it is called "Power Tier" instead. Tier 1 refers to 32 EU/p, tier 2 refers to 128 EU/p, tier 3 refers to 512 EU/p... The tier for machines decides the maximum acceptable packet size, which exceeding that packet size makes machines explode, just like EU storage blocks. Batteries can only be put into machines that have a equal or higher power tier, not the lower ones. For example, a tier 2 battery can be placed into a tier 2 machine or a tier 3 machine, but not a tier 1 machine. The tier of electric tools decide which EU storage blocks/generators can power them. They can only be charged in an EU storage block that has an equal or higher power tier. | |||
To increase or decrease voltage, a [[Transformer]] is needed. The Transformer will be introduced later, as you don't need to know or use it now. | |||
Currently, you are on LV (low voltage). You will gradually progress upwards the voltage tiers, and only by then will you need the [[Transformer]]. | |||
=== Alternative Power Sources === | |||
==== Solar Power ==== | |||
An option for renewable energy is to add a [[Solar Panel]] to reduce your Charcoal usage. Keep in mind that Solar Panels require an unobstructed view of the sky and they only work in the daytime. | |||
Materials needed: | |||
* 13 Rubber | |||
* 10 Iron Ingots | |||
* 6 redstone dusts | |||
* 4 copper ingots | |||
* 3 glass | |||
* 3 coal (not Charcoal!) | |||
* 3 tin ingots | |||
Craft 2 Electronic Circuits, a Generator, and macerate 3 coal into 3 coal dusts in the [Macerator]. Then you can craft the Solar Panel. | |||
{{Grid/Crafting Table | |||
|A1=Coal Dust|B1=Glass|C1=Coal Dust | |||
|A2=Glass|B2=Coal Dust|C2=Glass | |||
|A3=Electronic Circuit|B3=Generator|C3=Electronic Circuit | |||
|Output=Solar Panel | |||
}} | |||
Connect your Solar Panel (with or without a cable) to the top of the BatBox. Now your BatBox will receive a constant trickle from the Solar Panel and can also receive energy from your Generator. The downside is that these are pretty expensive, but just one or two helps immensely early on. | |||
==== Manual Power ==== | |||
The [[Manual Kinetic Generator]] allows you to generate some ''Kinetic Power'' (Unit: KU, short for kinetic unit) by simply standing there clicking on it over and over again. You will gradually use your hunger bar in this process. | |||
Materials needed: | |||
* 31 Iron Ingots | |||
* 6 Copper Ingots | |||
* 4 Tin Ingots | |||
* 2 Redstone Dusts | |||
Craft a Generator, a Basic Machine Casing, a Lever, 2 [[Tin Item Casing]]s, 2 [[Coil]]s, and 6 [[Iron Item Casing]]s. | |||
Craft a Manual Kinetic Generator. | |||
{{Grid/Crafting Table | |||
|A1=Machine|B1=Lever | |||
|Output=Manual Kinetic Generator | |||
}} | |||
Kinetic power can't be directly used, but you can convert it into Electric Units with the [[Kinetic Generator]]. But you still need to craft something else before you can craft the Kinetic Generator. | |||
First the [[Shaft (Iron)|Iron Shaft]]. This is made by extruding an Iron Block in the [[Metal Former]]. | |||
{{Grid/Crafting Table | |||
|A1=Iron|B1=Iron|C1=Iron | |||
|A2=Iron|B2=Iron|C2=Iron | |||
|A3=Iron|B3=Iron|C3=Iron | |||
|Output=Iron Block | |||
}} | |||
{{Grid/Metal Former | |||
|Mode=Extruding | |||
|Input=Iron Block | |||
|Output=Shaft (Iron) | |||
}} | |||
Then the [[Electric Motor]], You need two Tin Casings, one Iron Ingot, and two Copper [[Coil]]s: | |||
{{Grid/Crafting Table | |||
|B1=Tin Item Casing | |||
|A2=Coil|B2=Iron|C2=Coil | |||
|B3=Tin Item Casing | |||
|Output=Electric Motor | |||
}} | |||
Now you can craft the Kinetic Generator. | |||
{{Grid/Crafting Table | {{Grid/Crafting Table | ||
|A1=|B1=Copper Cable|C1= | |A1=Iron Casing|B1=Iron Casing|C1=Iron Casing | ||
|A2=Tin|B2=Redstone|C2=Tin | |A2=Generator|B2=Electric Motor|C2=Shaft (Iron) | ||
|A3= | |A3=Iron Casing|B3=Iron Casing|C3=Iron Casing | ||
|Output= | |Output=Kinetic Generator | ||
}} | |||
Place the Kinetic Generator next to the Manual Kinetic Generator so that the input face (look for that Iron Shaft in the middle of a dark hole) is in contact with the Manual Kinetic Generator. Now make sure the output face of the Kinetic Generator (just a completely black circle) is in contact with the high voltage side (indicated by 5 dots) of a [[LV Transformer]. Set the Transformer to fixed step down mode and connect the low voltage side (indicated by 1 dot) of the Transformer to a Cable or the BatBox. Now you can produce about 13 EU/t by just standing there and holding the USE button (default: right mouse button). This setup is great for [[Charge Pad (BatBox)|Batbox Chargepads]] early on! However, do not continue to spam-click when your EU storage is full - excess EU in the Kinetic Generator will make things explode. | |||
==== Plant Power ==== | |||
See [[Biofuel energy production]] for more details on how to turn green things into EU. HAYO! | |||
=== Etcetera === | |||
In this image you can see the BatBox, with the Generator to its left, and a length of Copper Cable four blocks long to its right. <s>In the current version of IC2, Tin Cable has taken the place where Copper Cable used to be in the cable hierarchy, so pretend that cable is Tin.</s> Up to four machines can then be placed directly in front of the cable. Going up from the BatBox is a four-block-long cable that connects to a second BatBox, and then from there to either a Solar Panel or a wind generator of sorts using Tin Cables. | |||
[[file:First Steps.png |600px| link=|center]] | |||
'''NOTE:''' Most textures in images are outdated. | |||
[[File:solarflowertop.png|400px| link=|left]] | |||
[[File:solarflowerbottom.png|400px| link=|right]] | |||
<br/> <br/> | |||
<center>''To provide a significant amount of EU from the sun, you'll need a lot of Solar Panels. If you want more advanced solar panels, or ones that work without sun, get the Advanced Solar Panels addon. This can be found on the IC2 forum. | |||
''</center> | |||
<br/> <br/> <br/> <br/> <br/> | |||
<br/> <br/> <br/> <br/> <br/> | |||
You can see the inside of a little base, 3 Macerators, 3 Electric Furnaces, 1 Extractor, 1 Generator in view, and 2 machines unknown. You can see there is a chest in front of the generator to gather the charged batteries when the player stalk outdoors. | |||
[[file:first_steps20.png |650px| link=|center]] | |||
== Second Steps == | |||
=== Electric tools === | |||
Tired of making pickaxe after pickaxe? What about an EU-based version? | |||
All electric tools use EU instead of durability. After using, you just need to recharge it by placing it either in a generator or in a [[EU storage block]] like the Batbox. | |||
These tools are optional for now, but you should eventually craft them. | |||
==== Mining Drill ==== | |||
The [[Mining Drill]] is the EU-based version of the pickaxe. | |||
Materials needed: | |||
* 11 Iron Ingots | |||
* 8 Copper Ingots | |||
* 8 Redstone Dusts | |||
* 8 Tin Ingots | |||
{{Grid/Crafting Table | |||
|A1=|B1=Tin Casing|C1= | |||
|A2=Coil|B2=Iron|C2=Coil | |||
|A3=|B3=Tin Casing|C3= | |||
|Output=Electric Motor | |||
}} | |||
{{Grid/Crafting Table | |||
|A1=RE Battery|B1=Copper Cable|C1=Iron Casing | |||
|A2=RE Battery|B2=Electronic Circuit|C2=Electric Motor | |||
|A3=RE Battery|B3=Copper Cable|C3=Iron Casing | |||
|Output=Power Unit | |||
}} | |||
{{Grid/Crafting Table | |||
|A1=|B1=Iron Plate|C1= | |||
|A2=Iron Plate|B2=Iron Plate|C2=Iron Plate | |||
|A3=Iron Plate|B3=Power Unit|C3=Iron Plate | |||
|Output=Mining Drill | |||
}} | |||
==== Chainsaw ==== | |||
The [[Chainsaw]] is an EU-based version of the axe, shears, and sword, all in one. | |||
Materials needed: | |||
* 11 Iron Ingots | |||
* 8 Copper Ingots | |||
* 8 Redstone Dusts | |||
* 8 Tin Ingots | |||
{{Grid/Crafting Table | |||
|B1=Iron Plate|C1=Iron Plate | |||
|A2=Iron Plate|B2=Iron Plate|C2=Iron Plate | |||
|A3=Power Unit|B3=Iron Plate | |||
|Output=Chainsaw | |||
}} | |||
==== Electric Wrench ==== | |||
Upgrade your Bronze Wrench to an [[Electric Wrench]]! This is a very useful tool. | |||
Materials needed: | |||
* 8 Copper Ingots | |||
* 6 Bronze Ingots | |||
* 5 Iron Ingots | |||
* 4 Redstone Dusts | |||
* 4 Tin Ingots | |||
{{Grid/Crafting Table | |||
|A1=|B1=Copper Cable|C1=Iron Casing | |||
|A2=RE Battery|B2=Electronic Circuit|C2=Electric Motor | |||
|A3=|B3=Copper Cable|C3=Iron Casing | |||
|Output=Small Power Unit | |||
}} | |||
{{Grid/Crafting Table | |||
|B1=Wrench | |||
|B1-link=Bronze Wrench | |||
|B2=Small Power Unit | |||
|Output=Electric Wrench | |||
}} | |||
The Electric Wrench works the same way as the bronze wrench. It's a lot of work to make, but using it doesn't decrease its durability. Just be careful not to drop it in lava. | |||
==== Electric Treetap ==== | |||
Going nuts making all those treetaps for resin? Then this is your tool: The [[Electric Treetap]]. | |||
Materials needed: | |||
* 8 Copper Ingots | |||
* 5 Iron Ingots | |||
* 4 Redstone Dusts | |||
* 4 Tin Ingots | |||
{{Grid/Crafting Table | |||
|A1=Treetap|B1=Small Power Unit | |||
|Output=Electric_Treetap | |||
}} | }} | ||
The Recipes and Resources page has a list of all available [[Recipes and Resources#Electric|power tools]]. | |||
=== Universal Fluid Cell === | |||
The [[Universal Fluid Cell]] is a stackable container capable of carrying fluids, similar to the vanilla bucket. It is also used in many crafting recipes of fluid-related machines. | |||
{{Grid/Crafting Table | |||
|A2=Glass|B2=Glass|C2=Glass | |||
|A3=Glass|B3=Glass|C3=Glass | |||
|OA=16 | |||
|Output=Glass Pane}} | |||
{{Grid/Crafting Table | |||
|B1=Tin Item Casing | |||
|A2=Tin Item Casing|B2=Glass Pane|C2=Tin Item Casing | |||
|B3=Tin Item Casing | |||
|Output=Universal Fluid Cell}} | |||
With the freakin' awesome fluid cell, you can walk around with 1728 buckets of lava in your inventory, instead of a mere 27 buckets. The practical use of this will be introduced later. | |||
=== Pump === | |||
Remember that lava lake you found waaaaay back when you made your first trip in the mines? Now it's time to take advantage of it with a [[Pump]]. The pump can fill buckets or [[Universal Fluid Cell]]s for us. | |||
Materials needed: | |||
*15 iron ingots | |||
*8 tin ingots | |||
*6 glass | |||
*2 copper ingots | |||
*2 redstone dusts | |||
Now, we will craft it! We'll need to make 2 [[Universal Fluid Cell]]s, some mining pipes, a treetap, and the basic stuff to craft it: | |||
{{Grid/Crafting Table | |||
|A1=Iron Plate|C1=Iron Plate | |||
|A2=Iron Plate|C2=Iron Plate | |||
|A3=Iron Plate|B3=Treetap|C3=Iron Plate | |||
|Output=Mining Pipe | |||
|OA=16 | |||
}} | |||
{{Grid/Crafting Table | {{Grid/Crafting Table | ||
|A1= | |A1=Universal Fluid Cell|B1=Electronic Circuit|C1=Universal Fluid Cell | ||
|A2= | |A2=Universal Fluid Cell|B2=Machine|C2=Universal Fluid Cell | ||
|B3= | |A3=Mining Pipe|B3=Treetap|C3=Mining Pipe | ||
|Output= | |Output=Pump | ||
}} | }} | ||
Place the pump directly over a lava lake and place a chest right next to it (it has to touch). Place some empty buckets or universal fluid cells in the chest and power the pump. It will start filling them up. Take 10 Universal Fluid Cells/buckets of lava and bring them to your base. Choose a good place and make a nether portal with them by placing water next to lava. If you don't know, this will cause lava to solidify into obsidian. | |||
=== Geothermal Power === | |||
Once you've acquired a Pump, you'll have the option of making a [[Geothermal Generator]]. This generator isn't renewable like solar or wind based ones, but it's a great alternative or supplement to Coal/Charcoal. A Geothermal Generator generates energy from lava. Building one of these is a good option after you've created the nether portal, as there are huge lava lakes that generates at y=32 and below in the nether. | |||
Materials needed: | |||
* 9 iron ingots | |||
* 7 tin ingots | |||
* 4 glass | |||
* 2 glass pane (you should have some left when crafting the pump) | |||
* 2 redstone dusts | |||
{{Grid/Crafting Table | |||
|A1=Glass|B1=Universal Fluid Cell|C1=Glass | |||
|A2=Glass|B2=Universal Fluid Cell|C2=Glass | |||
|A3=Iron Casing|B3=Generator|C3=Iron Casing | |||
|Output=Geothermal Generator | |||
}} | |||
If you didn't craft enough Universal Fluid Cells, you can also use [http://www.minecraftwiki.net/wiki/Bucket Bucket] for gathering lava. IC2 added a tin based recipe while the vanilla recipe is still usable. | |||
{| | {| | ||
|{{Grid/Crafting Table | |{{Grid/Crafting Table | ||
|A1= | |A1=|B1=|C1= | ||
|A2=Iron|B2=|C2=Iron | |A2=Iron|B2=|C2=Iron | ||
|A3=Iron|B3=Iron|C3=Iron | |A3=|B3=Iron|C3= | ||
|Output=Iron Furnace}} | |Output=Bucket | ||
||{{Grid/Crafting Table | }} | ||
|A1=|B1=Iron|C1= | |{{Grid/Crafting Table | ||
|A2=Iron|B2=|C2=Iron | |A1=|B1=|C1= | ||
|A3=Iron|B3=Furnace|C3=Iron | |A2=Tin|B2=|C2=Tin | ||
|Output=Iron | |A3=|B3=Tin|C3= | ||
|Output=Bucket | |||
}} | |||
|} | |||
==== Gathering Lava in the Nether ==== | |||
Before you actually go into the nether, you need to prepare some materials to build a basic base in the Nether to defend yourself against hostile mobs (mainly the ghast). You can also refer to [https://minecraft.gamepedia.com/Tutorials/Nether_survival the guide on Minecraft Wiki] or skip this part if you are experienced. | |||
Materials needed: | |||
*5 stacks of cobblestone | |||
*1 stack of wood | |||
*1 stack of "smooth" stone | |||
*1 flint and steel | |||
*1 iron door (at least) | |||
If you have access to the save file of the world that you are currently playing in, it is recommended to create a copy of your world when you are ready to go into nether. In the copy switch to creative mode and enter the nether, so that you can get a rough idea of the landscape that you are going to spawn in. Most importantly, go find the closest lava lake. Have an idea of how you can get there, for instance by ladders and tunnels, by staircases or by simply walking on near-flat land if your portal generates next to the lava lake. | |||
Once you feel that you are ready, jump into the nether portal! If you are playing on a server/multiplayer world, look for hostile mobs as soon as you spawned in the Nether. Presence of hostile mobs when you have just spawned indicates the presence of a player within 128 blocks of the mob you spotted. However, if you don't spot any, that doesn't mean there must be no players around. This can happen when the server/multiplayer world has a mob switch that is turned on, or when a player have come into the region not long enough that no mobs spawned where you can see them. | |||
Now that you are in the nether, you need to quickly build a small base out of cobblestone that completely surrounds the nether portal, even if it is as simple and ugly as a ''matchbox''. Cobblestone can't be destroyed by fireballs shot by ghasts. Don't put down any windows yet, for glass can be destroyed easily by ghasts. There will be information about how to do that on the next few paragraphs. Remember to add an iron door to go out! | |||
[[File:Lava_flow_blocked.png|thumb|right|In this picture you can see the lava completely being blocked by cobblestone. For demonstration purposes the base isn't built in the picture. You should build it to protect the nether portal. You can also see a cobblestone passageway to the lava lake nearby.]] | |||
Then, block any flowing lava with cobblestone, so that you don't accidentally walk into them. Next, replace the netherrack around your base with cobblestone. This is to prevent the ghast from creating holes right out of your door. | |||
After you've done with all these, mine 4 to 6 stacks of netherrrack. Go back to the overworld and smelt them. Then craft them into nether brick blocks. You will need them to craft Nether brick fences as your blast proof windows in the nether base. Craft some Nether Brick Fences, and replace some of the walls with the fences. Now you have got "windows", and your basic base is finished. | |||
[[File:Nether_base_inside_1.png|thumb|left|This picture shows the inside of a nether base. The two trapdoors near the cauldron is to align the player so that the player can fall easier into the cauldron. Cauldrons can hold water in the nether, and can extinguish the fire on the player]] | |||
[[Note: these spaces are to align the pictures in a better position. Please don't delete them :-) BTW, you won't see this in the actual tutorial| ]] | |||
[[File:Nether_base_outside_1.png|thumb|left| These pictures show the outside of the base. The nether brick fence walls outside is to prevent the ghast from seeing the player through gaps between the nether brick fence and the Iron door.]] | |||
[[File:Nether_base_outside_2.png|thumb|center]] | |||
[[File:Nether_base_outside_3.png|thumb|right]] | |||
Now you can finally go on to collecting a lava. You need a pump, and an RE battery to power the pump. You should have already crafted a pump. | |||
To collect lava, place the pump with its side that has a grey hole texture facing lava. Put the RE-battery inside and it should be sucking lava for you. Put in some empty Universal Fluid Cells and it will automatically fill them up. Bring those lava cells back to the overworld, put them in the Geothermal Generator, and you have got a free source of EU! Be careful not to drop the pump in lava when moving it! | |||
=== Portable batteries === | |||
Electric tools use a lot of EU. Wouldn't it be nice to carry more EU at a time? You can do this with a [[Charging RE Battery]]. The Charging RE Battery have 3 modes, which can be changed by right-clicking it when holding it in your hand. | |||
Materials needed: | |||
*16 Redstone Dusts | |||
*10 Tin Ingots | |||
*8 Copper Ingots | |||
*4 Iron Ingots | |||
{{ | |||
Grid/Crafting Table | |||
|A1=Electronic Circuit|B1=RE Battery|C1=Electronic Circuit | |||
|A2=RE Battery|B2=|C2=RE Battery | |||
|A3=Electronic Circuit|B3=RE Battery|C3=Electronic Circuit | |||
|Output=Charging RE Battery | |||
}} | |||
Walking around with 40,000 EU is still not enough? You can craft a more advanced one called the [[Advanced Charging Battery]]! A single one of them can carry 400,000 EU, ten times that of the Charging RE Battery! | |||
Materials needed: | |||
*31 Copper Ingots | |||
*12 Tin Ingots | |||
*10 Bronze Ingots | |||
*8 Redstone Dusts | |||
*4 Iron Ingots | |||
*4 Lead Ingots | |||
*4 Sulfur Dusts | |||
See [[Tuturial:First_Steps#Age_of_MV:_CES Unit|this]] on how to get [[Sulfur Dust]]. | |||
{{Grid/Crafting Table | |||
|A1=Insulated Copper Cable|B1=Bronze Item Casing|C1=Insulated Copper Cable | |||
|A2=Bronze Item Casing|B2=Sulfur Dust|C2=Bronze Item Casing | |||
|A3=Bronze Item Casing|B3=Lead Dust|C3=Bronze Item Casing | |||
|Output=Advanced RE-Battery | |||
}} | |||
{{Grid/Crafting Table | |||
|A1=Copper Plate|B1=Electronic Circuit|C1=Copper Plate | |||
|A2=Tin Plate|B2=Copper Plate|C2=Tin Plate | |||
|A3=Copper Plate|B3=Tin Plate|C3=Copper Plate | |||
|Output=Heat Exchanger | |||
}} | |||
{{Grid/Crafting Table | |||
|A1=Heat Exchanger|B1=Advanced RE-Battery|C1=Heat Exchanger | |||
|A2=Advanced RE-Battery|B2=Charging RE Battery|C2=Advanced RE-Battery | |||
|A3=Heat Exchanger|B3=Advanced RE-Battery|C3=Heat Exchanger | |||
|Output=Advanced Charging Battery | |||
}} | |||
=== Compressor === | |||
The [[Compressor]] is used to make several different things, but the important ones to know right now are that it can create [[Compressed Air Cell]] by compressing air into Universal Fluid Cells, and it can make [[Advanced Alloy]]s. These will be introduced later. | |||
Materials needed: | |||
* 9 Iron Ingots | |||
* 2 Copper Ingots | |||
* 2 Redstone Dusts | |||
Smelt some Cobblestone, craft a circuit, and then a Machine block. | |||
{{Grid/Crafting Table | |||
|A1=Stone|A2=Stone|A3=Stone | |||
|B2=Machine|B3=Electronic Circuit | |||
|C1=Stone|C2=Stone|C3=Stone | |||
|Output=Compressor}} | |||
Place that machine, give it energy, and place an empty [[Universal Fluid Cell]] in it! | |||
{{Grid/Machine | |||
|Type=Compressor | |||
|Top=Universal Fluid Cell | |||
|Bottom=RE Battery (Charged) | |||
|Output=Compressed Air Cell | |||
}} | |||
Now you can produce universal fluid cells filled with air. Don't right click with them in your hand though, or you will spend some time clean ''the air'' up! | |||
=== Blast Furnace === | |||
Moving forward, there are a small number of advanced things that require [[Steel]]. You can make Steel by heating Iron in a [[Blast Furnace]]. While you get Steel from Iron, [[Slag]] is also produced at a 1:1 ratio to Steel. Slag is an very important source of [[Coal Dust]], which you can get by processing it in an [[Thermal Centrifuge]] in the future. It takes about 5 minutes for a single blast furnace to produce a single piece of steel (and slag), so you need to build it early. In addition to the Blast Furnace itself, it requires a heat source, and a Compressor (listed above) is needed to make [[Compressed Air Cell]]s. In this tutorial we will use an [[Electric Heat Generator]] with one [[Coil]]. You can also use more coils to heat up the blast furnace faster, or a [[Fluid Heat Generator]] which consumes [[Biogas]] instead of EU as the heat source instead . | |||
Material list with an Electric Heat Generator and a single coil: | |||
*17 Iron Ingots | |||
*11 Copper Ingots | |||
*4 Redstone Dusts | |||
*3 Tin Ingots | |||
|{{Grid/Crafting Table | |||
|A1=Rubber|B1=Copper Plate|C1=Rubber | |||
|A2=Rubber|B2=Copper Plate|C2=Rubber | |||
|A3=Rubber|B3=Copper Plate|C3=Rubber | |||
|Output=Heat Conductor | |||
}} | |||
{{Grid/Crafting Table | |||
|A1=Iron Casing|B1=RE Battery|C1=Iron Casing | |||
|A2=Iron Casing|B2=Electronic Circuit|C2=Iron Casing | |||
|A3=Iron Casing|B3=Heat Conductor|C3=Iron Casing | |||
|Output=Electric Heat Generator | |||
}} | |||
{{Grid/Crafting Table | |||
|A1=Iron Casing|B1=Universal Fluid Cell|C1=Iron Casing | |||
|A2=Universal Fluid Cell|B2=Heat Conductor|C2=Universal Fluid Cell | |||
|A3=Iron Casing|B3=Universal Fluid Cell|C3=Iron Casing | |||
|Output=Fluid Heat Generator | |||
}} | |||
Place the heat generator where you want it, making sure the output side faces in the direction you want to place the Blast Furnace. | |||
{{Grid/Crafting Table | |||
|A1=Iron Casing|B1=Iron Casing|C1=Iron Casing | |||
|A2=Iron Casing|B2=Machine|C2=Iron Casing | |||
|A3=Iron Casing|B3=Heat Conductor|C3=Iron Casing | |||
|Output=Blast Furnace | |||
}} | |||
Place the Blast Furnace so that it touches the heat generator, with its input side (marked by a orange square) facing the Electric Heat Generator's output side (also marked by a orange square). If you are using the Electric Heat Generator, it can be placed behind or beneath the Blast Furnace, rather than side-by-side since you generally don't need to interact with it. Run a power cable to the Electric Heat Generator, or put Biogas fluid cells into the heat generator. The Blast Furnace doesn't need one. After you begin to heat the Blast Furnace, it won't start working instantly. It needs warming up, indicated by the red bar that you can see in its GUI. Only after being completely warmed up can it process Iron. | |||
Make a Coil and place them inside the Electric Heat Generator. If you have forgotten the recipe, it is below. One coil is enough to keep the blast furnace warm and working, but more coils have no use except making it warm up faster and wasting your materials. The Blast Furnace can accept a maximum of 20 Heat Units, and each Coil produces 5 Heat units. | |||
{{Grid/Crafting Table | |||
|A1=Copper Cable|B1=Copper Cable|C1=Copper Cable | |||
|A2=Copper Cable|B2=Iron|C2=Copper Cable | |||
|A3=Copper Cable|B3=Copper Cable|C3=Copper Cable | |||
|Output=Coil | |||
}} | |||
After completed its warm-up process, your Blast Furnace should be ready to use. Place an iron source (can be any stages of the iron ore, either the ore itself, the [[Crushed Iron Ore|crushed]], or the [[Purified Crushed Iron Ore|purified]]. Can also be iron ingot or iron dust.) and compressed air cells inside the Blast Furnace. It takes six compressed air cells to make 1 Refined Iron. You get the empty fluid cells back, and you can put them back in the Compressor again to refill them. Remember to avoid the blast furnace stop working for whatever reason. You will need a lot of its products later. | |||
=== Transformer === | |||
As you've been told before, the [[Transformer]] is needed to change voltages. It is actually quite dangerous, as if you did anything wrong, '''everything in your ENTIRE E-NET''' will explode. The transformer has a side with 5 dots, and 5 sides with a single dot. The 5 dot side is the high voltage face, while the single dot size is the low voltage face. They are two-ways, meaning that they can both take EU in and output EU. There are three options that you can choose, but depending on your needs '''DO NOT EVER''' choose the default one (Redstone = step-up) as you might accidentally power it one day. If that happens and your transformer is set to Redstone = step up, '''all''' of your machines connected to that transformer '''WILL EXPLODE'''. Be careful! Frequent backing up your world is recommended if possible. | |||
You will need to craft the [[LV Transformer]] so that your CESU that you're going to craft doesn't make all your machines explode.. | |||
Materials needed: | |||
*3 Copper Ingots | |||
*1 Iron Ingot | |||
*1 Tin Ingot | |||
{{Grid/Crafting Table | |||
|A1=Wooden Planks|B1=Insulated Tin Cable|C1=Wooden Planks | |||
|A2=Wooden Planks|B2=Coil|C2=Wooden Planks | |||
|A3=Wooden Planks|B3=Insulated Tin Cable|C3=Wooden Planks | |||
|Output=LV-Transformer}} | |||
=== Age of MV: CES Unit === | |||
Now, we have more machines, and we have more ways to power them. But what should we do when the BatBox runs out of energy? Let's put our knowledge of bronze to use making a bigger [[EU storage block]]! | |||
For that job, there is the [[CES Unit]]. The [[CES Unit]] stores 300,000 EU, exactly 5x as much as the BatBox. | |||
Materials needed: | |||
*13 Bronze Ingots | |||
*3 Copper Ingots | |||
*3 [[Sulfur Dust]]s | |||
*3 [[Lead Ingot]]s | |||
Before we begin, you'll need to get your hands on at least three [http://www.minecraftwiki.net/wiki/Gunpowder Gunpowder] or 27 netherrack. | |||
{{Grid/Machine | |||
|Type = Extractor | |||
|Top = Gunpowder | |||
|Bottom = RE_Battery_(Charged) | |||
|Output = Sulfur Dust | |||
}} | |||
Run three Gunpowder through an Extractor to get three [[Sulfur Dust]]. | |||
You can also produce sulfur from Netherrack. | |||
{{Grid/Machine | |||
|Type=Macerator | |||
|Top=Netherrack | |||
|Bottom=RE_Battery_(Charged) | |||
|Output=Netherrack Dust | |||
}} | |||
{{Grid/Machine | |||
|Type = Extractor | |||
|Top = Netherrack Dust | |||
|Bottom = RE_Battery_(Charged) | |||
|Output = Tiny Pile of Sulfur Dust | |||
}} | |||
Run three Lead Ingots through a Macerator to get three [[Lead Dust]]. | |||
{| | |||
|{{Grid/Machine | |||
|Type=Macerator | |||
|Top=Lead Ingot | |||
|Output=Lead Dust | |||
}} | |||
Assemble three [[Advanced RE-Battery|Advanced RE-Batteries]], then use them to build the CES Unit. | |||
{{Grid/Crafting Table | |||
|A1=Insulated Copper Cable|B1=Bronze Item Casing|C1=Insulated Copper Cable | |||
|A2=Bronze Item Casing|B2=Sulfur Dust|C2=Bronze Item Casing | |||
|A3=Bronze Item Casing|B3=Lead Dust|C3=Bronze Item Casing | |||
|Output=Advanced RE-Battery | |||
}} | |||
{{Grid/Crafting Table | |||
|A1=Bronze Plate|B1=Insulated Copper Cable|C1=Bronze Plate | |||
|A2=Advanced RE-Battery|B2=Advanced RE-Battery|C2=Advanced RE-Battery | |||
|A3=Bronze Plate|B3=Bronze Plate|C3=Bronze Plate | |||
|Output=CES Unit | |||
}} | |||
Before you place your shiny new CES Unit, there's one more thing we need: a [[LV Transformer|Low-Voltage Transformer]]. Don't worry, it's not hard to make. | |||
{{Grid/Crafting Table | |||
|A1=Wooden Planks|B1=Insulated Tin Cable|C1=Wooden Planks | |||
|A2=Wooden Planks|B2=Coil|C2=Wooden Planks | |||
|A3=Wooden Planks|B3=Insulated Tin Cable|C3=Wooden Planks | |||
|Output=LV Transformer | |||
}} | |||
Place the CES Unit and the LV Transformer so that the output of the CES Unit connects to the five-dotted side of the transformer. From there, you can run a cable from any of the one-dotted sides of the transformer to your machines. | |||
=== Distilled water === | |||
This section is mainly for the [[Upgrade#Overclocker Upgrade|Overclocker Upgrade]] that will be introduced in the next section. If you don't want overclocker upgrades, you can skip this section, but remember to come back when you need distilled water. | |||
Distilled water can be obtained in two ways. One is to use the [[Solar Distiller]], and the other is to use the [[Steam Boiler]], [[Steam Turbine]] and the [[Condenser]]. The Solar Distiller needs less materials and no EU to run, but it is slower and depends on the sun. The steam setup needs more materials and EU, but it is much faster. The Solar Distiller will be introduced here. | |||
Materials needed (1 Solar Distiller): | |||
* 11 Glass | |||
* 8 Iron Ingots | |||
* 4 Tin Ingots | |||
{{Grid/Crafting Table | |||
|A1=Glass |B1=Glass |C1=Glass | |||
|A2=Glass |B2= |C2=Glass | |||
|A3=Universal Fluid Cell |B3=Machine |C3=Universal Fluid Cell | |||
|Output=Solar_Distiller | |||
}} | |||
To put water in it, you can shift-click the block holding universal fluid cells that contain water, or you can put water fluid cells into it. The left tank is the water tank, and the right tank is the output tank. Slots on the top-right corner are for upgrades. To get distilled water out, you can either use an upgrade, or put fluid cells in it again. | |||
The Solar Distiller is very slow, so it is suggested to craft multiple of them. | |||
=== Fluid/Solid Canning Machine === | |||
This section is also needed to craft the [[Upgrade#Overclocker Upgrade|Overclocker Upgrade]]. If you don't want overclocker upgrades, you can skip this section, but remember to come back when you need the [[Fluid/Solid Canning Machine]]. | |||
The [[Fluid/Solid Canning Machine]] is a multipurpose machine that can be used to enrich fluids on "Fluid enrich Mode". It can also be used to fill [[Universal Fluid Cell]]s with liquids, such as [[Biogas]]. To change modes, click the button that says "Canning" on default. Click that button again to change into other modes. | |||
Materials needed: | |||
*9 Iron Ingots | |||
*4 Tin Ingots | |||
*2 Copper Ingots | |||
*2 Redstone Dusts | |||
{{Grid/Crafting Table | |||
|A1=Tin Casing|A2=Tin Casing|A3=Tin Casing | |||
|B1=Electronic Circuit|B2=Machine|B3=Tin Casing | |||
|C1=Tin Casing|C2=Tin Casing|C3=Tin Casing | |||
|Output=Canning Machine}} | |||
{{Grid/Metal Former | |||
|Mode=Extruding | |||
|Input=Tin Casing | |||
|Output=Tin Can | |||
}} | |||
{{Grid/Machine | |||
|Type=Canning Machine | |||
|Top=Cooked Porkchop | |||
|Bottom=Tin Can | |||
|Output=Canned Food|OA=8}} | |||
|} | |||
Since food comes in all shapes and sizes, some food fits in a few cans, while other foods need more than a few cans. The '''FOOD-TIN CAN''' list can be found [[Food List|here]]. | |||
=== [[Upgrade]]s === | |||
==== Overclocker Upgrade ==== | |||
Have some EU and materials? Is your machine lazily working its way to get what you want? Then go ahead and craft yourself an Overclocker Upgrade! | |||
{{Grid/Canning Machine | |||
|mode=D | |||
|input-tank=Distilled Water | |||
|input-fill=1000 | |||
|input=Lapis Lazuli Dust | |||
|output-tank=Coolant | |||
|output-fill=1000 | |||
|output-tank-link=Coolant (Fluid)}} | |||
{| | |||
|{{Grid/Crafting Table | |||
|B1=Tin Plate | |||
|A2=Tin Plate|B2=Coolant Cell|C2=Tin Plate | |||
|B3=Tin Plate | |||
|Output=10k Coolant Cell | |||
}} | |||
|{{Grid/Crafting Table | |||
|A1=Tin Plate|B1=Tin Plate|C1=Tin Plate | |||
|A2=10k Coolant Cell|B2=10k Coolant Cell|C2=10k Coolant Cell | |||
|A3=Tin Plate|B3=Tin Plate|C3=Tin Plate | |||
|Output=30k Coolant Cell | |||
}} | |||
|{{Grid/Crafting Table | |||
|A1=Tin Plate|B1=30k Coolant Cell|C1=Tin Plate | |||
|A2=Tin Plate|B2=Iron Plate|C2=Tin Plate | |||
|A3=Tin Plate|B3=30k Coolant Cell|C3=Tin Plate | |||
|Output=60k Coolant Cell | |||
}} | |||
|} | |||
{{Grid/Crafting Table | |||
|A2=10k Coolant Cell|B2=10k Coolant Cell|C2=10k Coolant Cell | |||
|A3=Insulated Copper Cable|B3=Electronic Circuit|C3=Insulated Copper Cable | |||
|Output=Overclocker Upgrade|OA=2|nobreak=y}} | |||
{{Grid/Crafting Table | |||
|A2=30k Coolant Cell|B2=30k Coolant Cell|C2=30k Coolant Cell | |||
|A3=Insulated Copper Cable|B3=Electronic Circuit|C3=Insulated Copper Cable | |||
|Output=Overclocker Upgrade|OA=6|nobreak=y}} | |||
{{Grid/Crafting Table | |||
|A2=60k Coolant Cell|B2=60k Coolant Cell|C2=60k Coolant Cell | |||
|A3=Insulated Copper Cable|B3=Electronic Circuit|C3=Insulated Copper Cable | |||
|Output=Overclocker Upgrade|OA=12}} | |||
Side affect: applying Overclocker Upgrade(s) causes your machine to use more EU to process a single item. They can be stacked in machines. The effects of them are depended on the total amount of them in a machine. | |||
==== Transformer Upgrade ==== | |||
Hate to see freakin' transformer blocks everywhere in your working station? Well, get yourself a machinery [[Upgrade#Transformer Upgrade|Transformer Upgrade]]! | |||
(needs material list) | |||
{{Grid/Crafting Table | |||
|A1=Glass|B1=Glass|C1=Glass | |||
|A2=Insulated Gold Cable|B2=MV Transformer|C2=Insulated Gold Cable | |||
|A3=Glass|B3=Electronic Circuit|C3=Glass | |||
|Output=Transformer upgrade | |||
}} | |||
The transformer upgrade must be placed in the slots on the right-hand side of certain machine (though not all machines accept upgrades). Like so: | |||
[[Image:upgradedmachine.png]] | |||
The transformer upgrade can increase the power tire that the machine can accept by 1 per upgrade. You can stack more transformer upgrades for higher voltage tier. | |||
==== Ejector upgrade ==== | |||
Feel bored placing compressed air cells into the compressor? Craft the [[Upgrade#Ejector Upgrade|Ejector Upgrade]]! This upgrade can eject any products that a machine contains. If you need a massive quantity of this upgrade, compress tin to get [[Dense Tin Plate]], and craft the upgrade with dense tin plate to save a few pistons. | |||
{{Grid/Crafting Table | |||
|A1=Tin Plate|C1=Tin Plate | |||
|B2=Piston | |||
|A3=Tin Plate|C3=Tin Plate | |||
|Output=Ejector Upgrade | |||
}} | |||
{{Grid/Crafting Table | |||
|A1=Dense Tin Plate|C1=Dense Tin Plate | |||
|B2=Piston | |||
|A3=Dense Tin Plate|C3=Dense Tin Plate | |||
|Output=Ejector Upgrade|OA=9}} | |||
Place the compressor next to the blast furnace for this upgrade to work. Set the upgrade's direction to the direction in which the side of the compressor is next to the blast furnace by (shift+) right-clicking it on a block. Put another non-directional upgrade in the blast furnace to eject empty fluid cells back to the compressor. | |||
==== Pulling upgrade ==== | |||
The [[Upgrade#Pulling Upgrade|Pulling Upgrade]] is similar to the Ejector Upgrade. Instead of ejecting items, this upgrade makes machine pull items from nearby containers. | |||
{{Grid/Crafting Table | |||
|A1=Tin Plate|C1=Tin Plate | |||
|B2=Sticky Piston | |||
|A3=Tin Plate|C3=Tin Plate | |||
|Output=Pulling Upgrade | |||
}} | |||
{{Grid/Crafting Table | |||
|A1=Dense Tin Plate|C1=Dense Tin Plate | |||
|B2=Sticky Piston | |||
|A3=Dense Tin Plate|C3=Dense Tin Plate | |||
|Output=Pulling Upgrade|OA=9}} | |||
==== Fluid Ejector Upgrade ==== | |||
The [[Upgrade#Fluid Ejector Upgrade|Fluid Ejector Upgrade]] is similar to the [[Ejector Upgrade]], but instead of ejecting items it enables the machine to eject fluids. | |||
{{Grid/Crafting Table | |||
|A1=Tin Plate|C1=Tin Plate | |||
|B2=Electric Motor | |||
|A3=Tin Plate|C3=Tin Plate | |||
|Output=Fluid Ejector Upgrade | |||
}} | |||
{{Grid/Crafting Table | |||
|A1=Dense Tin Plate|C1=Dense Tin Plate | |||
|B2=Electric Motor | |||
|A3=Dense Tin Plate|C3=Dense Tin Plate | |||
|Output=Fluid Ejector Upgrade | |||
|OA=9 | |||
}} | |||
==== Fluid Pulling Upgrade ==== | |||
The [[Upgrade#Fluid Pulling Upgrade|Fluid Pulling Upgrade]] is similar to the [[Pulling Upgrade]], but instead of pulling items it enables the machine to pull fluids from other fluid containers nearby.. | |||
{{Grid/Crafting Table | |||
|A1=Tin Plate|B1=Treetap|C1=Tin Plate | |||
|B2=Electric Motor | |||
|A3=Tin Plate|C3=Tin Plate | |||
|Output=Fluid Pulling Upgrade | |||
}} | |||
{{Grid/Crafting Table | |||
|A1=Dense Tin Plate|B1=Treetap|C1=Dense Tin Plate | |||
|B2=Electric Motor | |||
|A3=Dense Tin Plate|C3=Dense Tin Plate | |||
|Output=Fluid Pulling Upgrade | |||
|OA=9 | |||
}} | |||
=== Further down into the [[Ore processing|ore processing chain]] === | |||
You still want to get more out of your ores? It's time to do that! Do note that the Ore Washing Plant need '''LOTS''' of EU to run. | |||
The [[Ore Washing Plant]] can purify the ores one step further to get purified ores with 1000 mB Water and some EU. You can get tiny piles of ore dusts out of that. | |||
Materials needed: | |||
*24 Iron Ingots | |||
*13 Copper Ingots | |||
*2 Tin Ingots | |||
*2 Redstone Dusts | |||
Note that 3 or 6 Iron Ingots can be replaced with Tin Ingots if you use the IC2 Tin Ingots==>Bucket recipe instead of Iron Ingots. | |||
{{Grid/Crafting Table | |||
|A1=Iron Plate|B1=Iron Plate|C1=Iron Plate | |||
|A2=Bucket|B2=Machine|C2=Bucket | |||
|A3=Electric Motor|B3=Electronic Circuit|C3=Electric Motor | |||
|Output=Ore Washing Plant | |||
}} | |||
An ore washing plant needs water to work. Place any water container in the top left slot to add water, or use a pump with a fluid ejector upgrade to add water automatically. Of course the empty container will be returned. | |||
An example with iron ore being processed: | |||
{{Grid/Ore Washing Plant | |||
|Top=Water Bucket | |||
|Bottom=Bucket | |||
|Water=1000 | |||
|Input=Crushed Iron Ore | |||
|Output1=Purified Crushed Iron Ore | |||
|Output2=Tiny Pile of Iron Dust | |||
|OA2=2 | |||
|Output3=Stone Dust}} | |||
=== Basic Automation === | |||
Now that your machines are working, you probably want to save some labor like putting universal fluid cells filled with air into the blast furnace over and ''over'' and '''over''' again. Also, sometimes you want to process a lot of different items. You just wait there for the machine to do its work? NO! Set up some hoppers and stuff to get things going automatically! Here are some pictures of examples on how to do so. Of course you could create your own designs. However, automating stuff, which just makes your life easier, is always optional. | |||
[[File:Machine_automation_1.png|left|thumb]] | |||
This is a screenshot of a survival world that is played in for about 16 real life hours. On the left you can see some geothermal generators and some hoppers providing power for everything. Hoppers can averagely spread the lava fluid cells that was put into the top chest, and put the empty fluid cells into the bottom chest. There are upgrades in the metal former, pulling items in from the top chest and ejecting items to the chest behind. The metal former is a pretty slow machine, and these chests really helps when you need to process a bunch of iron and tin into plates / casings... Just don't forget to change modes when using this. On the right side you can see a macerator and a working ore washing plant. The macerator pulls items from the chest next to the macerator, and ejects items to the top chest. The ore washing plant has a default pulling upgrade on the first slot, an ejector upgrade set to eject towards to the pump on the second slot, and an ejector upgrade set to eject towards the top chest on the third slot. There is a single fluid cell in the pump/ore washing plant, which makes the ore washing plant automatically fill up with water, while the upgrade arrangement in the machine avoids the fluid cell to be ejected to the top chest. | |||
<br/> <br/> <br/> <br/> <br/> | |||
[[File:Machine_automation_2.png|left|thumb]] | |||
<br/> <br/> <br/> <br/> <br/> | |||
This is a screenshot viewed from the top. In this screenshot you can see the pump and the infinite water source on the top of the machines. | |||
<br/> <br/> <br/> <br/> <br/> | |||
[[File:Machine_automation_3.png|left|thumb]] | |||
<br/> <br/> <br/> <br/> <br/> | |||
This is a screenshot viewed from behind. The cursor is pointing towards the electric furnace, which is automated, having an input chest on the top and an output chest on the bottom. Hoppers were used here, but you can also use upgrades. You can also see the blast furnace and the electric heater, being next to the double chest that has 2 hoppers below it. Notice that the electric heater is the one that has a cable connected to it. | |||
<br/> <br/> <br/> <br/> <br/> | |||
[[File:Machine_automation_4.png|left|thumb]] | |||
<br/> <br/> <br/> <br/> <br/> | |||
In this screenshot you can see the self-detecting dropper that is responsible to send items, in this case the empty universal fluid cell up to the double chest. To the right side, there are 2 hopper filters under the double chest, which is the output chest for the blast furnace. One is to filter out the empty universal fluid cell, and the other one is to filter out the steel ingot, which is not necessary. Slag is left in the double chest. | |||
<br/> <br/> <br/> <br/> <br/> | |||
[[File:Machine_automation_5.png|left|thumb]] | |||
This screenshot shows the hopper filter. | |||
<br/> <br/> <br/> <br/> <br/> | |||
[[File:Machine_automation_6.png|left|thumb]] | |||
<br/> <br/> <br/> <br/> <br/> | |||
This is another screenshot of the automatic blast furnace system. The blast furnace is behind the compressor, with the compressor being set to eject towards the blast furnace, and the blast furnace set to eject towards the double chest. If you directly set the blast furnace to eject towards the compressor, steel will also end up in the compressor as it can be compressed into Steel Blocks. That's why a vanilla hopper filter is used to do that job. | |||
<br/> <br/> <br/> <br/> <br/> | |||
=== Wind Power === | |||
The [[Wind Turbine]] is a great source of EU with relatively high material costs. If you have plenty of Lava, you can craft another Geothermal Generator to fulfill your EU needs instead of crafting the wind turbine. | |||
There are different rotors you can put in the Wind Turbine. Unfortunately, they all eventually wear out. If you get all of your iron from mining, there are better options, although they do last a long time. However, it's a great option if the iron consumption isn't a problem for your operation. | |||
Materials needed: | |||
*49 Iron Ingots | |||
*6 Copper Ingots | |||
*4 Tin Ingots | |||
*2 Redstone Dusts | |||
To build the wind turbine, you'll need a machine block and two iron shafts, crafted like so: | |||
{{Grid/MetalFormer | |||
|Mode=Extruding | |||
|Top=Block of Iron | |||
|Bottom=RE Battery (Charged) | |||
|Output=Shaft (Iron)}} | |||
{{Grid/Crafting Table | |||
|A2=Shaft (Iron)|B2=Machine|C2=Shaft (Iron) | |||
|Output=Kinetic Wind Generator | |||
}} | |||
Here's how you make a wooden rotor: | |||
{{Grid/Crafting Table | |||
|A1=Wooden Planks|B1=Wood|C1=Wooden Planks | |||
|A2=Wooden Planks|B2=Wood|C2=Wooden Planks | |||
|A3=Wooden Planks|B3=Wood|C3=Wooden Planks | |||
|Output=Wood Rotor Blade}} | |||
{{Grid/Crafting Table | |||
|B1=Wood Rotor Blade | |||
|A2=Wood Rotor Blade|B2=Iron|C2=Wood Rotor Blade | |||
|B3=Wood Rotor Blade | |||
|Output=Kinetic Gearbox Rotor (Wood) | |||
}} | |||
The [[Kinetic_Wind_Generator#Rotors|Wood Rotor]] lasts 3 IRL hours inside the Wind Turbine and requires wind levels between 10 and 60 MCW. It has a [[Kinetic_Wind_Generator#Spacing|wingspan]] of 2 blocks. | |||
It takes 18 logs and one iron to make a single wooden rotor, so it needs to be in a location where it can generate more power than 16 pieces of Charcoal (using 2 pieces to turn the wood into charcoal) in a regular Generator to be worthwhile, and that still isn't taking the piece of iron into account. | |||
The Wind Turbine outputs [[KU|Kinetic Energy]], measured in KU. To convert [[KU]] into [[EU]], you also need to craft a [[Kinetic Generator]]. You should be familiar with this if you have used the [[Manual Kinetic Generator]] in the early days. | |||
{{Grid/Crafting Table | |||
|A1=Iron Casing|B1=Iron Casing|C1=Iron Casing| | |||
|A2=Generator|B2=Electric Motor|C2=Shaft (Iron) | |||
|A3=Iron Casing|B3=Iron Casing|C3=Iron Casing| | |||
|Output=Kinetic Generator | |||
}} | |||
Place the Wind Turbine and the Kinetic Generator next to each other at y=160 (use ladders to get up there) and place the rotor inside. Make sure that the output side of the Wind Turbine (marked with a bigger white circle than the other side) and the input side of the kinetic generator (marked with a small white dot) is in contact. If the rotor is spinning, the kinetic generator will then start producing EU. The kinetic generator has a power tier of 3, meaning that it sends out a maximum of 512 EU/p. Therefore, when wiring it to your base, don't forget to connect a MV transformer and a LV transformer before connecting the wire to the BatBox! | |||
You can measure the wind strength with the [[Windmeter]]. This is an optional tool. | |||
{{Grid/Crafting Table | |||
|B1=Tin Item Casing | |||
|A2=Tin Item Casing|B2=Bronze Item Casing|C2=Tin Item Casing | |||
|B3=Tin Item Casing|C3=Small Power Unit | |||
|Output=Windmeter | |||
}} | |||
=== Electric Jetpack === | |||
Now you have placed your wind turbines high in the world, how are you going to get up there faster? You can use the [[Electric Jetpack]]! With it, you can '''FLY''' <s>sometimes like an idiot</s>! | |||
Materials needed: | |||
*12 Redstone Dusts | |||
*2 Copper Ingots | |||
*3 Iron Ingots | |||
*4 Glowstone Dusts | |||
*2 Lapis Lazuli | |||
*8 Tin Ingots | |||
{{Grid/Crafting Table | |||
|A1=Iron Casing|B1=Advanced Circuit|C1=Iron Casing | |||
|A2=Iron Casing|B2=BatBox|C2=Iron Casing | |||
|A3=Glowstone Dust|B3=|C3=Glowstone Dust | |||
|Output=Electric Jetpack | |||
}} | |||
Now that you have got your Electric Jetpack, you can now fly up to avoid creeper explosions! But don't forget to charge it. | |||
==<big>The Way to Industry</big> == | |||
=== Automated Mining: The Miner === | |||
Now we have some machines, but don't stop whining. Pardon, mining. The [[Miner]]. | |||
It's a very good machine for lazy people. But if you want one, you must work hard. as you crafted 16 of them long, long ago. | |||
Total materials needed (with [[OD Scanner]] and 64 Mining Pipes): | |||
*36 Iron Ingots | |||
*10 Copper Ingots | |||
*8 Redstone Dusts | |||
*3 Bronze Ingots | |||
*1 Glowstone Dust | |||
*1 Gold Ingot | |||
*1 Lead Dust | |||
*1 Sulfur Dust | |||
{{Grid/Crafting Table | |||
|B1=Chest | |||
|A2=Electronic Circuit|B2=Machine|C2=Electronic Circuit | |||
|B3=Mining Pipe | |||
|Output=Miner | |||
}} | |||
For the [[Mining Pipe|mining pipe]], there should be still some lying around, but you need more. Craft 64 for each miner you want to use. That should be enough for your miner if you place it on y=64. You needs more if you place your miner higher. | |||
{{Grid/Crafting Table | |||
|A1=Iron Plate|A2=Iron Plate|A3=Iron Plate | |||
|B3=Treetap|C1=Iron Plate|C2=Iron Plate|C3=Iron Plate | |||
|Output=Mining Pipe|OA=16 | |||
}} | |||
For a miner to work, you have to craft another two things: | |||
First, you need a scanner. There are two types: an [[OD Scanner]], or a wider ranged, more energy-eating [[OV Scanner]]. | |||
{{Grid/Crafting Table | |||
|A1=Gold Casing|B1=Glowstone Dust|C1=Gold Casing | |||
|A2=Electronic Circuit|B2=Advanced RE-Battery|C2=Electronic Circuit | |||
|A3=Insulated Copper Cable|B3=Insulated Copper Cable|C3=Insulated Copper Cable | |||
|Output=OD Scanner}} | |||
If you have diamonds, you can craft the OV scanner. | |||
Materials needed: | |||
*11 Redstone Dusts | |||
*'''4 Diamonds''' | |||
*4 Glowstone Dusts | |||
*2 Copper Ingots | |||
*2 Gold Ingots | |||
*2 Lapis Lazuli | |||
*1 Iron Ingot | |||
*1 OD Scanner | |||
You need to craft 1 [[Energy Crystal]]. This recipe should be remembered. | |||
{{Grid/Machine | |||
|Type=Macerator | |||
|Top=Diamond | |||
|Bottom=RE Battery (Charged) | |||
|Output=Diamond Dust | |||
}} | |||
{{Grid/Crafting Table | |||
|A1=Redstone|B1=Diamond Dust|C1=Redstone | |||
|A2=Diamond Dust|B2=Redstone|C2=Diamond Dust | |||
|A3=Redstone|B3=Diamond Dust|C3=Redstone | |||
|Output=Energium Dust|OA=9 | |||
}} | |||
{{Grid/Machine | |||
|Type=Compressor | |||
|Top=Energium Dust|IA=9 | |||
|Bottom=RE Battery (Charged) | |||
|Output=Energy Crystal | |||
}} | |||
{{Grid/Crafting Table | |||
|A1=Redstone|A2=Lapis Lazuli (Dye)|A3=Redstone | |||
|B1=Glowstone Dust|B2=Electronic Circuit|B3=Glowstone Dust | |||
|C1=Redstone|C2=Lapis Lazuli (Dye)|C3=Redstone | |||
|Output=Advanced Circuit}} | |||
{{Grid/Crafting Table | |||
|A1=Gold Casing|B1=Energy Crystal|C1=Gold Casing | |||
|A2=Glowstone Dust|B2=Advanced Circuit|C2=Glowstone Dust | |||
|A3=2xIns. Gold Cable|B3=OD Scanner|C3=2xIns. Gold Cable | |||
|Output=OV Scanner | |||
}} | |||
When used, the OD Scanner scans the ores in a 5x5 area and submits the results on the player's screen. The OV Scanner scans a 9x9 area, and also submits the results on the player's screen. Either one can be used in the Miner. If you have plenty of EU to spare with and enough materials, the OV scanner is highly recommended for use in the miner. | |||
The second item your miner needs is a [[Mining Drill]]. You can put yours in there, and you can also craft a [[Diamond Drill]] for faster speeds and more EU consumption. | |||
|{{Grid/Crafting Table | |||
||B2=Diamond | |||
|A3=Diamond|B3=Mining Drill|C3=Diamond | |||
|Output=Diamond Drill | |||
}} | |||
Put the drill and the scanner in the miner with a few mining pipes, give them energy, and go to the bed, relax, watch TV, but don't do hard jobs! | |||
=== Bigger Portable Batteries === | |||
The miner use a lot of EU. Wouldn't it be nice to put in more EU at a time? You can do this with a [[BatPack]]. A BatPack can carry 60,000 EU. This will be helpful when powering your miners in the future. Although BatPacks are nice, you can carry more EU per slot by stacking fully charged [[Charging RE Battery|Charging RE Batteries]], and taking a single one out to use it. | |||
''(needs material list)'' | |||
{{Grid/Crafting Table | |||
|A1=RE Battery|B1=Electronic Circuit |C1=RE Battery | |||
|A2=RE Battery|B2=Wooden Planks |C2=RE Battery | |||
|A3=RE Battery|B3= |C3=RE Battery | |||
|Output=Bat-Pack | |||
}} | |||
=== Advanced Alloy === | |||
{{Grid/Crafting Table | |||
|A1=Iron Plate|B1=Iron Plate|C1=Iron Plate | |||
|A2=Bronze Plate|B2=Bronze Plate|C2=Bronze Plate | |||
|A3=Tin Plate|B3=Tin Plate|C3=Tin Plate | |||
|Output=Metal Block|OA=2 | |||
}} | |||
{{Grid/Machine | |||
|Type=Compressor | |||
|Top=Metal Block | |||
|Bottom=RE Battery (Charged) | |||
|Output=Advanced Alloy | |||
}} | |||
Now you have yourself plenty of [[Advanced Alloy]]s, bane of Creepers (also good for advanced machines, as you will learn later on)! One of the first things you can do with this Advanced Alloy is make yourself a [[Composite Armor Vest]]. This is as good as an Iron Chestplate, but lasts even longer than a Diamond Chestplate. | |||
{{Grid/Crafting Table | |||
|A1=Advanced Alloy|B1=|C1=Advanced Alloy | |||
|A2=Advanced Alloy|B2=Iron Chestplate|B2-link=Non-IC Items|C2=Advanced Alloy | |||
|A3=Advanced Alloy|B3=Bronze Chestplate|C3=Advanced Alloy | |||
|Output=Composite Armor Vest | |||
}} | |||
You can also make [[Reinforced Glass]], which is more Creeper-resistant than normal Glass: | |||
{| | |||
|{{Grid/Crafting Table | |||
|A1=Glass|A1-link=Non-IC Items|B1=Advanced Alloy|C1=Glass|C1-link=Non-IC Items | |||
|A2=Glass|A2-link=Non-IC Items|B2=Glass|B2-link=Non-IC Items|C2=Glass|C2-link=Non-IC Items | |||
|A3=Glass|A3-link=Non-IC Items|B3=Advanced Alloy|C3=Glass|C3-link=Non-IC Items | |||
|Output=Reinforced Glass|OA=7 | |||
}} | |||
|{{Grid/Crafting Table | |||
|A1=Glass|A1-link=Non-IC Items|B1=Glass|B1-link=Non-IC Items|C1=Glass|C1-link=Non-IC Items | |||
|A2=Advanced Alloy|B2=Glass|B2-link=Non-IC Items|C2=Advanced Alloy | |||
|A3=Glass|A3-link=Non-IC Items|B3=Glass|B3-link=Non-IC Items|C3=Glass|C3-link=Non-IC Items | |||
|Output=Reinforced Glass|OA=7 | |||
}} | |||
|} | |||
=== Synthetic Diamonds === | |||
Having trouble finding all of those diamonds? You can use the [[Compressor]] to convert all of that coal you have been hoarding into diamonds! HAYO! | |||
{{Grid/Crafting Table | |||
|A1=Coal Dust|B1=Coal Dust|C1=Coal Dust | |||
|A2=Coal Dust|B2=Flint|C2=Coal Dust | |||
|A3=Coal Dust|B3=Coal Dust|C3=Coal Dust | |||
|Output=Coal Ball | |||
}} | |||
{{Grid/Machine | |||
|Type=Compressor | |||
|Top=Coal Ball | |||
|Bottom=RE Battery (Charged) | |||
|Output=Compressed Coal Ball | |||
}} | |||
{| | |||
| | |||
{{Grid/Crafting Table | |||
|A1=Compressed Coal Ball|B1=Compressed Coal Ball|C1=Compressed Coal Ball | |||
|A2=Compressed Coal Ball|B2=Obsidian|C2=Compressed Coal Ball | |||
|A3=Compressed Coal Ball|B3=Compressed Coal Ball|C3=Compressed Coal Ball | |||
|Output=Coal Chunk | |||
}} | |||
| | |||
{{Grid/Crafting Table | |||
|A1=Compressed Coal Ball|B1=Compressed Coal Ball|C1=Compressed Coal Ball | |||
|A2=Compressed Coal Ball|B2=Block of Iron|C2=Compressed Coal Ball | |||
|A3=Compressed Coal Ball|B3=Compressed Coal Ball|C3=Compressed Coal Ball | |||
|Output=Coal Chunk | |||
}} | |||
| | |||
{{Grid/Crafting Table | |||
|A1=Compressed Coal Ball|B1=Compressed Coal Ball|C1=Compressed Coal Ball | |||
|A2=Compressed Coal Ball|B2=Bricks|C2=Compressed Coal Ball | |||
|A3=Compressed Coal Ball|B3=Compressed Coal Ball|C3=Compressed Coal Ball | |||
|Output=Coal Chunk | |||
}} | |||
| | |||
|} | |||
{{Grid/Machine | |||
|Type=Compressor | |||
|Top=Coal Chunk | |||
|Bottom=RE Battery (Charged) | |||
|Output=Diamond | |||
}} | |||
As it can be inferred from the recipes, crafting 1 diamond requires 64 coal dust, 8 flint, one obsidian/bricks/iron block and some EU. Bricks is recommended as it's made from clay, found in relatively great abundance in riverbeds. | |||
=== Mining Laser === | |||
''Uhh...'' So we've got some energy. I want to '''MINE''', but I don't like tapping my toes waiting for that Miner to get everything. Time to craft something hot and shiny: the [[Mining Laser]]! | |||
Materials needed: | |||
*10 Redstone Dusts | |||
*7 Iron Ingots | |||
*6 Bronze Ingots | |||
*6 Tin Ingots | |||
*'''4 Diamonds''' | |||
*2 Copper Ingots | |||
*2 Glowstone Dusts | |||
*2 Lapis Lazuli | |||
'''It's very expensive!''' | |||
* I know! But if you want mine with style...<br> | |||
Compress 4 [[Advanced Alloy]]s, craft another two energy crystals, and an [[Advanced Circuit]].<br> | |||
'''When will we finish that laser?'''<br> | |||
*Now! | |||
{{Grid/Crafting Table | |||
|A1=Redstone|A2=Advanced Alloy | |||
|B1=Redstone|B2=Advanced Alloy|B3=Advanced Alloy | |||
|C1=Energy Crystal|C3=Advanced Alloy|C2=Advanced Circuit | |||
|Output=Mining Laser | |||
}} | |||
Although you have crafted the [[Mining Laser]], it can't be charged it yet, which requires the MFE Unit, which needs 16 Diamonds. If you don't have that many diamonds but you have 5 stacks of slag, it is recommended to craft the [[Thermal Centrifuge]] first, which needs the Mining Laser, and you can get coal dust out of slag by processing it in the Thermal Centrifuge, and you can use the coal dust to craft diamonds needed for another Mining Laser and the MFE again. | |||
The Mining Laser have different firing modes. To change the firing mode, hold '''M''' and '''right-click''' (under default controls). The firing modes can be found [[Mining Laser|here]]. | |||
Every firing mode has advantages and disadvantages. The default firing mode is the mining mode. However, if you want to mine fast, use the 3x3 mode or scatter mode. | |||
Note: Explosive mode can inflict serious damage on entities. | |||
=== Completion of the [[Ore processing|ore processing chain]] === | |||
Actually, the thermal centrifuge has uses besides processing ores and slag. It can be used to process depleted nuclear fuels, and more. Similar to the blast furnace, it needs pre-heating before it can process items. It runs directly on EU. | |||
Materials needed: | |||
*20 Iron Ingots | |||
*16 Coal Dusts | |||
*11 Copper Ingots | |||
*4 Steel Ingots | |||
*4 Tin Ingots | |||
*3 Bronze Ingots | |||
{{Grid/Crafting Table | |||
|A1=Coal Dust|B1=Coal Dust | |||
|A2=Coal Dust|B2=Coal Dust | |||
|Output=Carbon Fibers}} | |||
{{Grid/Crafting Table | |||
|A1=Carbon Fibers|A2=Carbon Fibers | |||
|Output=Combined Carbon Fibers}} | |||
{{Grid/Machine | |||
|Type=Compressor | |||
|Top=Combined Carbon Fibers | |||
|Bottom=RE Battery (Charged) | |||
|Output=Carbon Plate}} | |||
{{Grid/Crafting Table | |||
|A1=Refined Iron Plate|A2=Carbon Plate|A3=Refined Iron Plate | |||
|B1=Advanced Alloy|B2=Machine|B3=Advanced Alloy | |||
|C1=Refined Iron Plate|C2=Carbon Plate|C3=Refined Iron Plate | |||
|Output=Advanced Machine}} | |||
{{Grid/Crafting Table | |||
|A1=Coil|B1=Mining Laser|C1=Coil | |||
|A2=Iron|B2=Advanced Machine|C2=Iron | |||
|A3=Iron|B3=Electric Motor|C3=Iron | |||
|Output=Thermal Centrifuge | |||
}} | |||
=== HV Era: The MFE Unit === | |||
For an even bigger energy storage unit, there is the [[MFE Unit]]. It can store 4,000,000 EU, as much as 100 BatBoxes!! If you can empty a fully-loaded MFE Unit during a night, you are a very spendthrift player <s>unless you're producing UUM</s>. | |||
But! It isn't cheap. You must have at least <big>SIXTEEN</big> diamonds! Go to layer 1-16, and search for some diamonds. | |||
Can you find sixteen diamonds? Are they genuine? Okay. Craft them into [[Energy Crystal]]s! | |||
Craft a machine block, 4 gold cables, and craft an MFE Unit like this: | |||
{{Grid/Crafting Table | |||
|A1=2xIns. Gold Cable|B1=Energy Crystal|C1=2xIns. Gold Cable | |||
|A2=Energy Crystal|B2=Machine|C2=Energy Crystal | |||
|A3=2xIns. Gold Cable|B3=Energy Crystal|C3=2xIns. Gold Cable | |||
|Output=MFE Unit | |||
}} | |||
Now, we can store a lot of EU for difficult times, and finally charge your mining laser. | |||
NOTE: Tin cable and most machines can only handle 32EU/t, and the MFE outputs 512EU/t. You must use a [[MV Transformer]] and a [[LV Transformer]], or a [[Gold Cable]] and a couple of [[Transformer upgrade]] add-ons. | |||
=== Steel Rotors === | |||
So you've got some crazy mining going on, you've built lots of expensive machines, your efficiency is through the roof, and hopefully you've built some food and mob-drop farms. Maybe now's a good time to look at Steel Rotors for the Wind Turbine (listed above). These are entirely optional, as there are a number of ways to generate EU. All rotors eventually wear out, but replacing your wooden rotors with steel rotors give a large buff to your wind generators. | |||
{{Grid/Crafting Table | |||
|B1=Steel Rotor Blade | |||
|A2=Steel Rotor Blade|B2=Shaft (Iron)|C2=Steel Rotor Blade | |||
|B3=Steel Rotor Blade | |||
|Output=Kinetic Gearbox Rotor (Steel) | |||
}} | |||
{{Grid/Crafting Table | |||
|A1=Refined Iron Plate|B1=Refined Iron|C1=Refined Iron Plate | |||
|A2=Refined Iron Plate|B2=Refined Iron|C2=Refined Iron Plate | |||
|A3=Refined Iron Plate|B3=Refined Iron|C3=Refined Iron Plate | |||
|Output=Steel Rotor Blade | |||
}} | |||
The Refined Iron (Steel) Rotor lasts 3 IRL days (72 hours) inside the KWG and requires wind levels between 17 and 90 MCW. It has a wingspan of 4 blocks. | |||
=== Block Cutting Machine === | |||
Yes, you heard it right. This magical machine that can cut blocks into plates, logs into ''more'' planks and planks into ''more'' sticks! | |||
Materials needed: | |||
* 13 Iron Ingots | |||
* 8 Copper Ingots | |||
* 8 Steel Ingots | |||
* 2 Redstone Dusts | |||
* 1 Tin Ingot | |||
{{Grid/Crafting Table | |||
|B1=Electronic Circuit | |||
|B2=Basic Machine Casing | |||
|B3=Electric Motor | |||
|Output=Block Cutting Machine | |||
}} | |||
The Block Cutting Machine is '''entirely useless''' without a blade in it. There are Iron blades, Steel blades and the Diamond blade. Steel blade is good enough for almost all purposes, with an exception of Steel blocks. If you have a lot of diamonds, you can also craft the diamond blade, but it is not recommended unless you need a lot of steel plates. | |||
{{Grid/Crafting Table | |||
|A1=Steel Plate|B1=Steel Plate|C1=Steel Plate | |||
|A2=Steel Plate|B2=Iron|C2=Steel Plate | |||
|A3=Steel Plate|B3=Steel Plate|C3=Steel Plate | |||
|Output=Block Cutting Blade (Steel) | |||
|nobreak=y | |||
}} | |||
{{Grid/Crafting Table | |||
|A1=Diamond|B1=Diamond|C1=Diamond | |||
|A2=Diamond|B2=Steel Ingot|C2=Diamond | |||
|A3=Diamond|B3=Diamond|C3=Diamond | |||
|Output=Block Cutting Blade (Diamond) | |||
}} | |||
Finally, you don't have to wait for the Metal Former <s>''that sucks at making plates''</s> to do its <s>stupid</s> thing! HOORAY! | |||
=== Nano Suit === | |||
Your armor is wearing out? There are the EU-based armors! Actually, there are two types of it: the [[Nano Suit]] and the [[Quantum Suit]]. The Quantum Suit is unaffordable now, thus we will craft the nano suit. As you should be wearing the [[Electric Jetpack]], we won't craft the [[Nano-Bodyarmor]] now, but it is needed to craft the [[Quantum-Bodyarmor]] later. | |||
Materials needed: ''(without the bodyarmor)'' | |||
* 112 Coal Dust | |||
* 41 Copper Ingots | |||
* 37 Redstone Dusts | |||
* 16 Tin Ingots | |||
* 15 Iron Ingots | |||
* '''12 Diamonds''' | |||
* 12 Glass | |||
* 10 Lapis Lazuli | |||
* 6 Bronze Ingots | |||
* 2 Glowstone Dusts | |||
* 1 Lead Ingot | |||
* 1 Sulfur Dust | |||
It needs lot of materials, huh? Now comes '''more''' crafting! | |||
{| | |||
| | |||
{{Grid/Machine | |||
|Type=Macerator | |||
|Top=Lapis Lazuli (Dye) | |||
|Bottom=RE Battery (Charged) | |||
|Output=Lapis Lazuli Dust | |||
}} | |||
|{{Grid/Machine | |||
|Type=Macerator | |||
|Top=Lapis Lazuli Block | |||
|Bottom=RE Battery (Charged) | |||
|Output=Lapis Lazuli Dust | |||
|OA=9 | |||
}} | }} | ||
| | |||
|} | |} | ||
The | {{Grid/Machine | ||
|Type=Compressor | |||
|Top=Lapis Lazuli Dust | |||
|Bottom=RE Battery (Charged) | |||
|Output=Lapis Lazuli Plate | |||
}} | |||
{{Grid/Crafting Table | |||
|A1=Copper Plate|B1=Electronic Circuit|C1=Copper Plate | |||
|A2=Tin Plate|B2=Copper Plate|C2=Tin Plate | |||
|A3=Copper Plate|B3=Tin Plate|C3=Copper Plate | |||
|Output=Heat Exchanger | |||
}} | |||
{{Grid/Crafting Table | |||
|A1=Lapis Lazuli Plate|B1=Electronic Circuit|C1=Lapis Lazuli Plate | |||
|A2=Heat Exchanger|B2=Copper Plate|C2=Heat Exchanger | |||
|A3=Lapis Lazuli Plate|B3=Electronic Circuit|C3=Lapis Lazuli Plate | |||
|Output=Advanced Heat Exchanger | |||
}} | |||
{{Grid/Crafting Table | |||
|A1=Insulated Copper Cable|B1=Bronze Item Casing|C1=Insulated Copper Cable | |||
|A2=Bronze Item Casing|B2=Sulfur Dust|C2=Bronze Item Casing | |||
|A3=Bronze Item Casing|B3=Lead Dust|C3=Bronze Item Casing | |||
|Output=Advanced RE-Battery | |||
}} | |||
{{Grid/Crafting Table | |||
|A1=Iron Casing|B1=Insulated Copper Cable|C1=Iron Casing | |||
|A2=Glass|B2=Tin_Cable|C2=Glass | |||
|A3=Glass|B3=Glass|C3=Glass | |||
|Output=Luminator|OA=8 | |||
}} | |||
{{Grid/Crafting Table | |||
|A1=Glass|B1=Glass|C1=Glass | |||
|A2=Advanced Alloy|B2=Glass|C2=Advanced Alloy | |||
|A3=Glass|B3=Glass|C3=Glass | |||
|Output=Reinforced Glass|OA=7 | |||
}} | |||
{{Grid/Crafting Table | |||
|A1=Advanced Heat Exchanger|B1=Advanced RE-Battery|C1=Advanced Heat Exchanger | |||
|A2=Luminator|B2=Reinforced Glass|C2=Luminator | |||
|A3=Rubber|B3=Advanced Circuit|C3=Rubber | |||
|Output=Nightvision Goggles | |||
}} | |||
Remember how to craft [[Carbon Plate]]s? Now comes the actual armor crafting. | |||
{{Grid/Crafting Table | |||
|A1=Carbon Plate|B1=Energy Crystal (Charged)|C1=Carbon Plate | |||
|A2=Carbon Plate|B2=Nightvision Goggles|C2=Carbon Plate | |||
|Output=Nano-Helmet | |||
}} | |||
{{Grid/Crafting Table | |||
|A1=Carbon Plate|B1=Energy Crystal (Charged)|C1=Carbon Plate | |||
|A2=Carbon Plate|C2=Carbon Plate | |||
|A3=Carbon Plate|C3=Carbon Plate | |||
|Output=Nano-Leggings | |||
}} | |||
{{Grid/Crafting Table | |||
|A2=Carbon Plate|C2=Carbon Plate | |||
|A3=Carbon Plate|B3=Energy Crystal (Charged)|C3=Carbon Plate | |||
|Output=Nano-Boots | |||
}} | |||
Now you can finally wear the ELECTRIC ARMOR!!! | |||
=== Teleporter === | |||
The [[Teleporter]]! | |||
{{Grid/Crafting Table | |||
|B1=Insulated Copper Cable | |||
|B2=Electronic Circuit | |||
|Output=FreqTrans}} | |||
{{Grid/Crafting Table | |||
|A1=Advanced Circuit |B1=FreqTrans |C1=Advanced Circuit | |||
|A2=Glass Fibre Cable |B2=Advanced Machine |C2=Glass Fibre Cable | |||
|A3=Advanced Circuit |B3=Diamond |C3=Advanced Circuit | |||
|Output=Teleporter}} | |||
Why do you need the teleporter? To craft the Advanced Miner! | |||
=== Advanced Miner === | |||
The [[Advanced Miner]] is the upgraded version of the [[Miner]]. You don't need to deal with excess cobble if you set it properly, and it can mine a much larger area. | |||
You also need your existing miner. | |||
Materials needed: | |||
* 55 Redstone Dusts | |||
* 51 Iron Ingots | |||
* 32 Coal Dusts | |||
* ''' 21 Diamonds ''' | |||
* 15 Copper Ingots | |||
* 12 Bronze Ingots | |||
* 12 Tin Ingots | |||
* 8 Glowstone Dusts | |||
* 8 Lapis Lazuli | |||
* 8 Steel Ingots | |||
* 6 Glass | |||
* 1 Gold Ingot | |||
* ''1 Miner'' | |||
It's expensive, but it is worth it. | |||
{{Grid/Crafting Table | |||
|B1=Chest | |||
|A2=Electronic Circuit|B2=Machine|C2=Electronic Circuit | |||
|B3=Mining Pipe | |||
|Output=Miner | |||
}} | |||
{{Grid/Crafting Table | |||
|A1=2xIns. Gold Cable|B1=Energy Crystal|C1=2xIns. Gold Cable | |||
|A2=Energy Crystal|B2=Basic Machine Casing|C2=Energy Crystal | |||
|A3=2xIns. Gold Cable|B3=Energy Crystal|C3=2xIns. Gold Cable | |||
|Output=MFE | |||
}} | |||
{{Grid/Crafting Table | |||
|A1=Steel Plate|B1=Carbon Plate|C1=Steel Plate | |||
|A2=Advanced Alloy|B2=Basic Machine Casing|C2=Advanced Alloy | |||
|A3=Steel Plate|B3=Carbon Plate|C3=Steel Plate | |||
|Output=Advanced Machine | |||
}} | |||
{{Grid/Crafting Table | |||
|B1=Insulated Copper Cable | |||
|B2=Electronic Circuit | |||
|Output=FreqTrans | |||
}} | |||
{{Grid/Centrifuge | |||
|Top=Crushed Gold Ore | |||
|Output2=Tiny Pile of Silver Dust | |||
|Output1=Gold Dust | |||
|Output3=Stone Dust | |||
|nobreak=y | |||
}} | |||
|{{Grid/Centrifuge | |||
|Top=Purified Crushed Gold Ore | |||
|Output2=Tiny Pile of Silver Dust | |||
|Output1=Gold Dust | |||
|Output3=Stone Dust | |||
}} | |||
{{Grid/Crafting Table | |||
|A1=Tiny Pile of Silver Dust|A2=Tiny Pile of Silver Dust|A3=Tiny Pile of Silver Dust | |||
|B1=Tiny Pile of Silver Dust|B2=Tiny Pile of Silver Dust|B3=Tiny Pile of Silver Dust | |||
|C1=Tiny Pile of Silver Dust|C2=Tiny Pile of Silver Dust|C3=Tiny Pile of Silver Dust | |||
|Output=Silver Dust | |||
}} | |||
{{Grid/Crafting Table | |||
|A1=Glass|B1=Glass|C1=Glass | |||
|A2=Energium Dust|B2=Silver Dust|C2=Energium Dust | |||
|A3=Glass|B3=Glass|C3=Glass | |||
|Output=Glass Fibre Cable|OA=6 | |||
}} | |||
{{Grid/Crafting Table | |||
|A1=Advanced Circuit|B1=FreqTrans|C1=Advanced Circuit | |||
|A2=Glass Fibre Cable|B2=Advanced Machine|C2=Glass Fibre Cable | |||
|A3=Advanced Circuit|B3=Diamond|C3=Advanced Circuit | |||
|Output=Teleporter | |||
}} | |||
{{Grid/Crafting Table | |||
|A1=Advanced Alloy|B1=Miner|C1=Advanced Alloy | |||
|A2=MFE Unit|B2=Advanced Machine|C2=Teleporter | |||
|A3=Advanced Alloy|B3=Miner|C3=Advanced Alloy | |||
|Output=Advanced Miner}} | |||
=== More powerful generators === | |||
Do you think that solar collectors or coal-based generators can't serve your purposes?<br /> | |||
Do you get tired of waiting for that stupid sun?<br /> | |||
Do you think that pollution isn't an important thing?<br /> | |||
Then, I think, the reactor is your best machine!<br /> | |||
But why doesn't your neighbor have a reactor?<br /> | |||
'''Because it's very expensive!''' | |||
You can find out all about Nuclear Reactors in the [[Tutorial:Nuclear_Power | Nuclear Power]] guide. | |||
Now, use your weapon, mine resources, because soon we will start a new chapter. Listen to a good music, chop down trees, get some cobblestone, manage your farm. Please, '''''RELAX'''''. | |||
=== IC2 Agriculture === | |||
While your advanced miner is slowly mining ores, you can consider cross-breeding crops to get a better yield. More information about this is in [[Tutorial:Crops_and_Cross-Breeding|another tutorial]]. | |||
== <big>'''DAWN OF THE EXTREME VOLTAGE'''</big>: MFSU == | |||
----- | |||
Note: this section "DAWN OF THE EXTREME VOLTAGE: MFSU" is unfinished. Please help if you can. Apologies for the inconvenience. | |||
--[[User:KrisBigK|KrisBigK]] ([[User talk:KrisBigK|talk]]) 01:09, 21 June 2020 (CET) | |||
----- | |||
Think that your MFE isn't storing enough power? Then craft the amazing MFSU! | |||
''(needs material list)'' | |||
{{Grid/Crafting Table | |||
|A1=Lapotron Crystal|B1=Advanced Circuit|C1=Lapotron Crystal | |||
|A2=Lapotron Crystal|B2=MFE Unit|C2=Lapotron Crystal | |||
|A3=Lapotron Crystal|B3=Advanced Machine|C3=Lapotron Crystal | |||
|Output=MFS Unit | |||
}} | |||
Before you can even craft your MFSU, you will need several blue crystals called [[Lapotron Crystal|lapotron crystals]]. | |||
[[ | {{Grid/Crafting Table | ||
|A1=Lapis Lazuli Dust |B1=Advanced Circuit |C1=Lapis Lazuli Dust | |||
|A2=Lapis Lazuli Dust |B2=Energy Crystal |C2=Lapis Lazuli Dust | |||
|A3=Lapis Lazuli Dust |B3=Advanced Circuit |C3=Lapis Lazuli Dust | |||
|Output=Lapotron Crystal | |||
}} | |||
To craft one, you will need energy crystals and upgrade them with advanced circuits and lapis. The MFSU is capable of storing 40 million EU, making it the highest tier of the energy storage device without addons! The MFSU will output EV(Extreme Voltage) and will destroy your wires and machine if transformers are not installed into your EU network properly. | |||
So you would want to consider crafting the [[HV-Transformer]]! | |||
{{Grid/Crafting Table | |||
|B1=2xIns. Gold Cable | |||
|A2=Electronic Circuit|B2=MV-Transformer|C2=Advanced RE-Battery | |||
|B3=2xIns. Gold Cable | |||
|Output=HV-Transformer}} | |||
Place the HV Transformer with the five-dots side facing the MFSU and the single-dot side facing the MV Transformer or your MFE. This way it will "step-down" the extreme voltage to high voltage. | |||
=== Replication === | |||
There is a [[Tutorial:Replication|separate tutorial]] about replication. | |||
=== Quantum Suit === | |||
Once you've replicated enough [[Iridium]], you can craft the quantum suit. | |||
''unfinished, please refer to [[QuantumSuit Bodyarmor]] for information.'' | |||
=== Terraformer === | |||
We did a lot of jobs, we have got a little house, and a few machines, '''BUT'''. | |||
Why don't we make a big house for our machines? I said, that keep in your mind a big, flat place. If it takes a lot of time to go to your flat place, we will craft a [[Teleporter]], or a [[Terraformer]]. | |||
For a Teleporter, you need a lot of energy, two metal blocks, some glowstone dust, and some coal dust. | |||
For a Terraformer, you need energy, two [[Tfbp|TFBP]], an [[Advanced Machine|advanced machine]], and some glowstone dust. | |||
Craft '''two''' carbon plates, and then compress two metal block. Make a machine, and craft them to an advanced machine! | |||
Now | Now make an electronic circuit, an advanced circuit, and take two redstone. | ||
[[file: | {{Grid/Crafting Table | ||
|B1=Electronic Circuit|B2=Advanced Circuit | |||
|A3=Redstone|C3=Redstone | |||
|Output=Tfbp}} | |||
Now, craft that amazing '''''TERRAFORMER'''''! | |||
{{Grid/Crafting Table | |||
|A1=Glowstone Dust|A2=Dirt|A3=Glowstone Dust | |||
|B1=Tfbp|B2=Advanced Machine|B3=Dirt | |||
|C1=Glowstone Dust|C2=Dirt|C3=Glowstone Dust | |||
|Output=Terraformer}} | |||
Make another Tfbp, and program that! | |||
*Flatificator | |||
It makes a flat area with dirt ground. | |||
{{Grid/Crafting Table | |||
|A2=Dirt|B1=Dirt|B2=Tfbp | |||
|B3=Dirt|C2=Dirt | |||
|Output=Flatificator}} | |||
*Cultivation | |||
It replaces sand with dirt, and places a few saplings. | |||
{{Grid/Crafting Table | |||
|A2=Seeds|B1=Seeds|B2=Tfbp | |||
|B3=Seeds|C2=Seeds | |||
|Output=Cultivation}} | |||
*Irrigation | |||
It forces saplings and seeds to grow faster, and causes sugar cane to grow 4 blocks high. | |||
{{Grid/Crafting Table | |||
|A2=Water Bucket|B1=Water Bucket|B2=Tfbp | |||
|B3=Water Bucket|C2=Water Bucket | |||
|Output=Irrigation}} | |||
*Desertification | |||
It replaces dirt with sand, destroys plants and saplings, melts ice and snow. '''It sets forests on fire!''' | |||
{{Grid/Crafting Table | |||
|A2=Sand|B1=Sand|B2=Tfbp | |||
|B3=Sand|C2=Sand | |||
|Output=Desertification}} | |||
To put a Tfbp in a Terraformer, just hold it and right-click in the Terraformer. To remove it, just right-click in the Terraformer with a wrench. Supply the Terraformer with energy, and after 2-3 days, it will finish the job. | |||
[[file:Workingterraformer.png|link=|1200px|center]] | |||
== That's it! == | |||
Of course this is just the first steps so now you are pretty much on your own! You might want to craft a [[Mass Fabricator]] or a [[Tesla Coil]], whatever... So, go ahead and do what you like do and yes, go and browse some pages on this wiki when you have some troubleshooting! | |||
{{Navigation|Tutorials=yes|Secrets=yes}} | {{Navigation|Tutorials=yes|Secrets=yes}} | ||
[[Category:Tutorial]] | [[Category:Tutorial]] | ||
Latest revision as of 19:19, 25 August 2022
The most recent version of IC² is V2.8.<html>.
This tutorial is regularly updated. You can see the first version of it here: First Steps in the IndustrialCraft mod for Minecraft V0.5.pdf (texture pack used: Soartex).
Important: This tutorial is made for v2.X of IndustrialCraft².
Before you begin[edit]
If this is your first time playing Minecraft, don't be that hurry to try mods. IC2 is a mod (modification), which adds new things and changes some vanilla behaviors, making it different from vanilla Minecraft. Try vanilla survival to get a taste of what vanilla is like before you begin on your IC2 survival. In this way, you'll get a clear understanding of what IC2 adds to Minecraft, and what's the difference.
If this is your first time playing with a mod, make sure that you have installed IC2 correctly. IC2 is based on Forge API, which needs installing Forge.
If this is your first time playing IC2, it is highly recommended to create a creative world and test things like how machines work, how to place down machines to orientate them correctly, and many more things. By doing this you can reduce the need for testing things in your survival world as there is a chance of messing things up. You don't want half an hour of your work turns into a hole in the ground, right?
If you find something mentioned in this tutorial not working, there is a high chance that your IC2 version is too old. There is a low chance that this tutorial is wrong, and a lower chance that you have actually discovered a bug.
In order to complete the IC2 tech tree, you will need at least tens of hours of gameplay. Don't expect that you can complete everything within a single day.
Basic steps in a new world[edit]
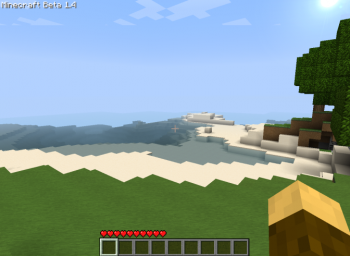
Now that you have downloaded and installed the mod and generated a new map, you really don't know where to begin. Like all other maps you begin in, gather some wood, then some cobblestone, and set up a base for your first night, just as how you would do in vanilla survival.
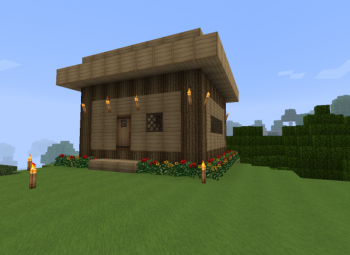
Here is an example of a base with some decorative flowers. In the first days, having an pretty base is not recommended, as it will be much easier to do this in late game.
Beware of the mobs if you are not playing in Peaceful mode; the creepers can blow up what you built. Lighting up wherever you go with torches is always a good thing to do.
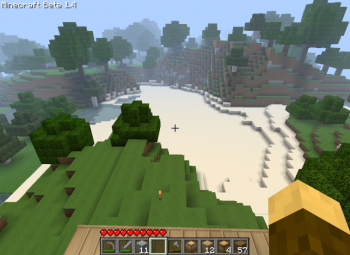
Keep in mind that you will need a lot of room for your industry. Try to get a good spot with a lot of open space not too far away, like the sandy beach in the picture. Don’t forget to add some chests and a bed in your little place. Once you acquire stone tools, growing trees and wheat are essential if you don't want to travel long distances to get wood and food.
In this tutorial, wood and cobblestone will not be included in the material list unless a great amount is needed because of their abundance and how easy it is to get them.
Nothing new here, but a good base is a good start. The next part will introduce some new things.
First Ingredients and Machines[edit]
Now, you have a little basic survival base. Want to plant crops in IC2 style? Sure! However, keep in mind that empty Crops, which is the IC2 block to plant crops on, will grow Weed after some time and it can destroy all of your farmed crops. Weed can be removed by breaking and replacing the crop block, or with a Weeding Trowel, which needs iron. However, the advantage of the IC2 crops is that you don't need to re-plant the wheat after harvesting it.
Of course, you should till some soil near a water source and gather a crop to plant. Wheat is a good crop to plant as wheat seeds are fairly simple to get in early game. For the hydration of farmland, use a natural water source if you can to save the iron needed to craft a bucket.
If you have decided to go with the IC2 crops, take some wood and create some sticks for Crops.


Take these, and place one on each block of farmland. Go get some Wheat seeds by punching grass and then plant them. When your wheat is ready to harvest, you can right-click to harvest it and wheat seedlings will remain, saving you from having to use more seeds to replant! There's a lot more you can do with crops in IC2, but this will help get you basic food to survive.
Now, you need to gather Rubber. Rubber is produced by smelting Sticky Resin in a furnace, and sticky resin can be collected by right clicking a Resin Hole on a Rubber Tree with a Treetap. While your crops are growing, go to a forest or a swamp biome to find a Rubber Tree. Harvest the tree, and take at least 1 sapling back to your base. With that sapling you can start a rubber tree farm. 3 to 5 rubber trees are enough for now, but more will be always beneficial in the long term. So just plant the tree, destroy the leaves to get the sapling back, and continue on until you have around 20 trees. That should be enough in the long term. Also, start a manual birch tree farm, as you main source of wood. In the meantime, you should always harvest your wheat and craft them into bread, to prepare enough food for mining. Always keep a stack of logs and half a stack of charcoal in your chest if you can.
Use 5 Wooden Planks to craft a Treetap. You will need more of them later, but one is enough for now. It doesn't have to be oak wood planks that works, any wood plank (including some of the modded ones) should work, as long as it is registered as plankWood in the oredict.
Now, extract 7 Sticky Resin from the Rubber Trees. You can leave the rubber in the furnace, as it is needed later.
For now, gather torches, stone pickaxes, an iron pickaxe and food, for you will have to go to the center of the earth! The second thing you must gather is Redstone; that next-to useless red powder you will have in astronomical quantity is the base of industrial electricity. Of course, you will need an iron pickaxe to extract it, but you must have a bad spawn point if you don’t find any along the way. The iron pickaxe is a luxury by now, so only use it when it is really needed, like mining redstone ores.
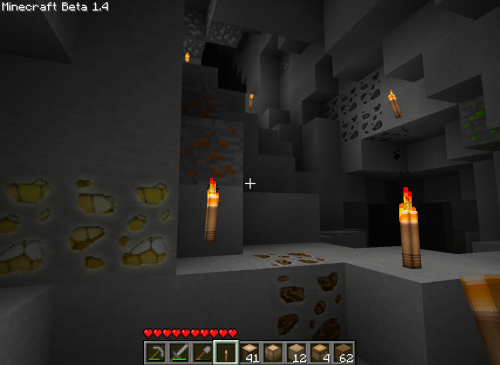
Here is a screenshot of a natural cave where you can see all but three types of ores you can gather, from left to right:
- Gold. It's much more useful in IC2 than it was in vanilla Minecraft, especially in its dust form. It's involved in many mid-tech machines. You should mine it - it will become more useful in the future.
- Tin. It is required for many things, but it is fairly common.
- Copper. Like Tin, it is required for most things in IC, such as cables, so you must gather a good stock in the beginning. Like Tin, there's plenty in the world.
- Iron. Every machine uses Iron, so it will be the ore you must hunt the most. You will be always short of Iron.
- Coal. Its value was increased, so if you want torches or furnace fuel, use Charcoal. Use Coal for other, more important things. Coal Dust is used to build Solar Panels; it's a more efficient Fuel, and lots of things like the nano-suit use it. In other worlds, you might not care about Coal, but in IC, it is valuable.
- Uranium. You will need it to power your future nuclear reactor or to craft a nuke to blow up a mountain. Besides that, it is not involved in other recipes. It is rarer than other ores, but can be found at every layer. You will need an iron pickaxe to gather it.
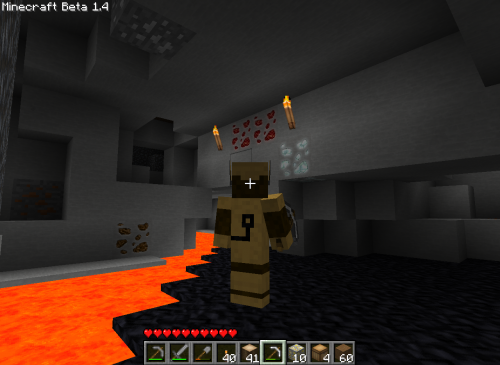
Further away in the cave:
- Redstone: Redstone is involved in most parts of IC crafting, especially the basic ones. We need some for crafting the first part of a machine, and later, other things.
- Diamond: Ha, the diamond. Everybody runs after them. Only get 3 of them and keep them in a chest; leave the rest of the diamond ores. It is not beneficial to mine diamond ores without a fortune pickaxe unless it is really necessary. We will craft something awesome with them(Not the vanilla diamond pickaxe!). You should know that you can produce diamonds with coal. This will be shown later. There is something else to do with them other than wasting them in one-use tools or armor.
- Lapis lazuli: Not shown here, but you know it. Involved in the more advanced machines, you need BLOCKS of lapis to craft them, so if you find it now, just keep it until you have a need to use it.
- Lava: I know, it’s not a mineable resource, but it’s used to power one of the most powerful generators: the Geothermal Generator. Also, it can be used to create a nether portal without a diamond pickaxe. Keep in mind where some lava lakes are to go back to later.
- Lead: Not shown here. You won't need lead for a quite a while, and even then only in small quantities. It's primary used in nuclear reactors, but is also used in intermediate batteries.
- Obsidian: You need some Obsidian to go in the Nether because you will need some Glowstone Dust for mid-tech machines (alternatively, Glowstone Dust can be crafted using Gold Dust and Redstone Dust). Obsidian is also a part of the process of producing Diamonds out of Coal.
Now you know what you can gather underground. To continue, you need to have the following materials:
- 27 Iron Ores
- 7 Rubbers
- 4 Redstone Dusts
- 3 Copper Ores
- 3 Tin Ores
- 3 Flint
An alternate route is available: If you REALLY can't get that much iron but you are willing to spend 5 extra redstone dusts, you can save yourself 4 iron ore and a tin ore. HAYO!
Now that you're safe at your base, smelt exactly 27 iron ore, 3 copper ore and 3 tin ore. For the alternate route: smelt exactly 19 iron ore, and 3 copper ore. Don't smelt the tin ore.
Be patient and don't smelt any more ore than listed above. Soon you will be able to craft an incredible machine: the Macerator, which will give you 2 crushed ores from one ore and other stuff which will be explained later.
However, before you build a Macerator, you need basic crafting tools in IC2: The Forge Hammer and the Cutter. Grab 2 sticks and your freshly-smelted iron ingots to craft those tools.
Why are there two recipes for the forge hammer? Because it is SYMMETRICAL! HAYO!
Your First Machine: the Macerator[edit]
Now that you have your tools ready, it's time to craft your first machine! Take all of your iron ingots and copper ingots, and craft all of them into iron and copper plates.
Note that these recipes are shapeless, meaning that you can put the two ingredients anywhere you like, and you will still get the same output. Your crafting tool will not be consumed, but they will take 1 damage per use, and they will be consumed once they run out of durability, just like any other tool.
You remember the rubber that you have smelted? Take it, and we will craft some Insulated Copper Cables. Place the Copper Plates and the Cutter onto the crafting grid to cut them into Copper Wires. Then combine your wire with Rubber to insulate it. These recipes are also shapeless.
Now we will craft our first Electronic Circuit. If you have followed this tutorial, all materials should be already prepared by now. Electronic Circuits are the basic circuit boards used in every machine.
Next we must craft the recipe of all machines: the Basic Machine Casing. Just take 8 Iron Plates and draw a box with them in the crafting interface.
FINALLY we can craft our first machine. We just need 3 more flint and 2 cobblestone. They should be lying somewhere in your chests or your inventory. Put the flints, the cobblestone, the Machine Casing, the Electronic Circuit on the crafting table and TADA!
And now, ladies and gentlemen, the moment you've all been waiting for: the incredible MACERATOR which can double your mining productivity. You placed down the Macerator, put your ores into it, but you are scratching your head thinking WHY IS THIS THING NOT WORKING? Because to use it, you need ELECTRICITY, made by a GENERATOR.
Alternate route
Still remember there is an alternate route? This is where things will start to be a little different. Skip this section if you have smelted 27 iron ores at the beginning.
What should you do with the 4 Iron Ores that you didn't smelt before? Macerate it! But power the Macerator with what? Redstone Dust! Redstone Dust can provide the Macerator (or any other machine) with 800 EU. Put your 4 iron ore into the top left slot of the Macerator, and then a single piece of Redstone Dust on the bottom left slot. BOOM! The Macerator magically starts to work! By hovering your mouse over the lightning icon, you can see how many EU the machine currently has. If a machine runs out of EU, it will stop working. When there is less than 400 EU, put another piece of Redstone Dust into the machine to continue powering it. After your Iron Ores are well-macerated, put 2 Iin Ores into it and repeat the same process. After all of them are complete, you should use 5 Redstone Dusts.
Now you have 8 Crushed Iron Ore and 4 Crushed Tin Ore, throw them into a Furnace to smelt them. The magic appears: each Crushed Ore is smelted into an ingot! You've got double the ingots out of a single ore block! Awesome!
Take Iron Ore as an example here. This works with any other ore generated in the Overworld.

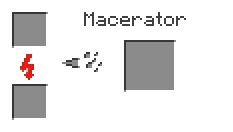
Generator[edit]
Before making the Generator, you also need to craft some items.
Take 3 Tin Ingots, first craft all of them into plates, them craft only 2 of them into Tin Item Casings. Crafting item casings is the same with other metals. Time to remember this recipe.
Craft the remaining Tin Plate into Tin Cables.
Insulate one of the Tin Cables as you just need one now.
Then craft a RE Battery.
There. Now you have crafted one of the main ingredients of the Generator.
There are 2 ways to craft a Generator, but both actually requires the same amount of raw materials. First, you can use a RE Battery, a Basic Machine Casing, and a Furnace.
Or, you can use a RE Battery, 3 Iron Plates, and an Iron Furnace.
The Iron Furnace is crafted as following:
Both recipes cost the same amount of Iron Plates overall, so take your pick.
Now you have got yourself a Generator. Place it next to the Macerator, and put Charcoal into the Generator to generate EU from it. Remember only to put in fuel when needing EU - otherwise precious EU is likely to get wasted.
The Power of Bronze[edit]
Now you have a small base that allows you to get twice as many ingots for every mining run. Unfortunately, you can’t move any of the machines. If you mine them with pickaxes, they will only drop a machine casing. Then you'll have to rebuild it from scrap.
You can craft an optional engi-friendly tool dedicated for moving and rotating machines: the Bronze Wrench. The Bronze Wrench is made from BRONZE. Your little voice is saying: "A new ore I haven't found? How can it be so rare?" YOU FOOL, Bronze is a man-made alloy that is made from COPPER and TIN. You need to use a Macerator to grind Copper and Tin Ingots into dusts, then take the dust and mix them in a 3:1 ratio. This Bronze Dust recipe is shapeless. Note that although you can create Bronze, there is no way in vanilla IC2 to separate those metals once they have been mixed. Think carefully before you do that!
To smelt Bronze Dust into ingots, put them in a Furnace.
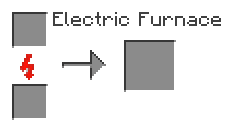
You'll need six Bronze Ingots to make a Bronze Wrench:
Using a Bronze Wrench is incredibly easy: just right-click on a machine and its primary side will rotate to that face; shift-right-click to rotate it to the opposite side you clicked; right-click the same face a second time and the machine will be removed; be careful: In some versions of IC2, if the wrenched machine isn't empty, you will lose everything it contains. And sometimes you can make a mistake (about a 20% chance of failure), and you can’t retrieve the machine you craft; it's unlucky, but it happens. Only 4 machines can be retrieved safely every time: MFE Unit, HV Transformer, Terraformer and MINERs. However, if you upgrade your wrench into an Electric Wrench, and toggle it to loss-less mode (this mode removed since IC2 v2.3.222), you are guaranteed to get your machines back no matter what, at a cost of 9000 EU per operation. Now there is a 100% success rate in IC2 Experimental with the Wrench and the Electric Wrench, so feel free to crank away! But removing EU storage blocks will cause them to lose 20% of their stored power.
The Recipes and Resources page has a list of all available Bronze tools.
Bronze can also be used to craft Bronze armor as a replacement of Iron armor. It will not be introduced here. Click on the link for more information.
Another important use for Bronze is to craft the Tool Box. 2 Tool Boxes are needed to craft the Metal Former, which will be introduced in the next section. It is better to craft them now.
Materials you need to craft 2 Tool Boxes:
- 6 copper dusts
- 2 tin dusts
- 2 chests
First, mix the dusts to create Bronze. Then smelt them to get ingots. Remember how to craft item casings? You need to craft 10 Bronze Item Casings. In case you have already forgotten them, they are shown below.
Now to craft two Tool Boxes:
Other uses of Bronze[edit]
Besides the uses mentioned above, bronze can also be used as a replacement for Iron.
|
Also, Bronze can be crafted into tools and armor. Bronze tools performs exactly the same like Iron tools, but their durability is 100 point higher than that of iron. Bronze armor is the same as Iron ones, with the only difference of names and textures.
Metal Former[edit]
Worried about having to keep crafting Cutters and Forge Hammers? Wondering if there is a machine that can do all this crafting without tools? Perhaps it's time for you built a Metal Former. It can craft metal into Plates, Casings, Cables, and some other miscellaneous things. Most importantly, it can craft 3 Copper Cables out of a single ingot, while with your crafting tools you can only craft 2.
Materials needed:
- 15 Copper Ingots (8 Copper Ores)
- 12 Iron Ingots (6 Iron Ores)
- 6 Rubber
- 2 Redstone Dusts
Craft all 15 Copper Ingots into Copper Cables, and insulate 6 of them. Then craft only 9 Iron into Plates. You'll need to make three Copper Coils.
Then craft an electronic circuit and a basic machine casing. If you have already forgot those recipes, they are in section 2.1. Now you should have all materials needed to craft a metal former.

Place the Metal Former according to the picture on the right. It can be mirrored to the left. The cables can be either Tin or Copper, or a mix of them.. You might want to craft either of them if you don't have some left-over cables. Remember to insulate them: Uninsulated cables will electrify you if you get too close to them, causing unwanted but easily avoidable damage.
The Metal Former has 3 modes: Rolling, Extruding and Cutting. Rolling takes the place of the Forge Hammer; turning Ingots into Plates and Plates into Casings. Cutting replaces the Cutter, though it has no real use, as the Extruding mode converts ingots directly into 3 to 4 cables (instead of 2 to 3 from cutting Plates, amount also depends on material, higher tier materials make more cables). The Extruding mode also makes most of the miscellaneous stuff, like Shafts for use in kinetic machines and Iron Fences from Iron Item Casings.
Iron Furnace[edit]
One of the first IC2-related things you'll probably want to create is an Iron Furnace. This is an upgrade over the regular Furnace from vanilla Minecraft (a.k.a. Stone Furnace by some IC2 users). It operates faster and uses fuel more efficiently. Click on the link for details.
Materials needed:
- 5 Iron Ingots (3 Iron Ores)
If you have only crafted one of them, don't place it down yet. The Iron Furnace is an important part of making an Electric Furnace in the next step.
Electric Furnace[edit]
Materials needed:
- 6 Rubber
- 4 Redstone Dusts
- 2 Copper Ingots
- 1 Iron Ingot
- 1 Iron Furnace
The Electric Furnace will allow you to smelt using electricity instead of using Charcoal. This is the thing you'll use your Iron Furnace to craft. Remember that you can craft 3 Copper Cables by extruding a Copper Ingot in the Metal Former?
I know, it’s another Circuit to craft, but you are warned that it would be everywhere.
You can place the Electric Furnace next to the cable that is connected to the Metal Former. Don't put it next to the Cable directly connected to the generator. Something else will replace that Cable later. Like the vanilla furnace, you put the stuff you want to heat in the upper part, and an EU source in the bottom. It's 12.5% faster than the Iron Furnace, and there is no energy wasted. If there is nothing left in the top, it immediately stops consuming EU.
You now have 1 Metal Former, 1 Generator, 1 Macerator, and 1 Electro Furnace. It’s not much. If you think you can use more things, you're right.
BatBox[edit]
Adding a BatBox will provide a much larger energy storage buffer for your Generator and therefore simplify your operation. You'll need three Rechargeable Batteries to build it.
Materials needed:
- 8 Tin Ingots
- 6 Redstone Dusts
- 4 Rubber

Replace the Cable next to the Generator with the BatBox that you just crafted. Make sure the output side, marked with a white dot, faces the cable. You can open a creative mode world to test how to place the BatBox in the correct direction. Don't make the cable longer than four blocks to avoid wasting energy. If you need to change the direction of the BatBox's output facing, you'll need to use the Bronze Wrench.

BatBoxes can be daisy-chained to provide more EU storage. They can also be used to break up lengths of cable to avoid energy loss. The maximum length you can have of Tin Cable and copper cable is four before it loses 1 EU/t. By placing a BatBox at the end of four blocks of Cables, you can then go another four blocks without energy loss. Keep these ideas in mind as you expand your base.
Extractor[edit]
Thinking it is a waste of Rubber by simply smelting Sticky Resin? That's why we're going to craft the Extractor!
Materials needed:
- 9 Iron Ingots
- 6 Rubber
- 4 Treetaps
- 2 Copper Ingots
- 2 Redstone Dust
The Treetap used in this recipe must be a new one, i.e. have a full durability of 16.
Now, extend your cable by a block and then place down your Extractor. With the Extractor, you an get 3 rubber out of a single Sticky Resin. Awesome!
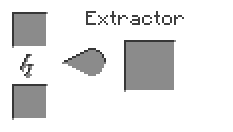
From now on Rubber will be no longer included in material lists as it is easy to produce them in mass quantities. Always keep a stack of them in your chest.
Introduction to the IC2 E-net[edit]
In IC2, a E-net is a series of blocks involved in the production, transportation and usage of EU. EU is produced by Generators, transported in packet form by Cables, Transformers, EU storage blocks or in item form by different kinds of Batteries, and consumed by mostly machines. The size of a packet determines the voltage (rounded up, available voltages are 32 EU/p, 128 EU/p, 512 EU/p, 2048 EU/p and 8192 EU/p), and a voltage too high can melt cables and blow up machines. EU storage blocks have a certain output voltage, and only outputs if it has enough EU stored for a single packet unless it powers the machines directly. For example, BatBoxes, which sends out 32 EU per packet, won't output anything unless it has 32 EU. What is also worth noticing is that EU storage blocks can accept any packet sizes equal or lower to its own output packet size without exploding, meaning that a CESU can accept power from a BatBox, but not vice versa.
Machines, batteries and electric tools each have their own Power Tiers, usually labelled in the tooltips. Power tier is just another name for voltage, or EU per packet. Since packets don't apply to items, it is called "Power Tier" instead. Tier 1 refers to 32 EU/p, tier 2 refers to 128 EU/p, tier 3 refers to 512 EU/p... The tier for machines decides the maximum acceptable packet size, which exceeding that packet size makes machines explode, just like EU storage blocks. Batteries can only be put into machines that have a equal or higher power tier, not the lower ones. For example, a tier 2 battery can be placed into a tier 2 machine or a tier 3 machine, but not a tier 1 machine. The tier of electric tools decide which EU storage blocks/generators can power them. They can only be charged in an EU storage block that has an equal or higher power tier.
To increase or decrease voltage, a Transformer is needed. The Transformer will be introduced later, as you don't need to know or use it now.
Currently, you are on LV (low voltage). You will gradually progress upwards the voltage tiers, and only by then will you need the Transformer.
Alternative Power Sources[edit]
Solar Power[edit]
An option for renewable energy is to add a Solar Panel to reduce your Charcoal usage. Keep in mind that Solar Panels require an unobstructed view of the sky and they only work in the daytime.
Materials needed:
- 13 Rubber
- 10 Iron Ingots
- 6 redstone dusts
- 4 copper ingots
- 3 glass
- 3 coal (not Charcoal!)
- 3 tin ingots
Craft 2 Electronic Circuits, a Generator, and macerate 3 coal into 3 coal dusts in the [Macerator]. Then you can craft the Solar Panel.
Connect your Solar Panel (with or without a cable) to the top of the BatBox. Now your BatBox will receive a constant trickle from the Solar Panel and can also receive energy from your Generator. The downside is that these are pretty expensive, but just one or two helps immensely early on.
Manual Power[edit]
The Manual Kinetic Generator allows you to generate some Kinetic Power (Unit: KU, short for kinetic unit) by simply standing there clicking on it over and over again. You will gradually use your hunger bar in this process.
Materials needed:
- 31 Iron Ingots
- 6 Copper Ingots
- 4 Tin Ingots
- 2 Redstone Dusts
Craft a Generator, a Basic Machine Casing, a Lever, 2 Tin Item Casings, 2 Coils, and 6 Iron Item Casings.
Craft a Manual Kinetic Generator.
Kinetic power can't be directly used, but you can convert it into Electric Units with the Kinetic Generator. But you still need to craft something else before you can craft the Kinetic Generator.
First the Iron Shaft. This is made by extruding an Iron Block in the Metal Former.
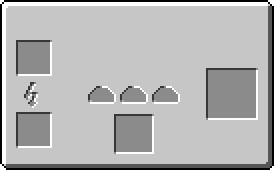
Then the Electric Motor, You need two Tin Casings, one Iron Ingot, and two Copper Coils:
Now you can craft the Kinetic Generator.
Place the Kinetic Generator next to the Manual Kinetic Generator so that the input face (look for that Iron Shaft in the middle of a dark hole) is in contact with the Manual Kinetic Generator. Now make sure the output face of the Kinetic Generator (just a completely black circle) is in contact with the high voltage side (indicated by 5 dots) of a [[LV Transformer]. Set the Transformer to fixed step down mode and connect the low voltage side (indicated by 1 dot) of the Transformer to a Cable or the BatBox. Now you can produce about 13 EU/t by just standing there and holding the USE button (default: right mouse button). This setup is great for Batbox Chargepads early on! However, do not continue to spam-click when your EU storage is full - excess EU in the Kinetic Generator will make things explode.
Plant Power[edit]
See Biofuel energy production for more details on how to turn green things into EU. HAYO!
Etcetera[edit]
In this image you can see the BatBox, with the Generator to its left, and a length of Copper Cable four blocks long to its right. In the current version of IC2, Tin Cable has taken the place where Copper Cable used to be in the cable hierarchy, so pretend that cable is Tin. Up to four machines can then be placed directly in front of the cable. Going up from the BatBox is a four-block-long cable that connects to a second BatBox, and then from there to either a Solar Panel or a wind generator of sorts using Tin Cables.
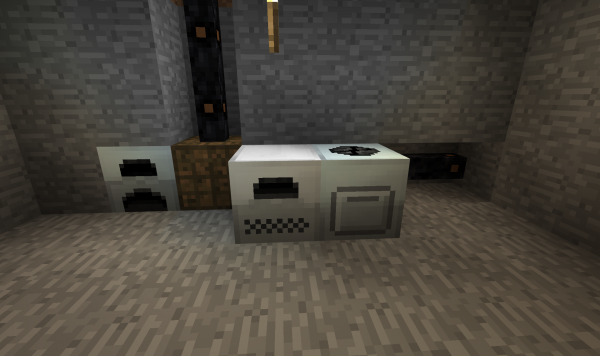
NOTE: Most textures in images are outdated.
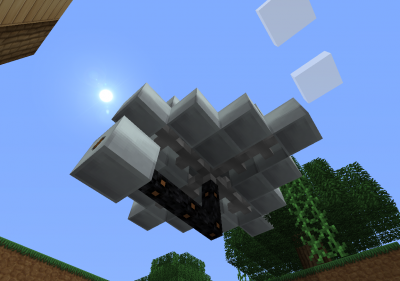
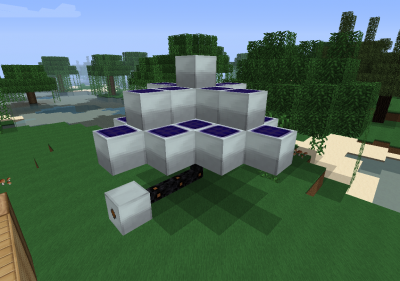
You can see the inside of a little base, 3 Macerators, 3 Electric Furnaces, 1 Extractor, 1 Generator in view, and 2 machines unknown. You can see there is a chest in front of the generator to gather the charged batteries when the player stalk outdoors.
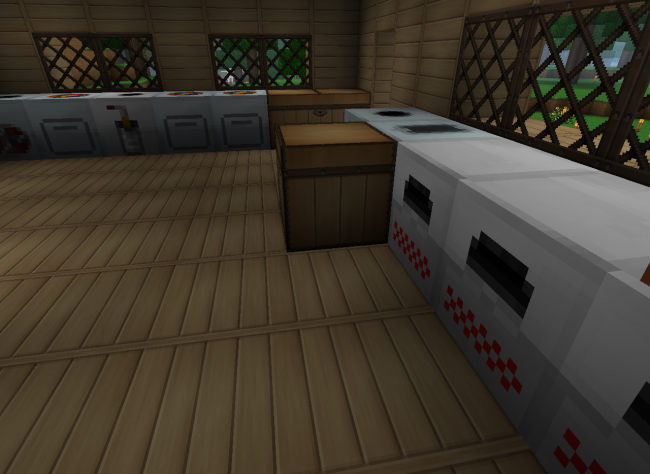
Second Steps[edit]
Electric tools[edit]
Tired of making pickaxe after pickaxe? What about an EU-based version?
All electric tools use EU instead of durability. After using, you just need to recharge it by placing it either in a generator or in a EU storage block like the Batbox.
These tools are optional for now, but you should eventually craft them.
Mining Drill[edit]
The Mining Drill is the EU-based version of the pickaxe.
Materials needed:
- 11 Iron Ingots
- 8 Copper Ingots
- 8 Redstone Dusts
- 8 Tin Ingots
Chainsaw[edit]
The Chainsaw is an EU-based version of the axe, shears, and sword, all in one.
Materials needed:
- 11 Iron Ingots
- 8 Copper Ingots
- 8 Redstone Dusts
- 8 Tin Ingots
Electric Wrench[edit]
Upgrade your Bronze Wrench to an Electric Wrench! This is a very useful tool.
Materials needed:
- 8 Copper Ingots
- 6 Bronze Ingots
- 5 Iron Ingots
- 4 Redstone Dusts
- 4 Tin Ingots
The Electric Wrench works the same way as the bronze wrench. It's a lot of work to make, but using it doesn't decrease its durability. Just be careful not to drop it in lava.
Electric Treetap[edit]
Going nuts making all those treetaps for resin? Then this is your tool: The Electric Treetap.
Materials needed:
- 8 Copper Ingots
- 5 Iron Ingots
- 4 Redstone Dusts
- 4 Tin Ingots
The Recipes and Resources page has a list of all available power tools.
Universal Fluid Cell[edit]
The Universal Fluid Cell is a stackable container capable of carrying fluids, similar to the vanilla bucket. It is also used in many crafting recipes of fluid-related machines.
With the freakin' awesome fluid cell, you can walk around with 1728 buckets of lava in your inventory, instead of a mere 27 buckets. The practical use of this will be introduced later.
Pump[edit]
Remember that lava lake you found waaaaay back when you made your first trip in the mines? Now it's time to take advantage of it with a Pump. The pump can fill buckets or Universal Fluid Cells for us.
Materials needed:
- 15 iron ingots
- 8 tin ingots
- 6 glass
- 2 copper ingots
- 2 redstone dusts
Now, we will craft it! We'll need to make 2 Universal Fluid Cells, some mining pipes, a treetap, and the basic stuff to craft it:
Place the pump directly over a lava lake and place a chest right next to it (it has to touch). Place some empty buckets or universal fluid cells in the chest and power the pump. It will start filling them up. Take 10 Universal Fluid Cells/buckets of lava and bring them to your base. Choose a good place and make a nether portal with them by placing water next to lava. If you don't know, this will cause lava to solidify into obsidian.
Geothermal Power[edit]
Once you've acquired a Pump, you'll have the option of making a Geothermal Generator. This generator isn't renewable like solar or wind based ones, but it's a great alternative or supplement to Coal/Charcoal. A Geothermal Generator generates energy from lava. Building one of these is a good option after you've created the nether portal, as there are huge lava lakes that generates at y=32 and below in the nether.
Materials needed:
- 9 iron ingots
- 7 tin ingots
- 4 glass
- 2 glass pane (you should have some left when crafting the pump)
- 2 redstone dusts
If you didn't craft enough Universal Fluid Cells, you can also use Bucket for gathering lava. IC2 added a tin based recipe while the vanilla recipe is still usable.
Gathering Lava in the Nether[edit]
Before you actually go into the nether, you need to prepare some materials to build a basic base in the Nether to defend yourself against hostile mobs (mainly the ghast). You can also refer to the guide on Minecraft Wiki or skip this part if you are experienced. Materials needed:
- 5 stacks of cobblestone
- 1 stack of wood
- 1 stack of "smooth" stone
- 1 flint and steel
- 1 iron door (at least)
If you have access to the save file of the world that you are currently playing in, it is recommended to create a copy of your world when you are ready to go into nether. In the copy switch to creative mode and enter the nether, so that you can get a rough idea of the landscape that you are going to spawn in. Most importantly, go find the closest lava lake. Have an idea of how you can get there, for instance by ladders and tunnels, by staircases or by simply walking on near-flat land if your portal generates next to the lava lake.
Once you feel that you are ready, jump into the nether portal! If you are playing on a server/multiplayer world, look for hostile mobs as soon as you spawned in the Nether. Presence of hostile mobs when you have just spawned indicates the presence of a player within 128 blocks of the mob you spotted. However, if you don't spot any, that doesn't mean there must be no players around. This can happen when the server/multiplayer world has a mob switch that is turned on, or when a player have come into the region not long enough that no mobs spawned where you can see them.
Now that you are in the nether, you need to quickly build a small base out of cobblestone that completely surrounds the nether portal, even if it is as simple and ugly as a matchbox. Cobblestone can't be destroyed by fireballs shot by ghasts. Don't put down any windows yet, for glass can be destroyed easily by ghasts. There will be information about how to do that on the next few paragraphs. Remember to add an iron door to go out!

Then, block any flowing lava with cobblestone, so that you don't accidentally walk into them. Next, replace the netherrack around your base with cobblestone. This is to prevent the ghast from creating holes right out of your door.
After you've done with all these, mine 4 to 6 stacks of netherrrack. Go back to the overworld and smelt them. Then craft them into nether brick blocks. You will need them to craft Nether brick fences as your blast proof windows in the nether base. Craft some Nether Brick Fences, and replace some of the walls with the fences. Now you have got "windows", and your basic base is finished.


Now you can finally go on to collecting a lava. You need a pump, and an RE battery to power the pump. You should have already crafted a pump.
To collect lava, place the pump with its side that has a grey hole texture facing lava. Put the RE-battery inside and it should be sucking lava for you. Put in some empty Universal Fluid Cells and it will automatically fill them up. Bring those lava cells back to the overworld, put them in the Geothermal Generator, and you have got a free source of EU! Be careful not to drop the pump in lava when moving it!
Portable batteries[edit]
Electric tools use a lot of EU. Wouldn't it be nice to carry more EU at a time? You can do this with a Charging RE Battery. The Charging RE Battery have 3 modes, which can be changed by right-clicking it when holding it in your hand.
Materials needed:
- 16 Redstone Dusts
- 10 Tin Ingots
- 8 Copper Ingots
- 4 Iron Ingots
Walking around with 40,000 EU is still not enough? You can craft a more advanced one called the Advanced Charging Battery! A single one of them can carry 400,000 EU, ten times that of the Charging RE Battery!
Materials needed:
- 31 Copper Ingots
- 12 Tin Ingots
- 10 Bronze Ingots
- 8 Redstone Dusts
- 4 Iron Ingots
- 4 Lead Ingots
- 4 Sulfur Dusts
See this on how to get Sulfur Dust.
Compressor[edit]
The Compressor is used to make several different things, but the important ones to know right now are that it can create Compressed Air Cell by compressing air into Universal Fluid Cells, and it can make Advanced Alloys. These will be introduced later.
Materials needed:
- 9 Iron Ingots
- 2 Copper Ingots
- 2 Redstone Dusts
Smelt some Cobblestone, craft a circuit, and then a Machine block.
Place that machine, give it energy, and place an empty Universal Fluid Cell in it!
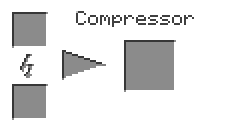
Now you can produce universal fluid cells filled with air. Don't right click with them in your hand though, or you will spend some time clean the air up!
Blast Furnace[edit]
Moving forward, there are a small number of advanced things that require Steel. You can make Steel by heating Iron in a Blast Furnace. While you get Steel from Iron, Slag is also produced at a 1:1 ratio to Steel. Slag is an very important source of Coal Dust, which you can get by processing it in an Thermal Centrifuge in the future. It takes about 5 minutes for a single blast furnace to produce a single piece of steel (and slag), so you need to build it early. In addition to the Blast Furnace itself, it requires a heat source, and a Compressor (listed above) is needed to make Compressed Air Cells. In this tutorial we will use an Electric Heat Generator with one Coil. You can also use more coils to heat up the blast furnace faster, or a Fluid Heat Generator which consumes Biogas instead of EU as the heat source instead .
Material list with an Electric Heat Generator and a single coil:
- 17 Iron Ingots
- 11 Copper Ingots
- 4 Redstone Dusts
- 3 Tin Ingots
|
Place the heat generator where you want it, making sure the output side faces in the direction you want to place the Blast Furnace.
Place the Blast Furnace so that it touches the heat generator, with its input side (marked by a orange square) facing the Electric Heat Generator's output side (also marked by a orange square). If you are using the Electric Heat Generator, it can be placed behind or beneath the Blast Furnace, rather than side-by-side since you generally don't need to interact with it. Run a power cable to the Electric Heat Generator, or put Biogas fluid cells into the heat generator. The Blast Furnace doesn't need one. After you begin to heat the Blast Furnace, it won't start working instantly. It needs warming up, indicated by the red bar that you can see in its GUI. Only after being completely warmed up can it process Iron.
Make a Coil and place them inside the Electric Heat Generator. If you have forgotten the recipe, it is below. One coil is enough to keep the blast furnace warm and working, but more coils have no use except making it warm up faster and wasting your materials. The Blast Furnace can accept a maximum of 20 Heat Units, and each Coil produces 5 Heat units.
After completed its warm-up process, your Blast Furnace should be ready to use. Place an iron source (can be any stages of the iron ore, either the ore itself, the crushed, or the purified. Can also be iron ingot or iron dust.) and compressed air cells inside the Blast Furnace. It takes six compressed air cells to make 1 Refined Iron. You get the empty fluid cells back, and you can put them back in the Compressor again to refill them. Remember to avoid the blast furnace stop working for whatever reason. You will need a lot of its products later.
Transformer[edit]
As you've been told before, the Transformer is needed to change voltages. It is actually quite dangerous, as if you did anything wrong, everything in your ENTIRE E-NET will explode. The transformer has a side with 5 dots, and 5 sides with a single dot. The 5 dot side is the high voltage face, while the single dot size is the low voltage face. They are two-ways, meaning that they can both take EU in and output EU. There are three options that you can choose, but depending on your needs DO NOT EVER choose the default one (Redstone = step-up) as you might accidentally power it one day. If that happens and your transformer is set to Redstone = step up, all of your machines connected to that transformer WILL EXPLODE. Be careful! Frequent backing up your world is recommended if possible.
You will need to craft the LV Transformer so that your CESU that you're going to craft doesn't make all your machines explode..
Materials needed:
- 3 Copper Ingots
- 1 Iron Ingot
- 1 Tin Ingot
Age of MV: CES Unit[edit]
Now, we have more machines, and we have more ways to power them. But what should we do when the BatBox runs out of energy? Let's put our knowledge of bronze to use making a bigger EU storage block!
For that job, there is the CES Unit. The CES Unit stores 300,000 EU, exactly 5x as much as the BatBox.
Materials needed:
- 13 Bronze Ingots
- 3 Copper Ingots
- 3 Sulfur Dusts
- 3 Lead Ingots
Before we begin, you'll need to get your hands on at least three Gunpowder or 27 netherrack.
Run three Gunpowder through an Extractor to get three Sulfur Dust.
You can also produce sulfur from Netherrack.
Run three Lead Ingots through a Macerator to get three Lead Dust.
Before you place your shiny new CES Unit, there's one more thing we need: a Low-Voltage Transformer. Don't worry, it's not hard to make. Place the CES Unit and the LV Transformer so that the output of the CES Unit connects to the five-dotted side of the transformer. From there, you can run a cable from any of the one-dotted sides of the transformer to your machines. Distilled water[edit]This section is mainly for the Overclocker Upgrade that will be introduced in the next section. If you don't want overclocker upgrades, you can skip this section, but remember to come back when you need distilled water. Distilled water can be obtained in two ways. One is to use the Solar Distiller, and the other is to use the Steam Boiler, Steam Turbine and the Condenser. The Solar Distiller needs less materials and no EU to run, but it is slower and depends on the sun. The steam setup needs more materials and EU, but it is much faster. The Solar Distiller will be introduced here. Materials needed (1 Solar Distiller):
To put water in it, you can shift-click the block holding universal fluid cells that contain water, or you can put water fluid cells into it. The left tank is the water tank, and the right tank is the output tank. Slots on the top-right corner are for upgrades. To get distilled water out, you can either use an upgrade, or put fluid cells in it again. The Solar Distiller is very slow, so it is suggested to craft multiple of them. Fluid/Solid Canning Machine[edit]This section is also needed to craft the Overclocker Upgrade. If you don't want overclocker upgrades, you can skip this section, but remember to come back when you need the Fluid/Solid Canning Machine. The Fluid/Solid Canning Machine is a multipurpose machine that can be used to enrich fluids on "Fluid enrich Mode". It can also be used to fill Universal Fluid Cells with liquids, such as Biogas. To change modes, click the button that says "Canning" on default. Click that button again to change into other modes. Materials needed:
|
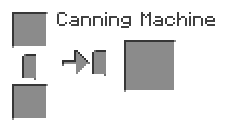
Since food comes in all shapes and sizes, some food fits in a few cans, while other foods need more than a few cans. The FOOD-TIN CAN list can be found here.
Upgrades[edit]
Overclocker Upgrade[edit]
Have some EU and materials? Is your machine lazily working its way to get what you want? Then go ahead and craft yourself an Overclocker Upgrade!
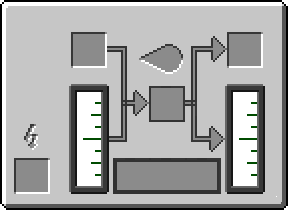
Side affect: applying Overclocker Upgrade(s) causes your machine to use more EU to process a single item. They can be stacked in machines. The effects of them are depended on the total amount of them in a machine.
Transformer Upgrade[edit]
Hate to see freakin' transformer blocks everywhere in your working station? Well, get yourself a machinery Transformer Upgrade!
(needs material list)
The transformer upgrade must be placed in the slots on the right-hand side of certain machine (though not all machines accept upgrades). Like so:

The transformer upgrade can increase the power tire that the machine can accept by 1 per upgrade. You can stack more transformer upgrades for higher voltage tier.
Ejector upgrade[edit]
Feel bored placing compressed air cells into the compressor? Craft the Ejector Upgrade! This upgrade can eject any products that a machine contains. If you need a massive quantity of this upgrade, compress tin to get Dense Tin Plate, and craft the upgrade with dense tin plate to save a few pistons.
Place the compressor next to the blast furnace for this upgrade to work. Set the upgrade's direction to the direction in which the side of the compressor is next to the blast furnace by (shift+) right-clicking it on a block. Put another non-directional upgrade in the blast furnace to eject empty fluid cells back to the compressor.
Pulling upgrade[edit]
The Pulling Upgrade is similar to the Ejector Upgrade. Instead of ejecting items, this upgrade makes machine pull items from nearby containers.
Fluid Ejector Upgrade[edit]
The Fluid Ejector Upgrade is similar to the Ejector Upgrade, but instead of ejecting items it enables the machine to eject fluids.
Fluid Pulling Upgrade[edit]
The Fluid Pulling Upgrade is similar to the Pulling Upgrade, but instead of pulling items it enables the machine to pull fluids from other fluid containers nearby..
Further down into the ore processing chain[edit]
You still want to get more out of your ores? It's time to do that! Do note that the Ore Washing Plant need LOTS of EU to run.
The Ore Washing Plant can purify the ores one step further to get purified ores with 1000 mB Water and some EU. You can get tiny piles of ore dusts out of that.
Materials needed:
- 24 Iron Ingots
- 13 Copper Ingots
- 2 Tin Ingots
- 2 Redstone Dusts
Note that 3 or 6 Iron Ingots can be replaced with Tin Ingots if you use the IC2 Tin Ingots==>Bucket recipe instead of Iron Ingots.
An ore washing plant needs water to work. Place any water container in the top left slot to add water, or use a pump with a fluid ejector upgrade to add water automatically. Of course the empty container will be returned.
An example with iron ore being processed:
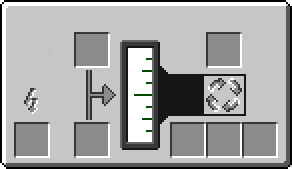
Basic Automation[edit]
Now that your machines are working, you probably want to save some labor like putting universal fluid cells filled with air into the blast furnace over and over and over again. Also, sometimes you want to process a lot of different items. You just wait there for the machine to do its work? NO! Set up some hoppers and stuff to get things going automatically! Here are some pictures of examples on how to do so. Of course you could create your own designs. However, automating stuff, which just makes your life easier, is always optional.

This is a screenshot of a survival world that is played in for about 16 real life hours. On the left you can see some geothermal generators and some hoppers providing power for everything. Hoppers can averagely spread the lava fluid cells that was put into the top chest, and put the empty fluid cells into the bottom chest. There are upgrades in the metal former, pulling items in from the top chest and ejecting items to the chest behind. The metal former is a pretty slow machine, and these chests really helps when you need to process a bunch of iron and tin into plates / casings... Just don't forget to change modes when using this. On the right side you can see a macerator and a working ore washing plant. The macerator pulls items from the chest next to the macerator, and ejects items to the top chest. The ore washing plant has a default pulling upgrade on the first slot, an ejector upgrade set to eject towards to the pump on the second slot, and an ejector upgrade set to eject towards the top chest on the third slot. There is a single fluid cell in the pump/ore washing plant, which makes the ore washing plant automatically fill up with water, while the upgrade arrangement in the machine avoids the fluid cell to be ejected to the top chest.

This is a screenshot viewed from the top. In this screenshot you can see the pump and the infinite water source on the top of the machines.

This is a screenshot viewed from behind. The cursor is pointing towards the electric furnace, which is automated, having an input chest on the top and an output chest on the bottom. Hoppers were used here, but you can also use upgrades. You can also see the blast furnace and the electric heater, being next to the double chest that has 2 hoppers below it. Notice that the electric heater is the one that has a cable connected to it.

In this screenshot you can see the self-detecting dropper that is responsible to send items, in this case the empty universal fluid cell up to the double chest. To the right side, there are 2 hopper filters under the double chest, which is the output chest for the blast furnace. One is to filter out the empty universal fluid cell, and the other one is to filter out the steel ingot, which is not necessary. Slag is left in the double chest.

This screenshot shows the hopper filter.

This is another screenshot of the automatic blast furnace system. The blast furnace is behind the compressor, with the compressor being set to eject towards the blast furnace, and the blast furnace set to eject towards the double chest. If you directly set the blast furnace to eject towards the compressor, steel will also end up in the compressor as it can be compressed into Steel Blocks. That's why a vanilla hopper filter is used to do that job.
Wind Power[edit]
The Wind Turbine is a great source of EU with relatively high material costs. If you have plenty of Lava, you can craft another Geothermal Generator to fulfill your EU needs instead of crafting the wind turbine.
There are different rotors you can put in the Wind Turbine. Unfortunately, they all eventually wear out. If you get all of your iron from mining, there are better options, although they do last a long time. However, it's a great option if the iron consumption isn't a problem for your operation.
Materials needed:
- 49 Iron Ingots
- 6 Copper Ingots
- 4 Tin Ingots
- 2 Redstone Dusts
To build the wind turbine, you'll need a machine block and two iron shafts, crafted like so:
Here's how you make a wooden rotor:
The Wood Rotor lasts 3 IRL hours inside the Wind Turbine and requires wind levels between 10 and 60 MCW. It has a wingspan of 2 blocks.
It takes 18 logs and one iron to make a single wooden rotor, so it needs to be in a location where it can generate more power than 16 pieces of Charcoal (using 2 pieces to turn the wood into charcoal) in a regular Generator to be worthwhile, and that still isn't taking the piece of iron into account.
The Wind Turbine outputs Kinetic Energy, measured in KU. To convert KU into EU, you also need to craft a Kinetic Generator. You should be familiar with this if you have used the Manual Kinetic Generator in the early days.
Place the Wind Turbine and the Kinetic Generator next to each other at y=160 (use ladders to get up there) and place the rotor inside. Make sure that the output side of the Wind Turbine (marked with a bigger white circle than the other side) and the input side of the kinetic generator (marked with a small white dot) is in contact. If the rotor is spinning, the kinetic generator will then start producing EU. The kinetic generator has a power tier of 3, meaning that it sends out a maximum of 512 EU/p. Therefore, when wiring it to your base, don't forget to connect a MV transformer and a LV transformer before connecting the wire to the BatBox!
You can measure the wind strength with the Windmeter. This is an optional tool.
Electric Jetpack[edit]
Now you have placed your wind turbines high in the world, how are you going to get up there faster? You can use the Electric Jetpack! With it, you can FLY sometimes like an idiot!
Materials needed:
- 12 Redstone Dusts
- 2 Copper Ingots
- 3 Iron Ingots
- 4 Glowstone Dusts
- 2 Lapis Lazuli
- 8 Tin Ingots
Now that you have got your Electric Jetpack, you can now fly up to avoid creeper explosions! But don't forget to charge it.
The Way to Industry[edit]
Automated Mining: The Miner[edit]
Now we have some machines, but don't stop whining. Pardon, mining. The Miner. It's a very good machine for lazy people. But if you want one, you must work hard. as you crafted 16 of them long, long ago.
Total materials needed (with OD Scanner and 64 Mining Pipes):
- 36 Iron Ingots
- 10 Copper Ingots
- 8 Redstone Dusts
- 3 Bronze Ingots
- 1 Glowstone Dust
- 1 Gold Ingot
- 1 Lead Dust
- 1 Sulfur Dust
For the mining pipe, there should be still some lying around, but you need more. Craft 64 for each miner you want to use. That should be enough for your miner if you place it on y=64. You needs more if you place your miner higher.
For a miner to work, you have to craft another two things: First, you need a scanner. There are two types: an OD Scanner, or a wider ranged, more energy-eating OV Scanner.
If you have diamonds, you can craft the OV scanner.
Materials needed:
- 11 Redstone Dusts
- 4 Diamonds
- 4 Glowstone Dusts
- 2 Copper Ingots
- 2 Gold Ingots
- 2 Lapis Lazuli
- 1 Iron Ingot
- 1 OD Scanner
You need to craft 1 Energy Crystal. This recipe should be remembered.
When used, the OD Scanner scans the ores in a 5x5 area and submits the results on the player's screen. The OV Scanner scans a 9x9 area, and also submits the results on the player's screen. Either one can be used in the Miner. If you have plenty of EU to spare with and enough materials, the OV scanner is highly recommended for use in the miner.
The second item your miner needs is a Mining Drill. You can put yours in there, and you can also craft a Diamond Drill for faster speeds and more EU consumption.
|
Put the drill and the scanner in the miner with a few mining pipes, give them energy, and go to the bed, relax, watch TV, but don't do hard jobs!
Bigger Portable Batteries[edit]
The miner use a lot of EU. Wouldn't it be nice to put in more EU at a time? You can do this with a BatPack. A BatPack can carry 60,000 EU. This will be helpful when powering your miners in the future. Although BatPacks are nice, you can carry more EU per slot by stacking fully charged Charging RE Batteries, and taking a single one out to use it.
(needs material list)
Advanced Alloy[edit]
Now you have yourself plenty of Advanced Alloys, bane of Creepers (also good for advanced machines, as you will learn later on)! One of the first things you can do with this Advanced Alloy is make yourself a Composite Armor Vest. This is as good as an Iron Chestplate, but lasts even longer than a Diamond Chestplate.
You can also make Reinforced Glass, which is more Creeper-resistant than normal Glass:
Synthetic Diamonds[edit]
Having trouble finding all of those diamonds? You can use the Compressor to convert all of that coal you have been hoarding into diamonds! HAYO!
|
|
|
|
As it can be inferred from the recipes, crafting 1 diamond requires 64 coal dust, 8 flint, one obsidian/bricks/iron block and some EU. Bricks is recommended as it's made from clay, found in relatively great abundance in riverbeds.
Mining Laser[edit]
Uhh... So we've got some energy. I want to MINE, but I don't like tapping my toes waiting for that Miner to get everything. Time to craft something hot and shiny: the Mining Laser!
Materials needed:
- 10 Redstone Dusts
- 7 Iron Ingots
- 6 Bronze Ingots
- 6 Tin Ingots
- 4 Diamonds
- 2 Copper Ingots
- 2 Glowstone Dusts
- 2 Lapis Lazuli
It's very expensive!
- I know! But if you want mine with style...
Compress 4 Advanced Alloys, craft another two energy crystals, and an Advanced Circuit.
When will we finish that laser?
- Now!
Although you have crafted the Mining Laser, it can't be charged it yet, which requires the MFE Unit, which needs 16 Diamonds. If you don't have that many diamonds but you have 5 stacks of slag, it is recommended to craft the Thermal Centrifuge first, which needs the Mining Laser, and you can get coal dust out of slag by processing it in the Thermal Centrifuge, and you can use the coal dust to craft diamonds needed for another Mining Laser and the MFE again.
The Mining Laser have different firing modes. To change the firing mode, hold M and right-click (under default controls). The firing modes can be found here.
Every firing mode has advantages and disadvantages. The default firing mode is the mining mode. However, if you want to mine fast, use the 3x3 mode or scatter mode.
Note: Explosive mode can inflict serious damage on entities.
Completion of the ore processing chain[edit]
Actually, the thermal centrifuge has uses besides processing ores and slag. It can be used to process depleted nuclear fuels, and more. Similar to the blast furnace, it needs pre-heating before it can process items. It runs directly on EU.
Materials needed:
- 20 Iron Ingots
- 16 Coal Dusts
- 11 Copper Ingots
- 4 Steel Ingots
- 4 Tin Ingots
- 3 Bronze Ingots
HV Era: The MFE Unit[edit]
For an even bigger energy storage unit, there is the MFE Unit. It can store 4,000,000 EU, as much as 100 BatBoxes!! If you can empty a fully-loaded MFE Unit during a night, you are a very spendthrift player unless you're producing UUM.
But! It isn't cheap. You must have at least SIXTEEN diamonds! Go to layer 1-16, and search for some diamonds. Can you find sixteen diamonds? Are they genuine? Okay. Craft them into Energy Crystals!
Craft a machine block, 4 gold cables, and craft an MFE Unit like this:
Now, we can store a lot of EU for difficult times, and finally charge your mining laser.
NOTE: Tin cable and most machines can only handle 32EU/t, and the MFE outputs 512EU/t. You must use a MV Transformer and a LV Transformer, or a Gold Cable and a couple of Transformer upgrade add-ons.
Steel Rotors[edit]
So you've got some crazy mining going on, you've built lots of expensive machines, your efficiency is through the roof, and hopefully you've built some food and mob-drop farms. Maybe now's a good time to look at Steel Rotors for the Wind Turbine (listed above). These are entirely optional, as there are a number of ways to generate EU. All rotors eventually wear out, but replacing your wooden rotors with steel rotors give a large buff to your wind generators.
The Refined Iron (Steel) Rotor lasts 3 IRL days (72 hours) inside the KWG and requires wind levels between 17 and 90 MCW. It has a wingspan of 4 blocks.
Block Cutting Machine[edit]
Yes, you heard it right. This magical machine that can cut blocks into plates, logs into more planks and planks into more sticks!
Materials needed:
- 13 Iron Ingots
- 8 Copper Ingots
- 8 Steel Ingots
- 2 Redstone Dusts
- 1 Tin Ingot
The Block Cutting Machine is entirely useless without a blade in it. There are Iron blades, Steel blades and the Diamond blade. Steel blade is good enough for almost all purposes, with an exception of Steel blocks. If you have a lot of diamonds, you can also craft the diamond blade, but it is not recommended unless you need a lot of steel plates.
Finally, you don't have to wait for the Metal Former that sucks at making plates to do its stupid thing! HOORAY!
Nano Suit[edit]
Your armor is wearing out? There are the EU-based armors! Actually, there are two types of it: the Nano Suit and the Quantum Suit. The Quantum Suit is unaffordable now, thus we will craft the nano suit. As you should be wearing the Electric Jetpack, we won't craft the Nano-Bodyarmor now, but it is needed to craft the Quantum-Bodyarmor later.
Materials needed: (without the bodyarmor)
- 112 Coal Dust
- 41 Copper Ingots
- 37 Redstone Dusts
- 16 Tin Ingots
- 15 Iron Ingots
- 12 Diamonds
- 12 Glass
- 10 Lapis Lazuli
- 6 Bronze Ingots
- 2 Glowstone Dusts
- 1 Lead Ingot
- 1 Sulfur Dust
It needs lot of materials, huh? Now comes more crafting!
|
|
Remember how to craft Carbon Plates? Now comes the actual armor crafting.
Now you can finally wear the ELECTRIC ARMOR!!!
Teleporter[edit]
The Teleporter!
Why do you need the teleporter? To craft the Advanced Miner!
Advanced Miner[edit]
The Advanced Miner is the upgraded version of the Miner. You don't need to deal with excess cobble if you set it properly, and it can mine a much larger area.
You also need your existing miner.
Materials needed:
- 55 Redstone Dusts
- 51 Iron Ingots
- 32 Coal Dusts
- 21 Diamonds
- 15 Copper Ingots
- 12 Bronze Ingots
- 12 Tin Ingots
- 8 Glowstone Dusts
- 8 Lapis Lazuli
- 8 Steel Ingots
- 6 Glass
- 1 Gold Ingot
- 1 Miner
It's expensive, but it is worth it.
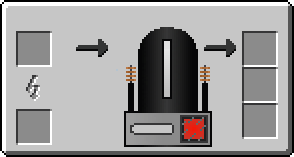
|
More powerful generators[edit]
Do you think that solar collectors or coal-based generators can't serve your purposes?
Do you get tired of waiting for that stupid sun?
Do you think that pollution isn't an important thing?
Then, I think, the reactor is your best machine!
But why doesn't your neighbor have a reactor?
Because it's very expensive!
You can find out all about Nuclear Reactors in the Nuclear Power guide.
Now, use your weapon, mine resources, because soon we will start a new chapter. Listen to a good music, chop down trees, get some cobblestone, manage your farm. Please, RELAX.
IC2 Agriculture[edit]
While your advanced miner is slowly mining ores, you can consider cross-breeding crops to get a better yield. More information about this is in another tutorial.
DAWN OF THE EXTREME VOLTAGE: MFSU[edit]
Note: this section "DAWN OF THE EXTREME VOLTAGE: MFSU" is unfinished. Please help if you can. Apologies for the inconvenience.
--KrisBigK (talk) 01:09, 21 June 2020 (CET)
Think that your MFE isn't storing enough power? Then craft the amazing MFSU!
(needs material list)
Before you can even craft your MFSU, you will need several blue crystals called lapotron crystals.
To craft one, you will need energy crystals and upgrade them with advanced circuits and lapis. The MFSU is capable of storing 40 million EU, making it the highest tier of the energy storage device without addons! The MFSU will output EV(Extreme Voltage) and will destroy your wires and machine if transformers are not installed into your EU network properly.
So you would want to consider crafting the HV-Transformer!
Place the HV Transformer with the five-dots side facing the MFSU and the single-dot side facing the MV Transformer or your MFE. This way it will "step-down" the extreme voltage to high voltage.
Replication[edit]
There is a separate tutorial about replication.
Quantum Suit[edit]
Once you've replicated enough Iridium, you can craft the quantum suit.
unfinished, please refer to QuantumSuit Bodyarmor for information.
Terraformer[edit]
We did a lot of jobs, we have got a little house, and a few machines, BUT. Why don't we make a big house for our machines? I said, that keep in your mind a big, flat place. If it takes a lot of time to go to your flat place, we will craft a Teleporter, or a Terraformer.
For a Teleporter, you need a lot of energy, two metal blocks, some glowstone dust, and some coal dust. For a Terraformer, you need energy, two TFBP, an advanced machine, and some glowstone dust.
Craft two carbon plates, and then compress two metal block. Make a machine, and craft them to an advanced machine!
Now make an electronic circuit, an advanced circuit, and take two redstone.
Now, craft that amazing TERRAFORMER!
Make another Tfbp, and program that!
- Flatificator
It makes a flat area with dirt ground.
- Cultivation
It replaces sand with dirt, and places a few saplings.
- Irrigation
It forces saplings and seeds to grow faster, and causes sugar cane to grow 4 blocks high.
- Desertification
It replaces dirt with sand, destroys plants and saplings, melts ice and snow. It sets forests on fire!
To put a Tfbp in a Terraformer, just hold it and right-click in the Terraformer. To remove it, just right-click in the Terraformer with a wrench. Supply the Terraformer with energy, and after 2-3 days, it will finish the job.
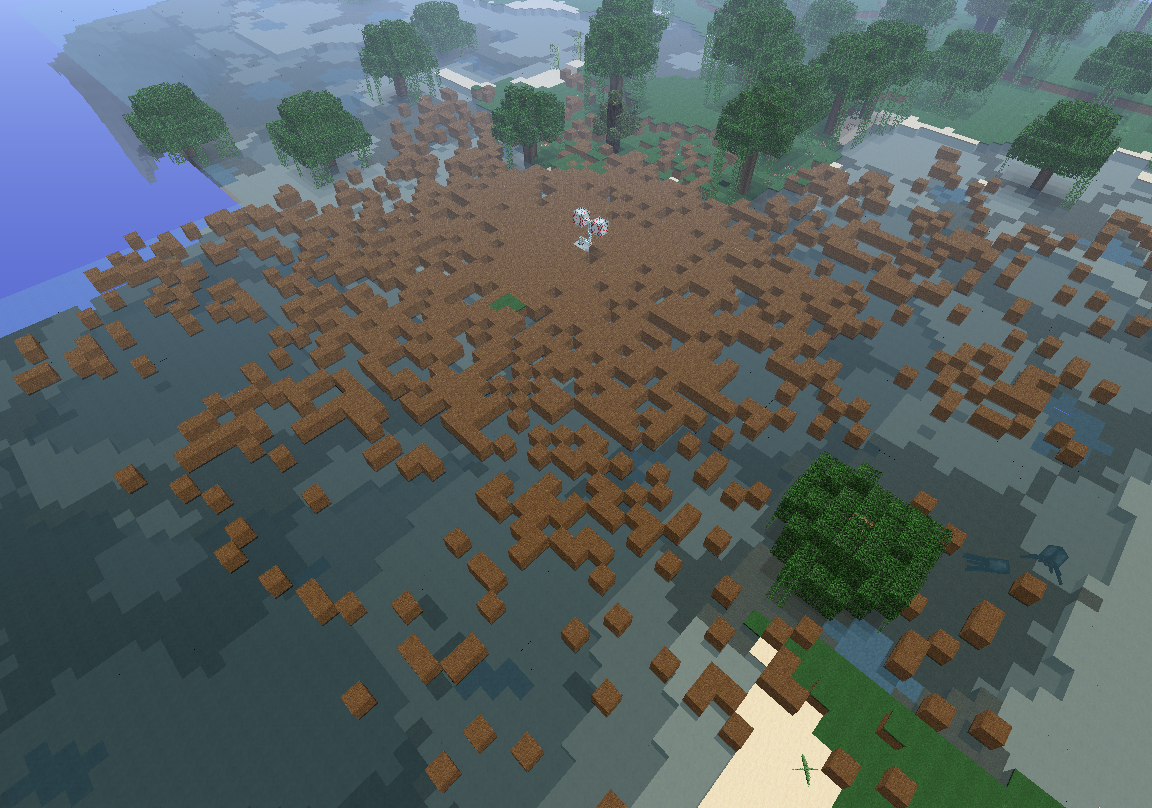
That's it![edit]
Of course this is just the first steps so now you are pretty much on your own! You might want to craft a Mass Fabricator or a Tesla Coil, whatever... So, go ahead and do what you like do and yes, go and browse some pages on this wiki when you have some troubleshooting!
| |||||||||||||||||||||||||||||||||||||||||||||||||||||||||||||||||||||||||||||||||||||||||||||||||||||||||||||||||||||||||||||||||||||||||||||||||||||||||||||||||||||||||||||||||||||||||||||||||||||||||||||||||||||||||||||||||||||||||||||||||||||||||||||||||||||||||||||
| |||||||||||||||||||||||||||||||||||||||||||||||||||||||||||||||||||||||||||||||||||||||||||||||||||||||||||||||||||||||||||||||||||||||||||||||||||||||||||||||||||||||||||||||||||||||||||||||||||||||||||||||||||||||||||||||||||||||||||||||||||||||||||||