Difference between revisions of "Recipes and Resources"
Jump to navigation
Jump to search
(even more organization, ores, rubber tree) |
m (Mainly link edits) |
||
| Line 58: | Line 58: | ||
|Output=Nano-Helmet | |Output=Nano-Helmet | ||
}} | }} | ||
|Energy-based helmet which absorbs part of your damage while charged. | |[[EU|Energy]]-based helmet which absorbs part of your damage while charged. | ||
|- | |- | ||
![[Nano-Bodyarmor|Nano Body Armor]] | ![[Nano-Bodyarmor|Nano Body Armor]] | ||
| Line 67: | Line 67: | ||
|Output=Nano-Bodyarmor | |Output=Nano-Bodyarmor | ||
}} | }} | ||
|Energy-based chestplate which absorbs part of your damage while charged. | |[[EU|Energy]]-based chestplate which absorbs part of your damage while charged. | ||
|- | |- | ||
![[Nano-Leggings|Nano Leggings]] | ![[Nano-Leggings|Nano Leggings]] | ||
| Line 76: | Line 76: | ||
|Output=Nano-Leggings | |Output=Nano-Leggings | ||
}} | }} | ||
|Energy-based leggings which absorb part of your damage while charged. | |[[EU|Energy]]-based leggings which absorb part of your damage while charged. | ||
|- | |- | ||
![[Nano-Boots|Nano Boots]] | ![[Nano-Boots|Nano Boots]] | ||
| Line 84: | Line 84: | ||
|Output=Nano-Boots | |Output=Nano-Boots | ||
}} | }} | ||
|Energy-based boots which absorb part of your damage while charged. | |[[EU|Energy]]-based boots which absorb part of your damage while charged. | ||
|- | |- | ||
![[QuantumSuit Helmet|Quantum Helmet]] | ![[QuantumSuit Helmet|Quantum Helmet]] | ||
| Line 92: | Line 92: | ||
|Output=Quantum-Helmet | |Output=Quantum-Helmet | ||
}} | }} | ||
|Energy-based helmet which lets you breathe underwater, replenishes your hunger and cures poison while charged. | |[[EU|Energy]]-based helmet which lets you breathe underwater, replenishes your hunger and cures poison while charged. | ||
|- | |- | ||
![[QuantumSuit Bodyarmor|Quantum Body Armor]] | ![[QuantumSuit Bodyarmor|Quantum Body Armor]] | ||
| Line 101: | Line 101: | ||
|Output=Quantum-Bodyarmor | |Output=Quantum-Bodyarmor | ||
}} | }} | ||
|Energy-based chestplate which absorbs all of your damage while charged. | |[[EU|Energy]]-based chestplate which absorbs all of your damage while charged. | ||
|- | |- | ||
![[QuantumSuit Leggings|Quantum Leggings]] | ![[QuantumSuit Leggings|Quantum Leggings]] | ||
| Line 110: | Line 110: | ||
|Output=Quantum-Leggings | |Output=Quantum-Leggings | ||
}} | }} | ||
|Energy-based leggings which let you sprint more than 3 times faster. | |[[EU|Energy]]-based leggings which let you sprint more than 3 times faster. | ||
|- | |- | ||
![[QuantumSuit Boots|Quantum Boots]] | ![[QuantumSuit Boots|Quantum Boots]] | ||
| Line 118: | Line 118: | ||
|Output=Quantum-Boots | |Output=Quantum-Boots | ||
}} | }} | ||
|Energy-based boots which absorb all of your fall damage while charged. | |[[EU|Energy]]-based boots which absorb all of your fall damage while charged. | ||
|- | |- | ||
|} | |} | ||
| Line 136: | Line 136: | ||
|Output=Bat-Pack | |Output=Bat-Pack | ||
}} | }} | ||
|Chestplate which powers your electric tools using its energy of up to 60000 EU while you are wearing it. | |Chestplate which powers your electric tools using its energy of up to 60000 [[EU]] while you are wearing it. | ||
|- | |- | ||
![[Composite Armor Vest|Composite Armor]] | ![[Composite Armor Vest|Composite Armor]] | ||
| Line 154: | Line 154: | ||
|Output=Electric Jetpack | |Output=Electric Jetpack | ||
}} | }} | ||
|Energy-powered jetpack worn as a chestplate. It has a limited maximum flying height and a smaller operational time, unlike the normal fuel-powered [[Jetpack]]. | |[[EU|Energy]]-powered jetpack worn as a chestplate. It has a limited maximum flying height and a smaller operational time, unlike the normal fuel-powered [[Jetpack]]. | ||
|- | |- | ||
![[Jetpack]] | ![[Jetpack]] | ||
| Line 163: | Line 163: | ||
|Output=Jetpack | |Output=Jetpack | ||
}} | }} | ||
|Fuel-powered jetpack worn as a chestplate. Use [[Biofuel Cell | |Fuel-powered jetpack worn as a chestplate. Use [[Biofuel Cell]]s or [[Coalfuel Cell]]s on a [[Canning Machine]] to refuel it. | ||
|- | |- | ||
![[Rubber Boots]] | ![[Rubber Boots]] | ||
| Line 188: | Line 188: | ||
|Output=Tin Cable|OA=9 | |Output=Tin Cable|OA=9 | ||
}} | }} | ||
|Special uninsulated tin cable which handles up to 3 EU/t (ultra-low voltage) and has very small loss, but can't be insulated (beware of shock) and thus can't be painted. | |Special uninsulated tin cable which handles up to 3 EU/t (ultra-low [[EU|voltage]]) and has very small loss, but can't be insulated (beware of shock) and thus can't be painted. | ||
|- | |- | ||
![[Copper Cable]] | ![[Copper Cable]] | ||
| Line 195: | Line 195: | ||
|Output=Copper Cable|OA=6 | |Output=Copper Cable|OA=6 | ||
}} | }} | ||
|Uninsulated copper cable which handles up to 32 EU/t (low voltage). | |Uninsulated copper cable which handles up to 32 EU/t (low [[EU|voltage]]). | ||
|- | |- | ||
![[Copper Cable|Insulated Copper Cable]] | ![[Copper Cable|Insulated Copper Cable]] | ||
| Line 208: | Line 208: | ||
|Output=Insulated Copper Cable | |Output=Insulated Copper Cable | ||
}} | }} | ||
|Insulated copper cable which handles up to 32 EU/t (low voltage). Insulation allows the cable to be painted, reduces distance-based energy loss and completely removes electric shock. You can also apply insulation to uninsulated copper cable by putting the uninsulated cable and a single piece of | |Insulated copper cable which handles up to 32 EU/t (low [[EU|voltage]]). Insulation allows the cable to be painted, reduces distance-based energy loss and completely removes electric shock. You can also apply insulation to uninsulated copper cable by putting the uninsulated cable and a single piece of [[Rubber]] (shapeless) in a crafting table. | ||
|- | |- | ||
![[Gold Cable]] | ![[Gold Cable]] | ||
| Line 215: | Line 215: | ||
|Output=Gold Cable|OA=12 | |Output=Gold Cable|OA=12 | ||
}} | }} | ||
|Uninsulated gold cable which handles up to 128 EU/t (medium voltage). | |Uninsulated gold cable which handles up to 128 EU/t (medium [[EU|voltage]]). | ||
|- | |- | ||
![[Gold Cable|Single-Insulated Gold Cable]] | ![[Gold Cable|Single-Insulated Gold Cable]] | ||
| Line 228: | Line 228: | ||
|Output=Insulated Gold Cable | |Output=Insulated Gold Cable | ||
}} | }} | ||
|Single-insulated gold cable which handles up to 128 EU/t (medium voltage). Single insulation allows the cable to be painted, reduces distance-based energy loss and reduces electric shock. | |Single-insulated gold cable which handles up to 128 EU/t (medium [[EU|voltage]]). Single insulation allows the cable to be painted, reduces distance-based energy loss and reduces electric shock. | ||
|- | |- | ||
![[Gold Cable|Double-Insulated Gold Cable]] | ![[Gold Cable|Double-Insulated Gold Cable]] | ||
| Line 239: | Line 239: | ||
|Output=2xIns. Gold Cable | |Output=2xIns. Gold Cable | ||
}} | }} | ||
|Double-insulated gold cable which handles up to 128 EU/t (medium voltage). | |Double-insulated gold cable which handles up to 128 EU/t (medium [[EU|voltage]]). | ||
|- | |- | ||
![[HV Cable]] | ![[HV Cable]] | ||
| Line 246: | Line 246: | ||
|Output=HV Cable|OA=12 | |Output=HV Cable|OA=12 | ||
}} | }} | ||
|Uninsulated HV cable which handles up to 512 EU/t (high voltage) and 2048 EU/t (extreme voltage). | |Uninsulated HV cable which handles up to 512 EU/t (high [[EU|voltage]]) and 2048 EU/t (extreme [[EU|voltage]]). | ||
|- | |- | ||
![[HV Cable|Single-Insulated HV Cable]] | ![[HV Cable|Single-Insulated HV Cable]] | ||
| Line 259: | Line 259: | ||
|Output=Insulated HV Cable|OA=4 | |Output=Insulated HV Cable|OA=4 | ||
}} | }} | ||
|Single-insulated HV cable which handles up to 512 EU/t (high voltage) and 2048 EU/t (extreme voltage). Single insulation allows the cable to be painted, reduces distance-based energy loss and reduces electric shock. | |Single-insulated HV cable which handles up to 512 EU/t (high [[EU|voltage]]) and 2048 EU/t (extreme [[EU|voltage]]). Single insulation allows the cable to be painted, reduces distance-based energy loss and reduces electric shock. | ||
|- | |- | ||
![[HV Cable|Double-Insulated HV Cable]] | ![[HV Cable|Double-Insulated HV Cable]] | ||
| Line 270: | Line 270: | ||
|Output=2xIns. HV Cable | |Output=2xIns. HV Cable | ||
}} | }} | ||
|Double-insulated HV cable which handles up to 512 EU/t (high voltage) and 2048 EU/t (extreme voltage). Double insulation allows the cable to be painted, reduces distance-based energy loss and reduces electric shock. | |Double-insulated HV cable which handles up to 512 EU/t (high [[EU|voltage]]) and 2048 EU/t (extreme [[EU|voltage]]). Double insulation allows the cable to be painted, reduces distance-based energy loss and reduces electric shock. | ||
|- | |- | ||
![[HV Cable|Quadruple-Insulated HV Cable]] | ![[HV Cable|Quadruple-Insulated HV Cable]] | ||
| Line 286: | Line 286: | ||
|Output=4xIns. HV Cable | |Output=4xIns. HV Cable | ||
}} | }} | ||
|Quadruple-insulated HV cable which handles up to 512 EU/t (high voltage) and 2048 EU/t (extreme voltage). Quadruple insulation allows the cable to be painted, reduces distance-based energy loss and removes electric shock. | |Quadruple-insulated HV cable which handles up to 512 EU/t (high [[EU|voltage]]) and 2048 EU/t (extreme [[EU|voltage]]). Quadruple insulation allows the cable to be painted, reduces distance-based energy loss and removes electric shock. | ||
|- | |- | ||
![[Glass Fibre Cable]] | ![[Glass Fibre Cable]] | ||
| Line 295: | Line 295: | ||
|Output=Glass Fibre Cable|OA=4 | |Output=Glass Fibre Cable|OA=4 | ||
}} | }} | ||
|Special glass fibre cable which handles up to 512 EU/t (high voltage). It is the only kind of uninsulated cable which can be painted and gives no electric shock. Glass fibre cable is useful for long-distance wiring, since it has the smallest energy loss of all kinds of cable - 1 EU every 20 blocks (0.05 EU per block). | |Special glass fibre cable which handles up to 512 EU/t (high [[EU|voltage]]). It is the only kind of uninsulated cable which can be painted and gives no electric shock. Glass fibre cable is useful for long-distance wiring, since it has the smallest energy loss of all kinds of cable - 1 EU every 20 blocks (0.05 EU per block). | ||
|- | |- | ||
|} | |} | ||
| Line 314: | Line 314: | ||
|Output=BatBox | |Output=BatBox | ||
}} | }} | ||
|EU storage block which stores up to 40,000 EU and accepts up to and outputs 32 EU/t (low voltage). Accepts current from any side, except the one with a dot, which is the output. | |[[EU]] storage block which stores up to 40,000 [[EU]] and accepts up to and outputs 32 EU/t (low voltage). Accepts current from any side, except the one with a dot, which is the output. | ||
|- | |- | ||
![[MFE Unit]] | ![[MFE Unit]] | ||
| Line 323: | Line 323: | ||
|Output=MFE Unit | |Output=MFE Unit | ||
}} | }} | ||
|EU storage block which stores up to 600,000 EU and accepts up to and outputs 128 EU/t (medium voltage). Accepts current from any side, except the one with a dot, which is the output. | |[[EU]] storage block which stores up to 600,000 [[EU]] and accepts up to and outputs 128 EU/t (medium voltage). Accepts current from any side, except the one with a dot, which is the output. | ||
|- | |- | ||
![[MFS Unit]] | ![[MFS Unit]] | ||
| Line 332: | Line 332: | ||
|Output=MFS Unit | |Output=MFS Unit | ||
}} | }} | ||
|EU storage block which stores up to 10,000,000 EU and accepts up to and outputs 512 EU/t (high voltage). Accepts current from any side, except the one with a dot, which is the output. | |[[EU]] storage block which stores up to 10,000,000 [[EU]] and accepts up to and outputs 512 EU/t (high voltage). Accepts current from any side, except the one with a dot, which is the output. | ||
|- | |- | ||
|} | |} | ||
| Line 356: | Line 356: | ||
|Output=Single-Use Battery|OA=5 | |Output=Single-Use Battery|OA=5 | ||
}} | }} | ||
|EU storage item which stores 1000 EU and can only be used once, but are stackable in up to 64. It can also be used to power most machines from their bottom slot. | |[[EU]] storage item which stores 1000 EU and can only be used once, but are stackable in up to 64. It can also be used to power most machines from their bottom slot. | ||
|- | |- | ||
![[RE Battery]] | ![[RE Battery]] | ||
| Line 365: | Line 365: | ||
|Output=RE Battery | |Output=RE Battery | ||
}} | }} | ||
|EU storage item which stores up to 10000 EU and can be charged or discharged in a [[BatBox]], [[MFE Unit]] or [[MFS Unit]]. It can also be used to power most machines from their bottom slot, and be charged in generators through their top (or middle) slot. | |[[EU]] storage item which stores up to 10000 [[EU]] and can be charged or discharged in a [[BatBox]], [[MFE Unit]] or [[MFS Unit]]. It can also be used to power most machines from their bottom slot, and be charged in generators through their top (or middle) slot. | ||
|- | |- | ||
![[RE Battery|Battery Pack]] | ![[RE Battery|Battery Pack]] | ||
| Line 375: | Line 375: | ||
|Output=Battery Pack | |Output=Battery Pack | ||
}} | }} | ||
|Stackable battery pack which pops 6 charged | |Stackable battery pack which pops 6 charged [[RE Battery|RE Batteries]] in the ground when right-clicked. | ||
|- | |- | ||
![[Energy Crystal]] | ![[Energy Crystal]] | ||
| Line 384: | Line 384: | ||
|Output=Energy Crystal | |Output=Energy Crystal | ||
}} | }} | ||
|EU storage item which stores up to 100,000 EU and can only be charged or discharged in a [[MFE Unit]] or a [[MFS Unit]]. | |[[EU]] storage item which stores up to 100,000 [[EU]] and can only be charged or discharged in a [[MFE Unit]] or a [[MFS Unit]]. | ||
|- | |- | ||
![[Lapotron Crystal]] | ![[Lapotron Crystal]] | ||
| Line 393: | Line 393: | ||
|Output=Lapotron Crystal | |Output=Lapotron Crystal | ||
}} | }} | ||
|EU storage item which stores up to 1,000,000 EU and can only be charged or discharged in a [[MFS Unit]]. | |[[EU]] storage item which stores up to 1,000,000 [[EU]] and can only be charged or discharged in a [[MFS Unit]]. | ||
|- | |- | ||
![[Electrolyzed Water Cell]] | ![[Electrolyzed Water Cell]] | ||
| Line 470: | Line 470: | ||
|Output=Generator | |Output=Generator | ||
}} | }} | ||
|Simple generator which accepts [[Fuel Can (Filled)|fuel]] (43,200 EU for coal fuel, 16,200 EU for bio fuel), coal (4000 EU), [[Scrap|scrap]] (825 EU), wood (750 EU), planks (750 EU), wooden blocks (750 EU), sticks (250 EU), saplings (250 EU, 200 EU for rubber tree saplings), sugar cane (125 EU) and cactus (125 EU) and outputs 5 EU/t. If there is no destination for the current, it can store up to 4000 EU. It is also a base component for other generators. | |Simple generator which accepts [[Fuel Can (Filled)|fuel]] (43,200 EU for coal fuel, 16,200 EU for bio fuel), coal (4000 EU), [[Scrap|scrap]] (825 EU), wood (750 EU), planks (750 EU), wooden blocks (750 EU), sticks (250 EU), saplings (250 EU, 200 EU for rubber tree saplings), sugar cane (125 EU) and cactus (125 EU) and outputs 5 EU/t. If there is no destination for the current, it can store up to 4000 [[EU]]. It is also a base component for other generators. | ||
|- | |- | ||
![[Geothermal Generator]] | ![[Geothermal Generator]] | ||
| Line 479: | Line 479: | ||
|Output=Geothermal Generator | |Output=Geothermal Generator | ||
}} | }} | ||
|Generator which accepts lava buckets and [[Lava Cell|cells]] and outputs 10 EU/t for a total of 20,000 EU per lava bucket. If there is no destination for the current, it stores up to 240,000 EU ( | |Generator which accepts lava buckets and [[Lava Cell|cells]] and outputs 10 EU/t for a total of 20,000 [[EU]] per lava bucket. If there is no destination for the current, it stores up to 240,000 [[EU]] (12 buckets or cells). | ||
|- | |- | ||
![[Solar Panel]] | ![[Solar Panel]] | ||
| Line 524: | Line 524: | ||
|Output=Nuclear Reactor | |Output=Nuclear Reactor | ||
}} | }} | ||
|Complex generator whose output and total EU varies depending on the setup. Making reactor setups isn't easy and can lead to violent nuclear explosions. See its article for more information on how to build proper reactor setups. Can be disabled (cooldown mode) by applying a redstone current to the core or any of the chambers. | |Complex generator whose output and total [[EU]] varies depending on the setup. Making reactor setups isn't easy and can lead to violent nuclear explosions. See its [[Nuclear Reactor|article]] for more information on how to build proper reactor setups. Can be disabled (cooldown mode) by applying a redstone current to the core or any of the chambers. | ||
|- | |- | ||
![[Reactor Chamber]] | ![[Reactor Chamber]] | ||
| Line 542: | Line 542: | ||
|Output=Refined Uranium | |Output=Refined Uranium | ||
}} | }} | ||
|Refined form of the uranium resource, used to craft a [[Uranium Cell]]. | |Refined form of the [[Uranium|uranium]] resource, used to craft a [[Uranium Cell]]. | ||
|- | |- | ||
![[Integrated Reactor Plating]] | ![[Integrated Reactor Plating]] | ||
| Line 551: | Line 551: | ||
|Output=Integrated Reactor Plating | |Output=Integrated Reactor Plating | ||
}} | }} | ||
|When placed in a reactor, redistributes heat evenly between neighboring [[Coolant Cell | |When placed in a reactor, redistributes heat evenly between neighboring [[Coolant Cell]]s or other plating. When there are no components cool enough, it stores up to 10,000 heat. It also increases the reactor hull's heat tolerance by 100. | ||
|- | |- | ||
![[Integrated Heat Dispenser]] | ![[Integrated Heat Dispenser]] | ||
| Line 559: | Line 559: | ||
|Output=Integrated Heat Dispenser | |Output=Integrated Heat Dispenser | ||
}} | }} | ||
|When placed in a reactor, redistributes heat from itself either to neighboring [[Coolant Cell | |When placed in a reactor, redistributes heat from itself either to neighboring [[Coolant Cell]]s or to the reactor hull. Every reactor tick (second), it can add or subtract 6 heat from neighboring elements and dispense up to 25 heat to or from the reactor hull. | ||
|- | |- | ||
![[Uranium Cell]] | ![[Uranium Cell]] | ||
| Line 570: | Line 570: | ||
|Output=Uranium Cell | |Output=Uranium Cell | ||
}} | }} | ||
|Generates 1,000,000-5,000,000 EU at 5-25 EU/t (depending on efficiency, that is, cell adjacency), but generates excess heat which must be eliminated through cooling. When it decays, rarely turns into a [[Near-Depleted Uranium Cell]], which once recharged, turns into a fresh new cell. | |Generates 1,000,000-5,000,000 [[EU]] at 5-25 EU/t (depending on efficiency, that is, cell adjacency), but generates excess heat which must be eliminated through cooling. When it decays, rarely turns into a [[Near-Depleted Uranium Cell]], which once recharged, turns into a fresh new cell. | ||
|- | |- | ||
![[Near-Depleted Uranium Cell]] | ![[Near-Depleted Uranium Cell]] | ||
| Line 579: | Line 579: | ||
|Output=Near-Depleted Uranium Cell|OA=8 | |Output=Near-Depleted Uranium Cell|OA=8 | ||
}} | }} | ||
<center>Rarely created when an [[Uranium Cell | <center>Rarely created when an [[Uranium Cell]] decays</center> | ||
|Can be turned into a rechargeable [[Depleted Isotope Cell]]. | |Can be turned into a rechargeable [[Depleted Isotope Cell]]. | ||
|- | |- | ||
| Line 587: | Line 587: | ||
|Output=Depleted Isotope Cell | |Output=Depleted Isotope Cell | ||
}} | }} | ||
|When surrounded by one or more [[Uranium Cell | |When surrounded by one or more [[Uranium Cell]]s, will make the cell pulse an additional time. This pulse generates heat, but not EU, and recharges the cell. Recharging is much faster when done on a reactor running very hot (up to 9000 heat). | ||
|- | |- | ||
![[Re-Enriched Uranium Cell]] | ![[Re-Enriched Uranium Cell]] | ||
|{{Grid/Crafting Table | |||
|A1=Re-Enriched Uranium Cell | |||
|B1=Coal Dust | |||
|Output=Uranium Cell | |||
}} | |||
|<center>Created once a [[Depleted Isotope Cell]] charges</center> | |<center>Created once a [[Depleted Isotope Cell]] charges</center> | ||
|Can be turned back into a [[Uranium Cell]]. | |Can be turned back into a [[Uranium Cell]]. | ||
| Line 624: | Line 629: | ||
|Output=Iron Furnace | |Output=Iron Furnace | ||
}} | }} | ||
|Normal furnace which is faster (and thus uses less fuel) than a normal furnace, which can also burn [[Fuel Can (Filled)|fuel]] | |Normal furnace which is faster (and thus uses less fuel) than a normal furnace, which can also burn [[Fuel Can (Filled)|fuel]]. Does not require energy. | ||
|- | |- | ||
![[Electro Furnace|Electric Furnace]] | ![[Electro Furnace|Electric Furnace]] | ||
| Line 632: | Line 637: | ||
|Output=Electro Furnace | |Output=Electro Furnace | ||
}} | }} | ||
|Energy-powered furnace which is faster than an iron furnace. Takes 313 EU per operation (at least 3 EU/t needed for continuous usage), up to low voltage (32 EU/t). | |[[EU|Energy]]-powered furnace which is faster than an iron furnace. Takes 313 [[EU]] per operation (at least 3 EU/t needed for continuous usage), up to low [[EU|voltage]] (32 EU/t). | ||
|- | |- | ||
![[Macerator]] | ![[Macerator]] | ||
| Line 641: | Line 646: | ||
|Output=Macerator | |Output=Macerator | ||
}} | }} | ||
|Turns ore into | |Turns ore into [[Dusts]] and some other things - look for more recipes on [[Macerator|this]] page. Takes 625 [[EU]] per operation (at least 2 EU/t needed for continuous usage), up to low [[EU|voltage]] (32 EU/t). | ||
|- | |- | ||
![[Extractor]] | ![[Extractor]] | ||
| Line 649: | Line 654: | ||
|Output=Extractor | |Output=Extractor | ||
}} | }} | ||
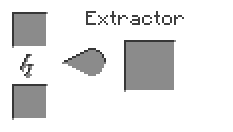
|Extracts resin into 3 rubber (triple the efficiency) and turns simple fuel cells into liquid fuel ones and some other things - look for more recipes on this page. Takes 313 EU per operation (at least 2 EU/t needed for continuous usage), up to low voltage (32 EU/t). | |Extracts resin into 3 rubber (triple the efficiency) and turns simple fuel cells into liquid fuel ones and some other things - look for more recipes on [[Extractor|this]] page. Takes 313 [[EU]] per operation (at least 2 EU/t needed for continuous usage), up to low [[EU|voltage]] (32 EU/t). | ||
|- | |- | ||
![[Compressor]] | ![[Compressor]] | ||
| Line 658: | Line 663: | ||
|Output=Compressor | |Output=Compressor | ||
}} | }} | ||
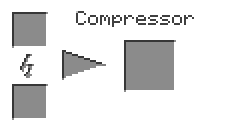
|Compresses [[Mixed Metal Ingots]] into [[Advanced Alloy]] and [[Plantballs]] into [[Compressed Plants]] and some other things - look for more recipes on this page. Takes 625 EU per operation (at least 2 EU/t needed for continuous usage), up to low voltage (32 EU/t). | |Compresses [[Mixed Metal Ingots]] into [[Advanced Alloy]] and [[Plantballs]] into [[Compressed Plants]] and some other things - look for more recipes on [[Compressor|this]] page. Takes 625 EU per operation (at least 2 EU/t needed for continuous usage), up to low [[EU|voltage]] (32 EU/t). | ||
|- | |- | ||
![[Recycler]] | ![[Recycler]] | ||
| Line 667: | Line 672: | ||
|Output=Recycler | |Output=Recycler | ||
}} | }} | ||
|Has a random chance of turning anything inserted into it | |Has a random chance of turning anything inserted into it to [[Scrap]]. Takes 35 [[EU]] per operation (at least 2 EU/t needed for continuous usage), up to low [[EU|voltage]] (32 EU/t). | ||
|- | |- | ||
![[Canning Machine]] | ![[Canning Machine]] | ||
| Line 676: | Line 681: | ||
|Output=Canning Machine | |Output=Canning Machine | ||
}} | }} | ||
|Turns food (top slot) and tin cans (bottom slot) into several canned food (see the [[Food List]]). Canned food instantly heals you 1 heart per unit. It is also used to fill [[Fuel Can (Empty)|fuel cans]] using | |Turns food (top slot) and tin cans (bottom slot) into several canned food (see the [[Food List]]). Canned food instantly heals you 1 heart per unit. It is also used to fill [[Fuel Can (Empty)|fuel cans]] using [[Biofuel Cell]]s and [[Coalfuel Cell]]s, and refuel [[Jetpack]]s using those cells. Takes (unknown) EU per operation, up to low [[EU|voltage]] (32 EU/t). | ||
|- | |- | ||
![[Induction Furnace]] | ![[Induction Furnace]] | ||
| Line 685: | Line 690: | ||
|Output=Induction Furnace | |Output=Induction Furnace | ||
}} | }} | ||
|Special two-input two-output furnace which increases its smelting speed as it heats up through smelting. When it's not smelting anything, it will quickly lose heat, but the furnace can be applied a redstone current to keep itself heated for 1 EU/t. Takes 6000 (0% heat) to 208 (100% heat) EU per operation (at least 16 EU/t needed for continuous usage), up to medium voltage (128 EU/t). | |Special two-input two-output furnace which increases its smelting speed as it heats up through smelting. When it's not smelting anything, it will quickly lose heat, but the furnace can be applied a redstone current to keep itself heated for 1 EU/t. Takes 6000 (0% heat) to 208 (100% heat) EU per operation (at least 16 EU/t needed for continuous usage), up to medium [[EU|voltage]] (128 EU/t). | ||
|- | |- | ||
![[Mass Fabricator]] | ![[Mass Fabricator]] | ||
| Line 694: | Line 699: | ||
|Output=Mass Fabricator | |Output=Mass Fabricator | ||
}} | }} | ||
|Generates [[Matter]] for a vast amount of energy, but said amount can be reduced and the generation speed increased by feeding [[Scrap]] to the bottom slot. Takes 1,000,000 EU per operation (without any scrap), up to high voltage (512 EU/t). | |Generates [[Matter]] for a vast amount of energy, but said amount can be reduced and the generation speed increased by feeding [[Scrap]] to the bottom slot. Takes 1,000,000 EU per operation (without any scrap), up to high [[EU|voltage]] (512 EU/t). | ||
|- | |- | ||
|} | |} | ||
| Line 720: | Line 725: | ||
|Output=Trade-O-Mat | |Output=Trade-O-Mat | ||
}} | }} | ||
|Allows a certain item to be traded by another, giving or taking from an adjacent chest or [[Personal Safe]]. Useful for SMP. See its article for a full guide on how to set one up. Does not require energy. | |Allows a certain item to be traded by another, giving or taking from an adjacent chest or [[Personal Safe]]. Useful for SMP. See its [[Trade-o-Mat|article]] for a full guide on how to set one up. Does not require energy. | ||
|- | |- | ||
![[Magnetizer]] | ![[Magnetizer]] | ||
| Line 729: | Line 734: | ||
|Output=Magnetizer | |Output=Magnetizer | ||
}} | }} | ||
|Turns [[Iron Fence | |Turns [[Iron Fence]]s stacked vertically (up and/or down) into a faster alternative to ladders. When a player wearing metal boots (iron, gold, [[Bronze Boots|bronze]], [[Nano-Boots|nano]] or [[QuantumSuit Boots|quantum]]) approaches the fences, said player is quickly propelled upwards while the Magnetizer uses energy. Takes 2 EU/t while a player is being propelled, up to low [[EU|voltage]] (32 EU/t). | ||
|- | |- | ||
![[Electrolyzer]] | ![[Electrolyzer]] | ||
| Line 738: | Line 743: | ||
|Output=Electrolyzer | |Output=Electrolyzer | ||
}} | }} | ||
|When placed adjacent to a [[MFE Unit]] or [[MFS Unit]] and filled with [[Water Cell | |When placed adjacent to a [[MFE Unit]] or [[MFS Unit]] and filled with [[Water Cell]]s, once the [[EU]] storage is full, starts turning the cells into [[Electrolyzed Water Cells]], but once it's empty, starts using up the electrolyzed cells to supply power. Both operations run at 10 EU/t. | ||
|- | |- | ||
![[Tesla Coil]] | ![[Tesla Coil]] | ||
| Line 747: | Line 752: | ||
|Output=Tesla Coil | |Output=Tesla Coil | ||
}} | }} | ||
|When charged and applied a redstone current, it starts finding NPCs and players at a range of 4 blocks at the cost of 2 EU/t. If a NPC/player is found, it will apply 10 hearts of damage to it and discharge. Useful for placing monster traps outside your base. Takes 5000 EU to charge, up to medium voltage (128 EU/t). | |When charged and applied a redstone current, it starts finding NPCs and players at a range of 4 blocks at the cost of 2 EU/t. If a NPC/player is found, it will apply 10 hearts of damage to it and discharge. Useful for placing monster traps outside your base. Takes 5000 [[EU]] to charge, up to medium [[EU|voltage]] (128 EU/t). | ||
|- | |- | ||
![[Teleporter]] | ![[Teleporter]] | ||
| Line 756: | Line 761: | ||
|Output=Teleporter | |Output=Teleporter | ||
}} | }} | ||
|Teleports a player to another | |Teleports a player to another [[Teleporter]] defined by a [[FreqTrans]] once it is applied redstone current. Takes a variable amount of EU depending on the distance, kind of creature (human/monster/animal), inventory and worn armor (from Distance*100 for an animal to Distance*3100 for a player with a full inventory of stacks of 64 and all armor pieces worn), up to high [[EU|voltage]] (512 EU/t). Please note that a teleporter does not accept cables as energy inputs - only EU storage blocks ([[MFS Unit]] recommended) adjacent to it. | ||
|- | |- | ||
|} | |} | ||
| Line 774: | Line 779: | ||
|Output=Miner | |Output=Miner | ||
}} | }} | ||
|Mines vertically by laying down [[Mining Pipe | |Mines vertically by laying down [[Mining Pipe]]s placed in the top-center slot, using the [[Mining Drill]] or [[Diamond Drill]] (faster but consumes more energy) in the top-left slot and scanning for ores using the [[OD Scanner]] (5x5 area) or [[OV Scanner]] (9x9 area) in the top-right slot, either throwing anything out or placing in an adjacent chest. Any kind of block may be placed in the pipe slot too, causing the pipes to be retracted and refunded. Takes a variable amount of EU per operation based on the scanner and drill (460 EU for Mining Drill or 890 EU for Diamond Drill + 70 EU for OD Scanner or 180 EU for OV Scanner), up to low [[EU|voltage]] (32 EU/t). | ||
|- | |- | ||
![[Pump]] | ![[Pump]] | ||
| Line 783: | Line 788: | ||
|Output=Pump | |Output=Pump | ||
}} | }} | ||
|When placed next to a miner and filled with empty cells, fills the cells with any liquid the miner comes across. When alone, fills an empty cell with a liquid one block directly below the pump. When alone, takes (unknown) EU per operation, up to low voltage (32 EU/t). | |When placed next to a miner and filled with empty [[Empty Cell|cells]], fills the cells with any liquid the miner comes across. When alone, fills an empty [[Empty Cell|cell]] with a liquid one block directly below the pump. When alone, takes (unknown) [[EU]] per operation, up to low [[EU|voltage]] (32 EU/t). | ||
|- | |- | ||
![[Mining Pipe]] | ![[Mining Pipe]] | ||
| Line 909: | Line 914: | ||
!Rubber Tree | !Rubber Tree | ||
![[Image:Rubber Tree.png|128px]] | ![[Image:Rubber Tree.png|128px]] | ||
|Unique trees which have pine (dark) logs and birch (light) leaves. They are rare to find, but are more common in swamp biomes, and are easy to find through their unique "wing" on their leaf design. Their wood is special and may be right-clicked with a treetap to get [[Sticky Resin]], extracted to make one piece of [[Rubber]], be crafted into 3 (instead of 4) wooden planks, or be smelted into normal spruce wood. Their leaves have a small chance of dropping a [[Rubber Tree | |Unique trees which have pine (dark) logs and birch (light) leaves. They are rare to find, but are more common in swamp biomes, and are easy to find through their unique "wing" on their leaf design. Their wood is special and may be right-clicked with a treetap to get [[Sticky Resin]], extracted to make one piece of [[Rubber]], be crafted into 3 (instead of 4) wooden planks, or be smelted into normal spruce wood. Their leaves have a small chance of dropping a [[Rubber Wood| Rubber Tree]] Sapling. | ||
|- | |- | ||
|} | |} | ||
To be completed. --[[User:RichardG|RichardG]]<sup>[[Special:Contributions/RichardG|c]]|[[Talk:RichardG|t]]</sup> 18:36, 1 November 2011 (CET) | To be completed. --[[User:RichardG|RichardG]]<sup>[[Special:Contributions/RichardG|c]]|[[Talk:RichardG|t]]</sup> 18:36, 1 November 2011 (CET) | ||
Revision as of 22:34, 1 November 2011
This is a list of recipes and resources found in IndustrialCraft².
Armor[edit]
Material[edit]
| Name | Recipe | Description |
|---|---|---|
| Bronze Helmet | Helmet with 30% more durability than iron. | |
| Bronze Chestplate | Chestplate with 30% more durability than iron. | |
| Bronze Leggings | Leggings with 30% more durability than iron. | |
| Bronze Boots | Boots with 30% more durability than iron. |

Energy[edit]
| Name | Recipe | Description |
|---|---|---|
| Nano Helmet | Energy-based helmet which absorbs part of your damage while charged. | |
| Nano Body Armor | Energy-based chestplate which absorbs part of your damage while charged. | |
| Nano Leggings | Energy-based leggings which absorb part of your damage while charged. | |
| Nano Boots | Energy-based boots which absorb part of your damage while charged. | |
| Quantum Helmet | Energy-based helmet which lets you breathe underwater, replenishes your hunger and cures poison while charged. | |
| Quantum Body Armor | Energy-based chestplate which absorbs all of your damage while charged. | |
| Quantum Leggings | Energy-based leggings which let you sprint more than 3 times faster. | |
| Quantum Boots | Energy-based boots which absorb all of your fall damage while charged. |
Utility[edit]
| Name | Recipe | Description |
|---|---|---|
| Bat-Pack | Chestplate which powers your electric tools using its energy of up to 60000 EU while you are wearing it. | |
| Composite Armor | Super-durable chestplate, more than 3 times the durability of a diamond chestplate. | |
| Electric Jetpack | Energy-powered jetpack worn as a chestplate. It has a limited maximum flying height and a smaller operational time, unlike the normal fuel-powered Jetpack. | |
| Jetpack | Fuel-powered jetpack worn as a chestplate. Use Biofuel Cells or Coalfuel Cells on a Canning Machine to refuel it. | |
| Rubber Boots | Boots which reduce your fall damage. |
Cables[edit]
| Name | Recipe | Description |
|---|---|---|
| Tin Cable | Special uninsulated tin cable which handles up to 3 EU/t (ultra-low voltage) and has very small loss, but can't be insulated (beware of shock) and thus can't be painted. | |
| Copper Cable | Uninsulated copper cable which handles up to 32 EU/t (low voltage). | |
| Insulated Copper Cable | Insulated copper cable which handles up to 32 EU/t (low voltage). Insulation allows the cable to be painted, reduces distance-based energy loss and completely removes electric shock. You can also apply insulation to uninsulated copper cable by putting the uninsulated cable and a single piece of Rubber (shapeless) in a crafting table. | |
| Gold Cable | Uninsulated gold cable which handles up to 128 EU/t (medium voltage). | |
| Single-Insulated Gold Cable | Single-insulated gold cable which handles up to 128 EU/t (medium voltage). Single insulation allows the cable to be painted, reduces distance-based energy loss and reduces electric shock. | |
| Double-Insulated Gold Cable | Double-insulated gold cable which handles up to 128 EU/t (medium voltage). | |
| HV Cable | Uninsulated HV cable which handles up to 512 EU/t (high voltage) and 2048 EU/t (extreme voltage). | |
| Single-Insulated HV Cable | Single-insulated HV cable which handles up to 512 EU/t (high voltage) and 2048 EU/t (extreme voltage). Single insulation allows the cable to be painted, reduces distance-based energy loss and reduces electric shock. | |
| Double-Insulated HV Cable | Double-insulated HV cable which handles up to 512 EU/t (high voltage) and 2048 EU/t (extreme voltage). Double insulation allows the cable to be painted, reduces distance-based energy loss and reduces electric shock. | |
| Quadruple-Insulated HV Cable | Quadruple-insulated HV cable which handles up to 512 EU/t (high voltage) and 2048 EU/t (extreme voltage). Quadruple insulation allows the cable to be painted, reduces distance-based energy loss and removes electric shock. | |
| Glass Fibre Cable | Special glass fibre cable which handles up to 512 EU/t (high voltage). It is the only kind of uninsulated cable which can be painted and gives no electric shock. Glass fibre cable is useful for long-distance wiring, since it has the smallest energy loss of all kinds of cable - 1 EU every 20 blocks (0.05 EU per block). |
EU Storage[edit]
Blocks[edit]
| Name | Recipe | Description |
|---|---|---|
| BatBox | EU storage block which stores up to 40,000 EU and accepts up to and outputs 32 EU/t (low voltage). Accepts current from any side, except the one with a dot, which is the output. | |
| MFE Unit | EU storage block which stores up to 600,000 EU and accepts up to and outputs 128 EU/t (medium voltage). Accepts current from any side, except the one with a dot, which is the output. | |
| MFS Unit | EU storage block which stores up to 10,000,000 EU and accepts up to and outputs 512 EU/t (high voltage). Accepts current from any side, except the one with a dot, which is the output. |
Items[edit]
| Name | Recipe | Description |
|---|---|---|
| Single-Use Battery | EU storage item which stores 1000 EU and can only be used once, but are stackable in up to 64. It can also be used to power most machines from their bottom slot. | |
| RE Battery | EU storage item which stores up to 10000 EU and can be charged or discharged in a BatBox, MFE Unit or MFS Unit. It can also be used to power most machines from their bottom slot, and be charged in generators through their top (or middle) slot. | |
| Battery Pack
(coming soon) |
Stackable battery pack which pops 6 charged RE Batteries in the ground when right-clicked. | |
| Energy Crystal | EU storage item which stores up to 100,000 EU and can only be charged or discharged in a MFE Unit or a MFS Unit. | |
| Lapotron Crystal | EU storage item which stores up to 1,000,000 EU and can only be charged or discharged in a MFS Unit. | |
| Electrolyzed Water Cell | Created in an Electrolyzer when the adjacent MFE Unit or MFS Unit is full, those cells absorb 15000 EU, but lose 1500 EU, only giving off 13500 EU when used (again by the Electrolyzer when the adjacent MFE/MFS is out of EU). |
Machine components[edit]
| Name | Recipe | Description |
|---|---|---|
| Machine | Base component for machines and the Quantum Leggings. | |
| Advanced Machine | Base component for more advanced machines. | |
| Electronic Circuit | Base component for machines, smart items and the Advanced Circuit. | |
| Advanced Circuit | Base component for more advanced machines and smart items. |
Generators[edit]
| Name | Recipe | Description |
|---|---|---|
| Generator | Simple generator which accepts fuel (43,200 EU for coal fuel, 16,200 EU for bio fuel), coal (4000 EU), scrap (825 EU), wood (750 EU), planks (750 EU), wooden blocks (750 EU), sticks (250 EU), saplings (250 EU, 200 EU for rubber tree saplings), sugar cane (125 EU) and cactus (125 EU) and outputs 5 EU/t. If there is no destination for the current, it can store up to 4000 EU. It is also a base component for other generators. | |
| Geothermal Generator | Generator which accepts lava buckets and cells and outputs 10 EU/t for a total of 20,000 EU per lava bucket. If there is no destination for the current, it stores up to 240,000 EU (12 buckets or cells). | |
| Solar Panel | Generator which, when exposed to sunlight through its top (glass and other non-full blocks like signs are an exception), outputs 1 EU/t for a total of 13050 EU per Minecraft day (08:20 to 19:45). | |
| Water Mill | Generator which accepts water buckets and adjacent water and outputs either 2 EU/t for a total of 1000 EU per water bucket, or 0.010 EU/t per adjacent water block for a maximum of 0.25 EU/t with a 3x3 cube of water with the water mill in the middle and cable on top. | |
| Wind Mill | Generator which outputs 0-3 EU/t for a total of an average of 250 EU/t multiplied by its height in the Minecraft world. The generation power can be hindered by any block in a 9x9x7 area around it, reducing the effective height by 1 for each block in said area. |
Nuclear Reactor[edit]
| Name | Recipe | Description | |
|---|---|---|---|
| Nuclear Reactor | Complex generator whose output and total EU varies depending on the setup. Making reactor setups isn't easy and can lead to violent nuclear explosions. See its article for more information on how to build proper reactor setups. Can be disabled (cooldown mode) by applying a redstone current to the core or any of the chambers. | ||
| Reactor Chamber | Can be attached to a reactor to increase its space by 1 column and its hull heat tolerance by 1000, also cooling the reactor at a rate of -2 heat per tick. Up to 6 chambers may be attached to a reactor, one on each side of it. Also used to craft a reactor. | ||
| Refined Uranium | Refined form of the uranium resource, used to craft a Uranium Cell. | ||
| Integrated Reactor Plating | When placed in a reactor, redistributes heat evenly between neighboring Coolant Cells or other plating. When there are no components cool enough, it stores up to 10,000 heat. It also increases the reactor hull's heat tolerance by 100. | ||
| Integrated Heat Dispenser | When placed in a reactor, redistributes heat from itself either to neighboring Coolant Cells or to the reactor hull. Every reactor tick (second), it can add or subtract 6 heat from neighboring elements and dispense up to 25 heat to or from the reactor hull. | ||
| Uranium Cell | Generates 1,000,000-5,000,000 EU at 5-25 EU/t (depending on efficiency, that is, cell adjacency), but generates excess heat which must be eliminated through cooling. When it decays, rarely turns into a Near-Depleted Uranium Cell, which once recharged, turns into a fresh new cell. | ||
| Near-Depleted Uranium Cell | Can be turned into a rechargeable Depleted Isotope Cell. | ||
| Depleted Isotope Cell | When surrounded by one or more Uranium Cells, will make the cell pulse an additional time. This pulse generates heat, but not EU, and recharges the cell. Recharging is much faster when done on a reactor running very hot (up to 9000 heat). | ||
| Re-Enriched Uranium Cell | Can be turned back into a Uranium Cell. | ||
| Coolant Cell | Absorbs up to 10,000 heat from uranium cells and other elements, while cooling itself down for 1 heat per reactor tick (second). |

Processors[edit]
| Name | Recipe | Description |
|---|---|---|
| Iron Furnace | Normal furnace which is faster (and thus uses less fuel) than a normal furnace, which can also burn fuel. Does not require energy. | |
| Electric Furnace | Energy-powered furnace which is faster than an iron furnace. Takes 313 EU per operation (at least 3 EU/t needed for continuous usage), up to low voltage (32 EU/t). | |
| Macerator | Turns ore into Dusts and some other things - look for more recipes on this page. Takes 625 EU per operation (at least 2 EU/t needed for continuous usage), up to low voltage (32 EU/t). | |
| Extractor | Extracts resin into 3 rubber (triple the efficiency) and turns simple fuel cells into liquid fuel ones and some other things - look for more recipes on this page. Takes 313 EU per operation (at least 2 EU/t needed for continuous usage), up to low voltage (32 EU/t). | |
| Compressor | Compresses Mixed Metal Ingots into Advanced Alloy and Plantballs into Compressed Plants and some other things - look for more recipes on this page. Takes 625 EU per operation (at least 2 EU/t needed for continuous usage), up to low voltage (32 EU/t). | |
| Recycler | Has a random chance of turning anything inserted into it to Scrap. Takes 35 EU per operation (at least 2 EU/t needed for continuous usage), up to low voltage (32 EU/t). | |
| Canning Machine | Turns food (top slot) and tin cans (bottom slot) into several canned food (see the Food List). Canned food instantly heals you 1 heart per unit. It is also used to fill fuel cans using Biofuel Cells and Coalfuel Cells, and refuel Jetpacks using those cells. Takes (unknown) EU per operation, up to low voltage (32 EU/t). | |
| Induction Furnace | Special two-input two-output furnace which increases its smelting speed as it heats up through smelting. When it's not smelting anything, it will quickly lose heat, but the furnace can be applied a redstone current to keep itself heated for 1 EU/t. Takes 6000 (0% heat) to 208 (100% heat) EU per operation (at least 16 EU/t needed for continuous usage), up to medium voltage (128 EU/t). | |
| Mass Fabricator | Generates Matter for a vast amount of energy, but said amount can be reduced and the generation speed increased by feeding Scrap to the bottom slot. Takes 1,000,000 EU per operation (without any scrap), up to high voltage (512 EU/t). |
Utility[edit]
| Name | Recipe | Description |
|---|---|---|
| Personal Safe | Chest which can only be opened by you once you right-click it for the first time. It also has the space of a double chest. Useful for SMP. Does not require energy. | |
| Trade-O-Mat | Allows a certain item to be traded by another, giving or taking from an adjacent chest or Personal Safe. Useful for SMP. See its article for a full guide on how to set one up. Does not require energy. | |
| Magnetizer | Turns Iron Fences stacked vertically (up and/or down) into a faster alternative to ladders. When a player wearing metal boots (iron, gold, bronze, nano or quantum) approaches the fences, said player is quickly propelled upwards while the Magnetizer uses energy. Takes 2 EU/t while a player is being propelled, up to low voltage (32 EU/t). | |
| Electrolyzer | When placed adjacent to a MFE Unit or MFS Unit and filled with Water Cells, once the EU storage is full, starts turning the cells into Electrolyzed Water Cells, but once it's empty, starts using up the electrolyzed cells to supply power. Both operations run at 10 EU/t. | |
| Tesla Coil | When charged and applied a redstone current, it starts finding NPCs and players at a range of 4 blocks at the cost of 2 EU/t. If a NPC/player is found, it will apply 10 hearts of damage to it and discharge. Useful for placing monster traps outside your base. Takes 5000 EU to charge, up to medium voltage (128 EU/t). | |
| Teleporter | Teleports a player to another Teleporter defined by a FreqTrans once it is applied redstone current. Takes a variable amount of EU depending on the distance, kind of creature (human/monster/animal), inventory and worn armor (from Distance*100 for an animal to Distance*3100 for a player with a full inventory of stacks of 64 and all armor pieces worn), up to high voltage (512 EU/t). Please note that a teleporter does not accept cables as energy inputs - only EU storage blocks (MFS Unit recommended) adjacent to it. |
Miner[edit]
| Name | Recipe | Description |
|---|---|---|
| Miner | Mines vertically by laying down Mining Pipes placed in the top-center slot, using the Mining Drill or Diamond Drill (faster but consumes more energy) in the top-left slot and scanning for ores using the OD Scanner (5x5 area) or OV Scanner (9x9 area) in the top-right slot, either throwing anything out or placing in an adjacent chest. Any kind of block may be placed in the pipe slot too, causing the pipes to be retracted and refunded. Takes a variable amount of EU per operation based on the scanner and drill (460 EU for Mining Drill or 890 EU for Diamond Drill + 70 EU for OD Scanner or 180 EU for OV Scanner), up to low voltage (32 EU/t). | |
| Pump | When placed next to a miner and filled with empty cells, fills the cells with any liquid the miner comes across. When alone, fills an empty cell with a liquid one block directly below the pump. When alone, takes (unknown) EU per operation, up to low voltage (32 EU/t). | |
| Mining Pipe | Placed in the miner's top-center slot. |
Terraformer[edit]
| Name | Recipe | Description |
|---|---|---|
| Terraformer | Alters (terraforms) nearby landscape following a Terraformer Blueprint inserted in it (by rightclicking the machine with the blueprint). Takes a variable amount of EU/t (based on the blueprint being used), up to high voltage (512 EU/t). | |
| Empty Blueprint | Empty terraformer blueprint used to craft functional ones. | |
| Chilling Blueprint | Simulates a snow biome by placing snow (and later snow blocks) on top of blocks and freezing water. Takes 4 EU/t. | |
| Compression Blueprint
(coming soon) |
Removes dirt and sand, crushing some of it into cobblestone and sandstone and then crushing cobblestone into stone. Takes 10 EU/t. | |
| Cultivation Blueprint | Simulates a plains biome by replacing sand with dirt, growing grass on top of dirt and randomly adding plantlife. Takes 20 EU/t. | |
| Desertification Blueprint | Simulates a desert biome by replacing dirt with sand, destroying plants, melting ice/snow and causing forest fires. Takes 4 EU/t. | |
| Flatificator Blueprint | Removes all natural blocks (except stone) above the terraformer and fills land below the terraformer with dirt. Takes 40 EU/t. | |
| Irrigation Blueprint | Replaces sand with dirt, grows grass on top of dirt, causes plants to grow faster, lets sugar cane grow past 3 blocks and rarely spawns water below the terraformer. Takes 8 EU/t. |
Resources[edit]
Ores[edit]
| Name | Picture | Description |
|---|---|---|
| Copper Ore | 
|
Found on layers 0 to 70. Used most notably to make Copper Cable and Bronze. |
| Tin Ore | 
|
Found on layers 0 to 40. Used most notably to make cells. |
| Uranium Ore | 
|
Found on layers 0 to 63. Used to make Refined Uranium. |
Overworld[edit]
| Name | Picture | Description |
|---|---|---|
| Rubber Tree | 
|
Unique trees which have pine (dark) logs and birch (light) leaves. They are rare to find, but are more common in swamp biomes, and are easy to find through their unique "wing" on their leaf design. Their wood is special and may be right-clicked with a treetap to get Sticky Resin, extracted to make one piece of Rubber, be crafted into 3 (instead of 4) wooden planks, or be smelted into normal spruce wood. Their leaves have a small chance of dropping a Rubber Tree Sapling. |
| |||||||||||||||||||||||||||||||||||||||||||||||||||||||||||||||||||||||||||||||||||||||||||||||||||||||||||||||||||||||||||||||||||||||||||||||||||||||||||||||||||||||||||||||||||||||||||||||||||||||||||||||||||||||||||||||||||||||||||||||||||||||||||||